Aptos Agent Skills (https://github.com/aptos-labs/aptos-agent-skills) cover common workflows: write-contracts, generate-tests, security-audit, deploy-contracts, use-ts-sdk, ts-sdk-transactions, create-aptos-project, analyze-gas-optimization, modernize-move. Install the skill that matches the task before deep work.
This is the full Aptos developer documentation corpus in rendered Markdown.
# Build the Future of Web3 on Aptos
> Everything you need to build a best-in-class Web3 experience.
Getting Started
* [Deploy Your First Move Smart Contract](/build/guides/first-move-module) Compile & publish Move modules to devnet in minutes.
* [Your First Transaction](/build/guides/first-transaction) Write and read on-chain data using the TypeScript SDK.
* [Code with AI (MCP)](/build/ai/aptos-mcp) Give Cursor and Claude Code direct access to Aptos APIs.
* [NEW! Agent Skills](/build/ai/aptos-agent-skills) Move and TS SDK skills for Claude Code, Cursor, Copilot.
Tools
* [NEW! AskAptos AI Chatbot](/build/ai) Query docs, plan or refine requirements with AI (top right!).
* [Testnet Faucet](/network/faucet) Fund your testnet account with APT to start building.
* [Official SDKs](/build/sdks) TypeScript, Go, Java, Python, Rust, C++, Unity, and more.
* [Aptos CLI](/build/cli) Compile, test, publish contracts; accounts & keys; localnet.
Smart Contracts
* [NEW! Move on Aptos (VS Code Extension)](/build/smart-contracts/move-vscode-extension) Aptos Labs' official extension for Move development.
* [Objects](/build/smart-contracts/objects) Composable on-chain primitives for flexible asset ownership, addressing, & programmability.
* [The Move Book](https://aptos-labs.github.io/move-book/) Understand Move syntax, types, resources, & best practices.
* [Vibe Code a full-stack dApp on Learn](https://learn.aptoslabs.com/en/hackathon/vibe-coder-to-aptos-guide/introduction) Interactive AI workshop to quickly build a full-stack dApp.
On-Chain Features
* [Sponsored Transactions](/build/guides/sponsored-transactions) Pay for users' gas so they can use your dApp with zero APT.
* [Keyless Accounts](/build/guides/aptos-keyless) Onboard users and sign without wallets or seed phrases.
* [NEW! Orderless Transactions](/build/guides/orderless-transactions) High-volume apps can be safer by sending transactions out of order with replay-protection nonce.
* [On-chain Randomness](/build/smart-contracts/randomness) Verifiable random number = fair games, lotteries, & drops.
Resources
* [NEW! LLMs.txt Integration](/llms-txt) AI-optimized documentation format, paste it in your favorite large context AI and get moving!
* [Query, Index, or Stream On-Chain Data](/build/indexer) Query Indexer API, index contracts, stream raw transactions.
* [Apply for a Grant](https://aptosnetwork.com/grants)
Connect
* [GitHub Developer Discussions](https://github.com/aptos-labs/aptos-developer-discussions/discussions)
* [Ecosystem Directory](https://aptosnetwork.com/ecosystem/directory)
* [Discord](https://discord.gg/aptosnetwork)
* [Telegram](https://t.me/aptos)
# Get Started Building on Aptos
> Learn how to build on Aptos with smart contracts, indexer queries, SDKs, APIs, and comprehensive developer resources
## What would you like to learn?
[](#what-would-you-like-to-learn)
[Smart Contracts](/build/smart-contracts) Learn how to write smart contracts on Aptos with the Move programming language.
[Query Data](/build/indexer) Use the Aptos Indexer to query for on-chain data efficiently.
[Blockchain Infrastructure](/network/blockchain/blockchain-deep-dive) Learn the different components of the Aptos blockchain's infrastructure.
## What developer tools should I use?
[](#what-developer-tools-should-i-use)
[SDKs](/build/sdks) Use our TypeScript, Python, Rust, and other SDKs to submit transactions and read on-chain data.
[Indexer](/build/indexer) Query for on-chain data like account balances, historical transactions, NFTs by account, and more.
[CLI](/build/cli) Compile and profile Move smart contracts, run a local network, and more with the Aptos CLI.
Here's an interactive example of our [Indexer](/build/indexer) and how you can query for the Current Fungible Asset Balances of an account. More usage examples can be found in [example queries](/build/indexer/indexer-api/fungible-asset-balances).
## Coming from another ecosystem?
[](#coming-from-another-ecosystem)
Quickly ramp up on some of the differences and similarities between Aptos and other ecosystems.
[Ethereum / EVM to Aptos Cheatsheet](/build/get-started/ethereum-cheatsheet)
[Solana / SVM to Aptos Cheatsheet](/build/get-started/solana-cheatsheet)
[VM Comparison](/network/blockchain/move#comparison-to-other-vms)
## Do you have any examples?
[](#do-you-have-any-examples)
We've got all kinds of examples and guides, catered to what you're looking for.
### End-to-end guides
[](#end-to-end-guides)
[Your First Transaction](/build/guides/first-transaction) This tutorial describes how to generate and submit transactions to the Aptos blockchain, and verify these submitted transactions.
[Your First NFT](/build/guides/your-first-nft) This tutorial describes how to create and transfer non-fungible assets on the Aptos blockchain.
[Your First Fungible Asset](/build/guides/first-fungible-asset) This tutorial introduces how you can compile, deploy, and mint your own fungible asset (FA), named FACoin.
### Smart Contract guides
[](#smart-contract-guides)
See the [Smart Contract](/build/smart-contracts) section for more info
[Create a Smart Contract](/build/guides/build-e2e-dapp/1-create-smart-contract) This is the first chapter of the tutorial on building an end-to-end dapp on Aptos.
[Aptos Move Examples](https://github.com/aptos-labs/aptos-core/tree/main/aptos-move/move-examples) 30+ examples on how to develop Move on Aptos
[Move Tutorial](https://github.com/aptos-labs/aptos-core/tree/main/aptos-move/move-examples/move-tutorial) Covers the basics of programming with Move
### Interactive guides
[](#interactive-guides)
[Aptos Learn](https://learn.aptoslabs.com/en/workshops) Basic and advanced guides
[Move Spiders](https://movespiders.com) Learn about Move with a friendly spider mascot by Move Spiders
[Aptos Shores](https://www.aptosshores.com) Learn about Move with Aptos Shores
## How do I setup a full node or validator?
[](#how-do-i-setup-a-full-node-or-validator)
[Setup a full node](/network/nodes/full-node)
[Setup a validator](/network/nodes/validator-node)
# Ethereum to Aptos Migration Guide
> Comprehensive comparison and migration guide for Ethereum developers transitioning to Aptos blockchain development
Aptos is built to allow you to quickly prototype and scale secure production applications. It combines a fast, cost-efficient, and stable blockchain layer with Move's compile-time safety that catches exploits before deployment, comprehensive tooling for rapid development, and a strong ecosystem of exchanges and bridges for seamless integration.
Step-by-Step Guide
Need the full migration tutorial instead of a quick reference table?
* Start with the local [Ethereum to Aptos guide](/build/guides/ethereum-to-aptos)
* Follow the [Billboard walkthrough](/build/guides/ethereum-to-aptos/billboard/demo) for a simple Solidity-to-Move port
* Continue to the [Dutch Auction walkthrough](/build/guides/ethereum-to-aptos/dutch-auction/demo) for a richer token and object example
### High Level Overview
[](#high-level-overview)
| Feature | Ethereum | Aptos | | -------------------------- | ------------------------------------------------------------------------------------------------------------------------------ | ---------------------------------------------------------------------------------------------------------------------------------------------------------------------------- | | **Account Addresses** | 160-bit | 256-bit | | **Storage Mindset** | Contract-based storage | Account centric mindset for code and data | | **Caller ID** | `msg.sender` | `&signer` reference | | **Smart Contracts** | Solidity, EVM | Move, MoveVM | | **Benefits** | Mature, wide adoption | Scalability, low latency, predictable fees | | **Transaction Fees** | Variable, can be high | Lower and more predictable | | **Sponsored Transactions** | Requires third-party services or EIP-7702 wallet support (2025+) | [Natively supported](/build/guides/sponsored-transactions) via fee payer field. [Geomi Gas Stations](https://geomi.dev/docs/gas-stations) provides production infrastructure | | **Account Structure** | Balance in a single field, uses nonce | Modules and resources, uses sequence number | | **Data Storage** | Patricia Merkle Trees | Global storage with resources and modules | | **Upgradeability** | Proxy patterns | Direct module upgrades | | **Safety & Security** | Vulnerable to attacks like reentrancy | Mitigates common vulnerabilities | | **Dispatch Type** | Dynamic dispatch | Static dispatch | | **Frontend SDK** | [Ethers.js library](https://docs.ethers.org/v6/) | [Aptos Typescript SDK](/build/sdks/ts-sdk) | | **NFT Standards** | [ERC-721](https://docs.openzeppelin.com/contracts/4.x/erc721), [ERC-1155](https://docs.openzeppelin.com/contracts/4.x/erc1155) | [Digital Asset](/build/smart-contracts/digital-asset) | | **FT Standard** | [ERC-20](https://docs.openzeppelin.com/contracts/4.x/erc20), factory pattern | See [Fungible Asset](/build/smart-contracts/fungible-asset), copy paste in your module: `use aptos_framework::fungible_asset...` | | **Example Code** | [ERC-20](https://github.com/OpenZeppelin/openzeppelin-contracts/tree/master/contracts/token/ERC20) (new contract per deploy) | [Fungible Asset](https://github.com/aptos-labs/aptos-core/blob/main/aptos-move/framework/aptos-framework/sources/fungible_asset.move) (single reusable module) |
Legacy [`Coin`](/build/smart-contracts/aptos-coin) documentation still covers the original standard; most new deployments should prefer the Fungible Asset module referenced above.
### Comparing Token Standards in Detail
[](#comparing-token-standards-in-detail)
| | Solidity | Move (Aptos) | | ---------------------- | --------------------------------------------------------------------------- | --------------------------------------------------------------------------------------------------------------------------------------------------- | | **Token Structure** | Each token is its own contract. | Every token is a typed `FungibleAsset` instantiation that reuses the same published module. | | **Token Standard** | Must conform to standards like ERC-20; implementations can vary per deploy. | Uniform interface and implementation enforced by the shared module; new tokens simply register a new type rather than redeploying code. | | **Balance Storage** | Balances stored in contract using a mapping structure. | **Resource-Oriented Balance**: balances live in an extensible object owned by the user's account. | | **Transfer Mechanism** | Tokens can be transferred without receiver's explicit permission. | Transfers can skip receiver permission, but only when the FA explicitly enables primary-store auto creation (visible in the token's creation code). |
### Comparing EVM and Move VM in Detail
[](#comparing-evm-and-move-vm-in-detail)
* **EVM**: Known for its flexibility and dynamic dispatch, which allows a wide range of smart contract behaviors. This flexibility, however, can lead to complexities in parallel execution and network operations.
* **Move VM**: Focuses on safety and efficiency with a more integrated approach between the VM and the programming language. Its data storage model allows for better parallelization, and its static dispatch method enhances security and predictability.
| | EVM (Ethereum Virtual Machine) | Move VM (Move Virtual Machine) | | ------------------------------- | ---------------------------------------------------------------------- | ------------------------------------------------------------------------------------------------------------------ | | **Data Storage** | Data is stored in the smart contract's storage space. | Data is stored across smart contracts, user accounts, and objects. | | **Parallelization** | Parallel execution is limited due to shared storage space. | More parallel execution enabled due to flexible split storage design. | | **VM and Language Integration** | Separate layers for EVM and smart contract languages (e.g., Solidity). | Seamless integration between VM layer and Move language, with native functions written in Rust executable in Move. | | **Critical Network Operations** | Implementation of network operations can be complex and less direct. | Critical operations like validator set management natively implemented in Move, allowing for direct execution. | | **Function Calling** | Dynamic dispatch allows for arbitrary smart contract calls. | Static dispatch aligns with a focus on security and predictable behavior. | | **Type Safety** | Contract types provide a level of type safety. | Module structs and generics in Move offer robust type safety. | | **Transaction Safety** | Uses nonces for transaction ordering and safety. | Uses sequence numbers for transaction ordering and safety. | | **Authenticated Storage** | Yes, with smart contract storage. | Yes, leveraging Move’s resource model. | | **Object Accessibility** | Objects are not globally accessible; bound to smart contract scope. | Guaranteed global accessibility of objects. |
## Migration Tips for Ethereum Developers
[](#migration-tips-for-ethereum-developers)
* [Storage](#tab-panel-0)
* [Authentication](#tab-panel-1)
* [Resources & Abilities](#tab-panel-2)
* [Upgradability](#tab-panel-3)
* [Deploying Modules](#tab-panel-4)
Ethereum stores all data in contract storage using mappings. Aptos uses an account-centric model where each account stores their own resources. Instead of a contract maintaining a `mapping(address => T)`, each user stores their own `T` resource at their address.
```
module my_hackathon_account::prototype { use std::string; use std::signer;
// Unlike Solidity's mapping(address => string), each account stores their own resource struct MessageHolder has key, store, drop { message: string::String, }
entry fun set_message(account: &signer, message: string::String) acquires MessageHolder { let addr = signer::address_of(account); // Check if resource exists at this account (like checking mapping[addr]) if (exists(addr)) { move_from(addr); // Remove old resource }; // Store resource at the user's address (in their account, not in contract storage!) move_to(account, MessageHolder { message }); }
#[view] public fun get_message(addr: address): string::String acquires MessageHolder { assert!(exists(addr), 0); // Read message stored at the user's address borrow_global(addr).message }}
```
By default, modules deploy to your account address. For production apps, consider deploying to [Objects](/build/smart-contracts/objects), which creates a unique address per deployment and enables transferable code ownership. See [Using Objects](/build/smart-contracts/object/using-objects) for implementation details.
Learn more: [`global storage operators`](https://aptos-labs.github.io/move-book/global-storage.html), [`structs and resources`](https://aptos-labs.github.io/move-book/structs-and-enums.html)
On Ethereum, `msg.sender` is set by the EVM, but many bugs come from using `tx.origin` for auth or trusting user-supplied addresses. Aptos' `&signer` goes further: it's an unforgeable capability created only by the VM for actual transaction signers, so any function that requires `&signer` can't be called with a spoofed identity. In dapps, wallets plus the [Aptos TypeScript SDK](/build/sdks/ts-sdk) and [wallet adapter](/build/sdks/wallet-adapter/wallets) bridge this signer identity from frontend to on-chain.
```
module my_hackathon_account::prototype { use std::string; use std::signer;
struct MessageHolder has key, store, drop { message: string::String, }
// Only the account owner can provide their &signer (unforgeable authentication) entry fun set_message(account: &signer, message: string::String) acquires MessageHolder { // Extract address from authenticated signer (no spoofing possible!) let addr = signer::address_of(account); if (exists(addr)) { move_from(addr); }; // account is guaranteed to be authentic move_to(account, MessageHolder { message }); }
#[view] public fun get_message(addr: address): string::String acquires MessageHolder { assert!(exists(addr), 0); // Read message stored at the user's address borrow_global(addr).message }}
```
Create and fund an account using the [Aptos CLI](/build/cli):
```
aptos init
```
Learn more: [`signer`](https://aptos-labs.github.io/move-book/primitive-types.html) type, [`functions`](https://aptos-labs.github.io/move-book/functions.html)
Move has four abilities: `copy`, `drop`, `store`, and `key`, which control how values can be used. In this example, MessageHolder deliberately omits `copy` so messages stored as resources can't be duplicated; you generally avoid `copy` on any type that represents on-chain state or assets. `key` + `store` allow it to live in global storage at an address, and `drop` lets you destroy the old resource safely when overwriting it.
```
module my_hackathon_account::prototype { use std::string; use std::signer;
// Resources: structs with 'key' ability that live in global storage // key = can be stored at account addresses (makes it a "resource") // store = can be stored inside other structs // drop = can be destroyed/discarded implicitly struct MessageHolder has key, store, drop { message: string::String, }
entry fun set_message(account: &signer, message: string::String) acquires MessageHolder { let addr = signer::address_of(account); // The 'drop' ability allows implicit destruction if (exists(addr)) { move_from(addr); // Old resource is destroyed (requires 'drop') }; move_to(account, MessageHolder { message }); }
#[view] public fun get_message(addr: address): string::String acquires MessageHolder { assert!(exists(addr), 0); // Read message stored at the user's address borrow_global(addr).message }}
```
Learn more: [`abilities`](https://aptos-labs.github.io/move-book/generics-and-abilities.html), [`structs and resources`](https://aptos-labs.github.io/move-book/structs-and-enums.html)
Aptos packages support two upgrade policies: `compatible` (default; only backward-compatible changes allowed) and `immutable` (no upgrades allowed). By default, packages published with the [Aptos CLI](/build/cli) using `aptos move publish` use the **compatible** policy, which lets you push new versions as long as you don't break struct layouts or public function signatures.
To prevent all future upgrades, set the immutable policy:
```
aptos move publish --upgrade-policy immutable
```
Or configure in your `Move.toml`:
```
[package]name = "MyPackage"version = "1.0.0"upgrade_policy = "immutable"
```
See [Package Upgrades](https://aptos-labs.github.io/move-book/cli-deploy.html) for the exact compatibility rules.
On Ethereum you "deploy a contract to a new address." On Aptos you **publish a package** of Move modules to an account (or object) address using the [Aptos CLI](/build/cli).
Publish your package:
```
aptos move publish
```
Call an `entry` function after deployment:
```
aptos move run --function-id 'your_address::module_name::function_name'
```
Both account-based publishing and object-based deployment (via `aptos move deploy-object`) respect the package's upgrade policy. See [Your First Move Module](/build/guides/first-move-module) for a complete walkthrough and [Objects](/build/smart-contracts/objects) for object-centric patterns.
# Your First Transaction
> Create and submit your first transaction on Aptos blockchain - transfer coins between accounts with TypeScript and Python examples.
Transactions are the fundamental way to change data on the Aptos blockchain. Think of them like sending a package: you need to specify what you're sending, who it's going to, and then track it until delivery is confirmed. In blockchain terms, transactions allow you to transfer coins, call smart contract functions, and update on-chain state.
This tutorial will guide you through creating and submitting your first transaction on the Aptos blockchain. You'll learn how to:
1. Set up your development environment
2. Create test accounts and fund them
3. Build a transaction to transfer coins
4. Simulate the transaction to estimate costs
5. Sign and submit the transaction
6. Verify the transaction was executed successfully
Note
This tutorial builds on concepts from the Aptos blockchain. If you're new to blockchain development, don't worry - we'll explain key concepts along the way.
You can jump to the full code sample [here](#full-code-sample) or continue reading for a step-by-step walkthrough.
## 1\. Setting Up Your Environment
[](#1-setting-up-your-environment)
* [TypeScript](#tab-panel-24)
* [Python](#tab-panel-25)
Before we can create transactions, we need to set up our development environment with the necessary tools and SDKs.
1. Install the TypeScript SDK
Install the TypeScript SDK using your preferred package manager:
* [npm](#tab-panel-5)
* [yarn](#tab-panel-6)
* [pnpm](#tab-panel-7)
```
npm install @aptos-labs/ts-sdk
```
```
yarn add @aptos-labs/ts-sdk
```
```
pnpm add @aptos-labs/ts-sdk
```
2. Create a project directory
Create a new directory for your project:
```
mkdir my-first-transactioncd my-first-transaction
```
3. Create a new file
Create a new file named `transaction.ts`:
* [Mac/Linux](#tab-panel-8)
* [Windows](#tab-panel-9)
```
touch transaction.ts
```
```
type nul > transaction.ts
```
Before we can create transactions, we need to set up our development environment with the necessary tools and SDKs.
1. Install the Python SDK
Install the Python SDK using pip:
```
pip install aptos-sdk
```
2. Create a project directory
Create a new directory for your project:
```
mkdir my-first-transactioncd my-first-transaction
```
3. Create a new file
Create a new file named `transaction.py`:
* [Mac/Linux](#tab-panel-10)
* [Windows](#tab-panel-11)
```
touch transaction.py
```
```
type nul > transaction.py
```
## 2\. Creating Test Accounts
[](#2-creating-test-accounts)
* [TypeScript](#tab-panel-14)
* [Python](#tab-panel-15)
In blockchain, all transactions must come from an account. Let's create two test accounts: one to send coins (Alice) and one to receive them (Bob).
1. Set up the client
First, we need to initialize the Aptos client that will connect to the blockchain. Open `transaction.ts` in your editor and add:
```
import { Account, Aptos, AptosConfig, Network,} from "@aptos-labs/ts-sdk";
async function main() { // Initialize the Aptos client const config = new AptosConfig({ network: Network.DEVNET }); const aptos = new Aptos(config);
console.log("Connected to Aptos devnet");
// More code will go here}
main().catch(console.error);
```
Note
We're connecting to the Aptos devnet, which is a test network where you can experiment without using real coins. The devnet is reset periodically, so don't store anything important there. You can explore the full TypeScript SDK source code in the [aptos-ts-sdk repository](https://github.com/aptos-labs/aptos-ts-sdk).
2. Generate accounts
Add this code inside your `main()` function to create two accounts - Alice (sender) and Bob (receiver):
```
// Generate two accountsconst alice = Account.generate();const bob = Account.generate();
console.log("=== Addresses ===");console.log(`Alice's address: ${alice.accountAddress}`);console.log(`Bob's address: ${bob.accountAddress}`);
```
Note
Each account has a unique address (like a bank account number) and a keypair (like your login credentials). The address is derived from the public key, while the private key is kept secret and used for signing transactions. For more details on how accounts work in Aptos, see [Account basics](/network/blockchain/accounts).
3. Fund the accounts
Add this code after generating the accounts to get test coins from the faucet:
```
// Fund the accounts with test APT from the devnet faucetconsole.log("\n=== Funding accounts ===");await aptos.fundAccount({ accountAddress: alice.accountAddress, amount: 100_000_000, // 1 APT = 100,000,000 octas});console.log("Accounts funded successfully");
// Check initial balancesconst aliceBalance = await aptos.getAccountAPTAmount({ accountAddress: alice.accountAddress,});const bobBalance = await aptos.getAccountAPTAmount({ accountAddress: bob.accountAddress,});
console.log("\n=== Initial Balances ===");console.log(`Alice: ${aliceBalance} octas`);console.log(`Bob: ${bobBalance} octas`);
```
4. Run the code
Let's test our code so far:
```
npx ts-node transaction.ts
```
You should see output similar to:
```
Connected to Aptos devnet=== Addresses ===Alice's address: 0x978c213990c4833df71548df7ce49d54c759d6b6d932de22b24d56060b7af2aaBob's address: 0x7af2d6c93a2feafc9b69b5e8ad9d6b513b260f62f23f3a384a3a2e4a84694a9b
=== Funding accounts ===Accounts funded successfully
=== Initial Balances ===Alice: 100000000 octasBob: 0 octas
```
Note
The addresses you see will be different from the ones shown here, as they are randomly generated each time.
In blockchain, all transactions must come from an account. Let's create two test accounts: one to send coins (Alice) and one to receive them (Bob).
1. Set up the client
First, we need to initialize the Aptos client that will connect to the blockchain. Open `transaction.py` in your editor and add:
```
import asynciofrom aptos_sdk.account import Accountfrom aptos_sdk.async_client import FaucetClient, RestClientfrom aptos_sdk.transactions import EntryFunction, TransactionPayload, TransactionArgument, RawTransactionfrom aptos_sdk.bcs import Serializerimport time
# Network configurationNODE_URL = "https://fullnode.devnet.aptoslabs.com/v1"FAUCET_URL = "https://faucet.devnet.aptoslabs.com"
async def main(): # Initialize the clients rest_client = RestClient(NODE_URL) faucet_client = FaucetClient(FAUCET_URL, rest_client)
print("Connected to Aptos devnet")
# More code will go here
if __name__ == "__main__": asyncio.run(main())
```
Note
We're connecting to the Aptos devnet, which is a test network where you can experiment without using real coins. The devnet is reset periodically, so don't store anything important there. You can explore the full Python SDK source code in the [aptos-python-sdk repository](https://github.com/aptos-labs/aptos-python-sdk).
2. Generate accounts
Add this code inside your `main()` function to create two accounts - Alice (sender) and Bob (receiver):
```
# Generate two accountsalice = Account.generate()bob = Account.generate()
print("=== Addresses ===")print(f"Alice's address: {alice.address()}")print(f"Bob's address: {bob.address()}")
```
Note
Each account has a unique address (like a bank account number) and a keypair (like your login credentials). The address is derived from the public key, while the private key is kept secret and used for signing transactions. For more details on how accounts work in Aptos, see [Account basics](/network/blockchain/accounts).
3. Fund the accounts
Add this code after generating the accounts to get test coins from the faucet:
```
# Fund the accounts with test APT from the devnet faucetprint("\n=== Funding accounts ===")alice_amount = 100_000_000 # 1 APT = 100,000,000 octasbob_amount = 0 # Bob starts with 0 APT
await faucet_client.fund_account(alice.address(), alice_amount)print("Account funded successfully")
# Check initial balancesalice_balance = await rest_client.account_balance(alice.address())bob_balance = await rest_client.account_balance(bob.address())
print("\n=== Initial Balances ===")print(f"Alice: {alice_balance} octas")print(f"Bob: {bob_balance} octas")
```
4. Run the code
Let's test our code so far:
```
python transaction.py
```
You should see output similar to:
```
Connected to Aptos devnet=== Addresses ===Alice's address: 0x978c213990c4833df71548df7ce49d54c759d6b6d932de22b24d56060b7af2aaBob's address: 0x7af2d6c93a2feafc9b69b5e8ad9d6b513b260f62f23f3a384a3a2e4a84694a9b
=== Funding accounts ===Accounts funded successfully
=== Initial Balances ===Alice: 100000000 octasBob: 0 octas
```
Note
The addresses you see will be different from the ones shown here, as they are randomly generated each time.
## 3\. Building a Transaction
[](#3-building-a-transaction)
* [TypeScript](#tab-panel-16)
* [Python](#tab-panel-17)
Now that we have funded accounts, let's create a transaction to transfer coins from Alice to Bob. This is like filling out a form specifying what you want to send and to whom.
1. Understand transaction structure
A transaction in Aptos has several key components:
1. **Sender**: The account initiating the transaction (Alice)
2. **Function**: The on-chain function to call (in this case, a coin transfer)
3. **Arguments**: Data needed by the function (recipient address and amount)
4. **Gas parameters**: Maximum gas amount and gas unit price
5. **Expiration time**: When the transaction is no longer valid if not executed
6. **Sequence number**: A counter that prevents replay attacks
Note
All data in Aptos transactions is serialized using Binary Canonical Serialization (BCS), a compact and deterministic format designed for blockchain use. The SDK handles this serialization for you.
BCS ensures that transaction data is consistently encoded across different platforms and languages, which is critical for a blockchain where the same transaction might be processed by nodes running different implementations.
2. Build the transaction
Let's add code to build a transaction that transfers 1000 octas from Alice to Bob:
Add this code to your `main()` function:
```
// 1. Build the transactionconsole.log("\n=== 1. Building the transaction ===");const transaction = await aptos.transaction.build.simple({ sender: alice.accountAddress, data: { function: "0x1::aptos_account::transfer", functionArguments: [bob.accountAddress, 1000], // Transfer 1000 octas },});console.log("Transaction built successfully");
// Access transaction details from the raw transactionconst rawTxn = transaction.rawTransaction;console.log(`Sender: ${rawTxn.sender}`);console.log(`Sequence Number: ${rawTxn.sequence_number}`);console.log(`Max Gas Amount: ${rawTxn.max_gas_amount}`);console.log(`Gas Unit Price: ${rawTxn.gas_unit_price}`);console.log(`Expiration Timestamp: ${new Date(Number(rawTxn.expiration_timestamp_secs) * 1000).toISOString()}`);
```
Note
The function `0x1::aptos_account::transfer` is a built-in function in the Aptos framework that transfers coins between accounts. The `0x1` prefix indicates it's part of the core framework. Behind the scenes, this function calls the [Coin Move module source code](https://github.com/aptos-labs/aptos-core/blob/main/aptos-move/framework/aptos-framework/sources/coin.move) to perform the actual transfer.
Now that we have funded accounts, let's create a transaction to transfer coins from Alice to Bob. This is like filling out a form specifying what you want to send and to whom.
1. Understand transaction structure
A transaction in Aptos has several key components:
1. **Sender**: The account initiating the transaction (Alice)
2. **Function**: The on-chain function to call (in this case, a coin transfer)
3. **Arguments**: Data needed by the function (recipient address and amount)
4. **Gas parameters**: Maximum gas amount and gas unit price
5. **Expiration time**: When the transaction is no longer valid if not executed
6. **Sequence number**: A counter that prevents replay attacks
Note
All data in Aptos transactions is serialized using Binary Canonical Serialization (BCS), a compact and deterministic format designed for blockchain use. The SDK handles this serialization for you.
BCS ensures that transaction data is consistently encoded across different platforms and languages, which is critical for a blockchain where the same transaction might be processed by nodes running different implementations.
2. Build the transaction
Add the following code to your `main()` function to build a transaction that transfers 1000 octas from Alice to Bob:
```
# 1. Build the transactionprint("\n=== 1. Building the transaction ===")
# Create the entry function payload# This specifies which function to call and with what argumentsentry_function = EntryFunction.natural( "0x1::aptos_account", # Module address and name "transfer", # Function name [], # Type arguments (empty for this function) [ # Function arguments with their serialization type TransactionArgument(bob.address(), Serializer.struct), # Recipient address TransactionArgument(1000, Serializer.u64), # Amount to transfer (1000 octas) ],)
# Get the chain ID for the transactionchain_id = await rest_client.chain_id()
# Get the sender's current sequence numberaccount_data = await rest_client.account(alice.address())sequence_number = int(account_data["sequence_number"])
# Create the raw transaction with all required fieldsraw_transaction = RawTransaction( sender=alice.address(), # Sender's address sequence_number=sequence_number, # Sequence number to prevent replay attacks payload=TransactionPayload(entry_function), # The function to call max_gas_amount=2000, # Maximum gas units to use gas_unit_price=100, # Price per gas unit in octas expiration_timestamps_secs=int(time.time()) + 600, # Expires in 10 minutes chain_id=chain_id, # Chain ID to ensure correct network)
print("Transaction built successfully")print(f"Sender: {raw_transaction.sender}")print(f"Sequence Number: {raw_transaction.sequence_number}")print(f"Max Gas Amount: {raw_transaction.max_gas_amount}")print(f"Gas Unit Price: {raw_transaction.gas_unit_price}")print(f"Expiration Timestamp: {time.ctime(raw_transaction.expiration_timestamps_secs)}")
```
Note
The function `0x1::aptos_account::transfer` is a built-in function in the Aptos framework that transfers coins between accounts. The `0x1` prefix indicates it's part of the core framework. Behind the scenes, this function calls the [Coin Move module source code](https://github.com/aptos-labs/aptos-core/blob/main/aptos-move/framework/aptos-framework/sources/coin.move) to perform the actual transfer.
The Python SDK uses several key components to construct transactions:
* `EntryFunction.natural()` creates a callable Move function reference
* `TransactionArgument` with `Serializer` types ensures proper BCS serialization
* `TransactionPayload` wraps the entry function for inclusion in the transaction
* `RawTransaction` combines all transaction parameters into a complete transaction
This layered approach gives you fine-grained control over transaction construction.
## 4\. Simulating the Transaction
[](#4-simulating-the-transaction)
* [TypeScript](#tab-panel-18)
* [Python](#tab-panel-19)
Before submitting a transaction, it's wise to simulate it first to estimate the gas cost. This is like checking shipping costs before sending a package.
1. Simulate the transaction
Add this code after building the transaction:
```
// 2. Simulate the transactionconsole.log("\n=== 2. Simulating the transaction ===");const [simulationResult] = await aptos.transaction.simulate.simple({ signerPublicKey: alice.publicKey, transaction,});
const gasUsed = parseInt(simulationResult.gas_used);const gasUnitPrice = parseInt(simulationResult.gas_unit_price);console.log(`Estimated gas units: ${gasUsed}`);console.log(`Estimated gas cost: ${gasUsed * gasUnitPrice} octas`);console.log(`Transaction would ${simulationResult.success ? "succeed" : "fail"}`);
```
Note
Gas is the computational fee paid to process transactions on the blockchain. The total cost is calculated as `gas_used × gas_unit_price`. During simulation, the blockchain executes the transaction in a temporary environment to estimate these costs without making permanent changes to the blockchain state. This helps you avoid failed transactions due to insufficient gas.
Before submitting a transaction, it's wise to simulate it first to estimate the gas cost. This is like checking shipping costs before sending a package.
1. Simulate the transaction
Add this code after building the transaction:
```
# 2. Simulate the transactionprint("\n=== 2. Simulating the transaction ===")
# Create a BCS transaction for simulation# This doesn't actually submit the transaction to the blockchainsimulation_transaction = await rest_client.create_bcs_transaction(alice, TransactionPayload(entry_function))
# Simulate the transaction to estimate gas costs and check for errorssimulation_result = await rest_client.simulate_transaction(simulation_transaction, alice)
# Extract and display the simulation resultsgas_used = int(simulation_result[0]['gas_used'])gas_unit_price = int(simulation_result[0]['gas_unit_price'])success = simulation_result[0]['success']
print(f"Estimated gas units: {gas_used}")print(f"Estimated gas cost: {gas_used * gas_unit_price} octas")print(f"Transaction would {'succeed' if success else 'fail'}")
```
Note
Gas is the computational fee paid to process transactions on the blockchain. The total cost is calculated as `gas_used × gas_unit_price`. During simulation, the blockchain executes the transaction in a temporary environment to estimate these costs without making permanent changes to the blockchain state. This helps you avoid failed transactions due to insufficient gas.
## 5\. Signing and Submitting the Transaction
[](#5-signing-and-submitting-the-transaction)
* [TypeScript](#tab-panel-20)
* [Python](#tab-panel-21)
Now that we've built and simulated the transaction, we need to sign it with Alice's private key and submit it to the blockchain.
1. Sign the transaction
Signing proves that Alice authorized this transaction:
Add this code after simulating the transaction:
```
// 3. Sign the transactionconsole.log("\n=== 3. Signing the transaction ===");const senderAuthenticator = aptos.transaction.sign({ signer: alice, transaction,});console.log("Transaction signed successfully");
```
Note
Digital signatures work like a personal seal or signature in the physical world. They prove that the transaction was authorized by the account owner (who has the private key) and haven't been tampered with.
2. Submit the transaction
Add this code after signing the transaction to submit the signed transaction to the blockchain:
```
// 4. Submit the transactionconsole.log("\n=== 4. Submitting the transaction ===");const pendingTransaction = await aptos.transaction.submit.simple({ transaction, senderAuthenticator,});console.log(`Transaction submitted with hash: ${pendingTransaction.hash}`);
```
Note
The transaction hash is a unique identifier for your transaction, similar to a tracking number for a package. When submitting a transaction, the Aptos blockchain performs several validation checks, including verifying the transaction signature and ensuring the sequence number hasn't been used before (preventing replay attacks). You can use the hash to check the status of your transaction on the [Aptos Explorer](https://explorer.aptoslabs.com/) or via the [REST API](/build/apis/fullnode-rest-api).
Now that we've built and simulated the transaction, we need to sign it with Alice's private key and submit it to the blockchain.
1. Sign the transaction
Signing proves that Alice authorized this transaction:
Add this code after simulating the transaction:
```
# 3. Sign the transactionprint("\n=== 3. Signing the transaction ===")
# Sign the raw transaction with the sender's private key# This creates a cryptographic signature that proves the sender authorized this transactionsigned_transaction = await rest_client.create_bcs_signed_transaction( alice, # Account with the private key TransactionPayload(entry_function), # The payload from our transaction sequence_number=sequence_number # Use the same sequence number as before)
print("Transaction signed successfully")# We can't easily extract the signature from the signed transaction object,# but we can confirm it was created
```
Note
Digital signatures work like a personal seal or signature in the physical world. They prove that the transaction was authorized by the account owner (who has the private key) and haven't been tampered with.
2. Submit the transaction
Add this code after signing the transaction to submit the signed transaction to the blockchain:
```
# 4. Submit the transactionprint("\n=== 4. Submitting the transaction ===")
# Submit the signed transaction to the blockchain# This broadcasts the transaction to the network for processingtx_hash = await rest_client.submit_bcs_transaction(signed_transaction)
print(f"Transaction submitted with hash: {tx_hash}")
```
Note
The transaction hash is a unique identifier for your transaction, similar to a tracking number for a package. When submitting a transaction, the Aptos blockchain performs several validation checks, including verifying the transaction signature and ensuring the sequence number hasn't been used before (preventing replay attacks). You can use the hash to check the status of your transaction on the [Aptos Explorer](https://explorer.aptoslabs.com/) or via the [REST API](/build/apis/fullnode-rest-api).
## 6\. Waiting for Confirmation
[](#6-waiting-for-confirmation)
* [TypeScript](#tab-panel-22)
* [Python](#tab-panel-23)
After submitting a transaction, we need to wait for it to be processed by the blockchain. This is like waiting for a package to be delivered.
1. Wait for transaction completion
Add this code after submitting the transaction:
```
// 5. Wait for the transaction to completeconsole.log("\n=== 5. Waiting for transaction completion ===");const txnResult = await aptos.waitForTransaction({ transactionHash: pendingTransaction.hash,});console.log(`Transaction completed with status: ${txnResult.success ? "SUCCESS" : "FAILURE"}`);
// If you want to see more details about the transaction:console.log(`VM Status: ${txnResult.vm_status}`);console.log(`Gas used: ${txnResult.gas_used}`);
```
2. Verify the results
Add this code after waiting for the transaction to check the balances and confirm the transfer worked:
```
// Check final balancesconst aliceFinalBalance = await aptos.getAccountAPTAmount({ accountAddress: alice.accountAddress,});const bobFinalBalance = await aptos.getAccountAPTAmount({ accountAddress: bob.accountAddress,});
console.log("\n=== Final Balances ===");console.log(`Alice: ${aliceFinalBalance} octas (spent ${aliceBalance - aliceFinalBalance} octas on transfer and gas)`);console.log(`Bob: ${bobFinalBalance} octas (received 1000 octas)`);
```
3. Run the complete code
```
npx ts-node transaction.ts
```
You should see output similar to:
```
Connected to Aptos devnet=== Addresses ===Alice's address: 0x978c213990c4833df71548df7ce49d54c759d6b6d932de22b24d56060b7af2aaBob's address: 0x7af2d6c93a2feafc9b69b5e8ad9d6b513b260f62f23f3a384a3a2e4a84694a9b
=== Funding accounts ===Accounts funded successfully
=== Initial Balances ===Alice: 100000000 octasBob: 0 octas
=== 1. Building the transaction ===Transaction built successfullySender: 0x978c213990c4833df71548df7ce49d54c759d6b6d932de22b24d56060b7af2aaSequence Number: 0Max Gas Amount: 20000Gas Unit Price: 100Expiration Timestamp: 2025-03-05T22:59:21.000Z
=== 2. Simulating the transaction ===Estimated gas units: 146Estimated gas cost: 14600 octasTransaction would succeed
=== 3. Signing the transaction ===Transaction signed successfully
=== 4. Submitting the transaction ===Transaction submitted with hash: 0x3a8a3e34a1c64ad9d7636a3a827b7ec3bb12d73825b36fa06d425c5a3b42cccc
=== 5. Waiting for transaction completion ===Transaction completed with status: SUCCESSVM Status: Executed successfullyGas used: 146
=== Final Balances ===Alice: 99984400 octas (spent 15600 octas on transfer and gas)Bob: 1000 octas (received 1000 octas)
```
Note
Notice that Alice's balance decreased by more than 1000 octas. The extra amount is the gas fee paid to process the transaction. When checking balances, the TypeScript SDK uses `getAccountAPTAmount`, which resolves APT after the Fungible Asset migration and does not rely on the legacy `CoinStore` resource (new accounts may not have it).
After submitting a transaction, we need to wait for it to be processed by the blockchain. This is like waiting for a package to be delivered.
1. Wait for transaction completion
Add this code after submitting the transaction:
```
# 5. Wait for the transaction to completeprint("\n=== 5. Waiting for transaction completion ===")
# Wait for the transaction to be processed by the blockchain# This polls the blockchain until the transaction is confirmedawait rest_client.wait_for_transaction(tx_hash)
# Get the transaction details to check its statustransaction_details = await rest_client.transaction_by_hash(tx_hash)success = transaction_details["success"]vm_status = transaction_details["vm_status"]gas_used = transaction_details["gas_used"]
print(f"Transaction completed with status: {'SUCCESS' if success else 'FAILURE'}")print(f"VM Status: {vm_status}")print(f"Gas used: {gas_used}")
```
2. Verify the results
Add this code after waiting for the transaction to check the balances and confirm the transfer worked:
```
# Check final balancesalice_final_balance = await rest_client.account_balance(alice.address())bob_final_balance = await rest_client.account_balance(bob.address())
print("\n=== Final Balances ===")print(f"Alice: {alice_final_balance} octas (spent {alice_balance - alice_final_balance} octas on transfer and gas)")print(f"Bob: {bob_final_balance} octas (received 1000 octas)")
```
3. Run the complete code
```
python transaction.py
```
You should see output similar to:
```
Connected to Aptos devnet=== Addresses ===Alice's address: 0x978c213990c4833df71548df7ce49d54c759d6b6d932de22b24d56060b7af2aaBob's address: 0x7af2d6c93a2feafc9b69b5e8ad9d6b513b260f62f23f3a384a3a2e4a84694a9b
=== Funding accounts ===Accounts funded successfully
=== Initial Balances ===Alice: 100000000 octasBob: 0 octas
=== 1. Building the transaction ===Transaction built successfullySender: 0x978c213990c4833df71548df7ce49d54c759d6b6d932de22b24d56060b7af2aaSequence Number: 0Max Gas Amount: 2000Gas Unit Price: 100Expiration Timestamp: Wed Mar 05 22:59:21 2025
=== 2. Simulating the transaction ===Estimated gas units: 146Estimated gas cost: 14600 octasTransaction would succeed
=== 3. Signing the transaction ===Transaction signed successfully
=== 4. Submitting the transaction ====== 3. Signing the transaction ===Transaction signed successfully
=== 4. Submitting the transaction ===Transaction submitted with hash: 0x3a8a3e34a1c64ad9d7636a3a827b7ec3bb12d73825b36fa06d425c5a3b42cccc
=== 5. Waiting for transaction completion ===Transaction completed with status: SUCCESSVM Status: Executed successfullyGas used: 146
=== Final Balances ===Alice: 99984400 octas (spent 15600 octas on transfer and gas)Bob: 1000 octas (received 1000 octas)
```
Note
Notice that Alice's balance decreased by more than 1000 octas. The extra amount is the gas fee paid to process the transaction. When checking balances, the Python SDK's `account_balance` uses the node's balance APIs, which reflect APT after the Fungible Asset migration rather than only the legacy `CoinStore` resource.
## 7\. (Optional) Explore Your Transaction On-Chain
[](#7-optional-explore-your-transaction-on-chain)
Now that you've successfully executed a transaction, you can explore it on the Aptos Explorer. This will help you understand how transactions are recorded on the blockchain and what information is publicly available.
1. Copy your transaction hash
From your terminal output, copy the transaction hash that was printed after submission. It looks something like this:
```
Transaction submitted with hash: 0x3a8a3e34a1c64ad9d7636a3a827b7ec3bb12d73825b36fa06d425c5a3b42cccc
```
2. Open the Aptos Explorer
Go to the [Aptos Explorer](https://explorer.aptoslabs.com/?network=devnet).
3. Ensure you are on Devnet network
Look for "Devnet" in the top right corner, or switch networks by clicking the dropdown and selecting Devnet.
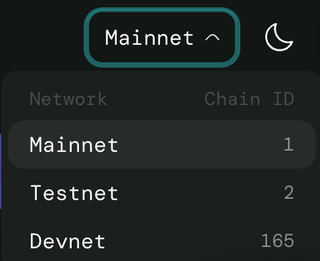
4. Search for your transaction
Paste your transaction hash into the search bar in the middle of the page.
Caution
Do not press enter! There is a known bug where searching with Enter does not work.
5. View the transaction details
Wait for the results to appear, then click on the transaction hash to view its details.
You should see information about your transaction, including:
* Status (should be "Success")
* Timestamp
* Gas used
* Sender and recipient addresses
* Amount transferred
6. Explore further
From the transaction details page, you can:
* Click on the sender or recipient addresses to view their account details
* See the exact changes made to the blockchain state
* View the transaction payload and arguments
Note
The Explorer is a powerful tool for debugging transactions and understanding blockchain activity. Developers frequently use it to verify their transactions executed as expected and to investigate any issues.
## 8\. Next Steps
[](#8-next-steps)
Congratulations! You've successfully created and executed your first transaction on the Aptos blockchain. Here are some suggestions for what to explore next:
**Learn about more complex transactions**:
* [Multi-Agent Signatures](/build/sdks/ts-sdk/building-transactions/multi-agent-transactions) - Transactions requiring multiple signers
* [Sponsoring Transactions](/build/sdks/ts-sdk/building-transactions/sponsoring-transactions) - Having another account pay gas fees
* [Batching Transactions](/build/sdks/ts-sdk/building-transactions/batching-transactions) - Sending multiple transactions efficiently
Note
The above links are for the Typescript SDK but the principles are the same if you are using Python or Rust.
**Explore smart contracts or account basics**:
* [Your First Move Module](/build/guides/first-move-module) - Create your own smart contract
* [Account Basics](/network/blockchain/accounts)
[Join the Aptos Discord](https://discord.gg/aptoslabs) and share what you're building!
## Full Code Sample
[](#full-code-sample)
The complete code samples below combine all the snippets we've covered in this tutorial:
* [TypeScript](#tab-panel-12)
* [Python](#tab-panel-13)
```
import { Account, Aptos, AptosConfig, Network } from "@aptos-labs/ts-sdk";
async function main() { // Initialize the Aptos client const config = new AptosConfig({ network: Network.DEVNET }); const aptos = new Aptos(config);
console.log("Connected to Aptos devnet");
// More code will go here // Generate two accounts const alice = Account.generate(); const bob = Account.generate();
console.log("=== Addresses ==="); console.log(`Alice's address: ${alice.accountAddress}`); console.log(`Bob's address: ${bob.accountAddress}`);
// Fund the accounts with test APT from the devnet faucet console.log("\n=== Funding accounts ==="); await aptos.fundAccount({ accountAddress: alice.accountAddress, amount: 100_000_000, // 1 APT = 100,000,000 octas }); await aptos.fundAccount({ accountAddress: bob.accountAddress, amount: 0, // Bob starts with 0 APT }); console.log("Accounts funded successfully");
// Check initial balances const aliceBalance = await aptos.getAccountAPTAmount({ accountAddress: alice.accountAddress, }); const bobBalance = await aptos.getAccountAPTAmount({ accountAddress: bob.accountAddress, });
console.log("\n=== Initial Balances ==="); console.log(`Alice: ${aliceBalance} octas`); console.log(`Bob: ${bobBalance} octas`);
// 1. Build the transaction console.log("\n=== 1. Building the transaction ==="); const transaction = await aptos.transaction.build.simple({ sender: alice.accountAddress, data: { function: "0x1::aptos_account::transfer", functionArguments: [bob.accountAddress, 1000], // Transfer 1000 octas }, }); console.log("Transaction built successfully"); // Use type assertion to bypass TypeScript's type checking const txnAny = transaction as any; console.log(`Sender: ${alice.accountAddress}`); // Use the known sender address console.log(`Sequence Number: ${txnAny.sequenceNumber || "N/A"}`); console.log(`Max Gas Amount: ${txnAny.maxGasAmount || "N/A"}`); console.log(`Gas Unit Price: ${txnAny.gasUnitPrice || "N/A"}`); console.log( `Expiration Timestamp: ${new Date( Number(txnAny.expirationTimestampSecs || 0) * 1000 ).toISOString()}` );
// 2. Simulate the transaction console.log("\n=== 2. Simulating the transaction ==="); const [simulationResult] = await aptos.transaction.simulate.simple({ signerPublicKey: alice.publicKey, transaction, });
console.log(`Estimated gas units: ${simulationResult.gas_used}`); console.log( `Estimated gas cost: ${ Number(simulationResult.gas_used) * Number(simulationResult.gas_unit_price) } octas` ); console.log( `Transaction would ${simulationResult.success ? "succeed" : "fail"}` );
// 3. Sign the transaction console.log("\n=== 3. Signing the transaction ==="); const senderAuthenticator = aptos.transaction.sign({ signer: alice, transaction, }); console.log("Transaction signed successfully"); // Use type assertion to bypass TypeScript's type checking const authAny = senderAuthenticator as any; const signatureStr = typeof authAny.signature === 'string' ? authAny.signature : JSON.stringify(authAny.signature || ''); console.log(`Signature: ${signatureStr.slice(0, 20)}...`);
// 4. Submit the transaction console.log("\n=== 4. Submitting the transaction ==="); const pendingTransaction = await aptos.transaction.submit.simple({ transaction, senderAuthenticator, }); console.log(`Transaction submitted with hash: ${pendingTransaction.hash}`);
// 5. Wait for the transaction to complete console.log("\n=== 5. Waiting for transaction completion ==="); const txnResult = await aptos.waitForTransaction({ transactionHash: pendingTransaction.hash, }); console.log( `Transaction completed with status: ${ txnResult.success ? "SUCCESS" : "FAILURE" }` );
// If you want to see more details about the transaction: console.log(`VM Status: ${txnResult.vm_status}`); console.log(`Gas used: ${txnResult.gas_used}`);
// Check final balances const aliceFinalBalance = await aptos.getAccountAPTAmount({ accountAddress: alice.accountAddress, }); const bobFinalBalance = await aptos.getAccountAPTAmount({ accountAddress: bob.accountAddress, });
console.log("\n=== Final Balances ==="); console.log( `Alice: ${aliceFinalBalance} octas (spent ${ aliceBalance - aliceFinalBalance } octas on transfer and gas)` ); console.log(`Bob: ${bobFinalBalance} octas (received 1000 octas)`);}
main().catch(console.error);
```
```
import asynciofrom aptos_sdk.account import Accountfrom aptos_sdk.async_client import FaucetClient, RestClientfrom aptos_sdk.transactions import EntryFunction, TransactionPayload, TransactionArgument, RawTransactionfrom aptos_sdk.bcs import Serializerimport time
# Network configurationNODE_URL = "https://fullnode.devnet.aptoslabs.com/v1"FAUCET_URL = "https://faucet.devnet.aptoslabs.com"
async def main(): # Initialize the clients rest_client = RestClient(NODE_URL) faucet_client = FaucetClient(FAUCET_URL, rest_client)
print("Connected to Aptos devnet")
# Generate two accounts alice = Account.generate() bob = Account.generate()
print("=== Addresses ===") print(f"Alice's address: {alice.address()}") print(f"Bob's address: {bob.address()}") # More code will go here # Fund the accounts with test APT from the devnet faucet print("\n=== Funding accounts ===") alice_amount = 100_000_000 # 1 APT = 100,000,000 octas bob_amount = 0 # Bob starts with 0 APT
await faucet_client.fund_account(alice.address(), alice_amount) await faucet_client.fund_account(bob.address(), bob_amount) print("Accounts funded successfully")
# Check initial balances alice_balance = await rest_client.account_balance(alice.address()) bob_balance = await rest_client.account_balance(bob.address())
print("\n=== Initial Balances ===") print(f"Alice: {alice_balance} octas") print(f"Bob: {bob_balance} octas")
# 1. Build the transaction print("\n=== 1. Building the transaction ===")
# Create the entry function payload # This specifies which function to call and with what arguments entry_function = EntryFunction.natural( "0x1::aptos_account", # Module address and name "transfer", # Function name [], # Type arguments (empty for this function) [ # Function arguments with their serialization type TransactionArgument(bob.address(), Serializer.struct), # Recipient address TransactionArgument(1000, Serializer.u64), # Amount to transfer (1000 octas) ], )
# Get the chain ID for the transaction chain_id = await rest_client.chain_id()
# Get the sender's current sequence number account_data = await rest_client.account(alice.address()) sequence_number = int(account_data["sequence_number"])
# Create the raw transaction with all required fields raw_transaction = RawTransaction( sender=alice.address(), # Sender's address sequence_number=sequence_number, # Sequence number to prevent replay attacks payload=TransactionPayload(entry_function), # The function to call max_gas_amount=2000, # Maximum gas units to use gas_unit_price=100, # Price per gas unit in octas expiration_timestamps_secs=int(time.time()) + 600, # Expires in 10 minutes chain_id=chain_id, # Chain ID to ensure correct network )
print("Transaction built successfully") print(f"Sender: {raw_transaction.sender}") print(f"Sequence Number: {raw_transaction.sequence_number}") print(f"Max Gas Amount: {raw_transaction.max_gas_amount}") print(f"Gas Unit Price: {raw_transaction.gas_unit_price}") print(f"Expiration Timestamp: {time.ctime(raw_transaction.expiration_timestamps_secs)}")
# 2. Simulate the transaction print("\n=== 2. Simulating the transaction ===")
# Create a BCS transaction for simulation # This doesn't actually submit the transaction to the blockchain simulation_transaction = await rest_client.create_bcs_transaction(alice, TransactionPayload(entry_function))
# Simulate the transaction to estimate gas costs and check for errors simulation_result = await rest_client.simulate_transaction(simulation_transaction, alice)
# Extract and display the simulation results gas_used = int(simulation_result[0]['gas_used']) gas_unit_price = int(simulation_result[0]['gas_unit_price']) success = simulation_result[0]['success']
print(f"Estimated gas units: {gas_used}") print(f"Estimated gas cost: {gas_used * gas_unit_price} octas") print(f"Transaction would {'succeed' if success else 'fail'}")
# 3. Sign the transaction print("\n=== 3. Signing the transaction ===")
# Sign the raw transaction with the sender's private key # This creates a cryptographic signature that proves the sender authorized this transaction signed_transaction = await rest_client.create_bcs_signed_transaction( alice, # Account with the private key TransactionPayload(entry_function), # The payload from our transaction sequence_number=sequence_number # Use the same sequence number as before )
print("Transaction signed successfully") # We can't easily extract the signature from the signed transaction object, # but we can confirm it was created
# 4. Submit the transaction print("\n=== 4. Submitting the transaction ===")
# Submit the signed transaction to the blockchain # This broadcasts the transaction to the network for processing tx_hash = await rest_client.submit_bcs_transaction(signed_transaction)
print(f"Transaction submitted with hash: {tx_hash}")
# 5. Wait for the transaction to complete print("\n=== 5. Waiting for transaction completion ===")
# Wait for the transaction to be processed by the blockchain # This polls the blockchain until the transaction is confirmed await rest_client.wait_for_transaction(tx_hash)
# Get the transaction details to check its status transaction_details = await rest_client.transaction_by_hash(tx_hash) success = transaction_details["success"] vm_status = transaction_details["vm_status"] gas_used = transaction_details["gas_used"]
print(f"Transaction completed with status: {'SUCCESS' if success else 'FAILURE'}") print(f"VM Status: {vm_status}") print(f"Gas used: {gas_used}")
# Check final balances alice_final_balance = await rest_client.account_balance(alice.address()) bob_final_balance = await rest_client.account_balance(bob.address())
print("\n=== Final Balances ===") print(f"Alice: {alice_final_balance} octas (spent {alice_balance - alice_final_balance} octas on transfer and gas)") print(f"Bob: {bob_final_balance} octas (received 1000 octas)")if __name__ == "__main__": asyncio.run(main())
```
# Your First Move Module
> Learn to compile, test, publish, and interact with Move smart contracts on Aptos blockchain from setup to deployment.
The Aptos blockchain allows developers to write Turing complete smart contracts (called “modules”) with the secure-by-design Move language. Smart contracts enable users to send money with the blockchain, but also write arbitrary code, even games! It all starts with the Aptos CLI creating an account which will store the deployed (”published”) Move module.
This tutorial will help you understand Move Modules by guiding you through setting up a minimal Aptos environment, then how to compile, test, publish and interact with Move modules on the Aptos Blockchain. You will learn how to:
1. Setup your environment, install the CLI
2. Create a devnet account and fund it
3. Compile and test a Move module
4. Publish (or "deploy") a Move module to the Aptos blockchain
5. Interact with the module
6. Keep building with Aptos (next steps)
Note
This tutorial is not meant to teach you the fundamentals of Move. That is a longer topic best learned through the [Move Book](https://aptos-labs.github.io/move-book/).
## 1\. Setup
[](#1-setup)
Changes to the blockchain are called “transactions”, and they require an account to pay the network fee (”gas fee”). We will need to create an account with some APT to pay that fee and own the published contract. In order to do that, we will need to use the Aptos CLI.
1. Install the Aptos CLI
[Install the Aptos CLI](/build/cli) (if you haven't already).
2. Open a new terminal
Open a new terminal window or tab.
3. Verify the installation
Run `aptos --version` to verify you have it installed.
```
aptos --version
```
You should see a response like `aptos 4.6.1`.
4. Create a project folder
Create a new folder for this tutorial by running:
```
mkdir my-first-module
```
5. Navigate to the project folder
Run `cd my-first-module` to go into your new folder.
6. Initialize your account
Run `aptos init` and press 'enter' for each step of setup to create a test account on `devnet`.
Note
As we are configuring your Aptos CLI for this folder, notice that this setup follows the logic of the blockchain itself:
1. Which network are we working with (default `devnet`, which refreshes every week)?
2. What is the account we are transacting from (creating a unique private key, which in turn generates a cryptographic public key and account address)?
3. How do I pay for "gas"? (For devnet, testnet, and local networks, the Aptos CLI will helpfully fund this account with Aptos Coin, APT).
For now, just press 'enter' repeatedly to accept all the defaults.
You should see a success message like this:
```
---Aptos CLI is now set up for account 0x9ec1cfa30b885a5c9d595f32f3381ec16d208734913b587be9e210f60be9f9ba as profile default!{ "Result": "Success"}
```
Note
What you might not have noticed is that the Aptos CLI has created a new hidden folder `.aptos/` with a `.gitignore` and `config.yaml` which contains the account information, including private key, public key, and account address.
You can view hidden files with `ls -a` in Unix/Mac terminal or `dir /ah` in Windows.
## 2\. (Optional) Explore What You Just Did On-Chain
[](#2-optional-explore-what-you-just-did-on-chain)
1. Copy your account address
Copy the address from the command line for your new account.
The address looks like this `0x9ec1cfa30b885a5c9d595f32f3381ec16d208734913b587be9e210f60be9f9ba` and you can find it in the line:
```
Aptos CLI is now set up for account 0x9ec1cfa30b885a5c9d595f32f3381ec16d208734913b587be9e210f60be9f9ba as profile default!
```
2. Open the Aptos Explorer
Go to the [Aptos Explorer](https://explorer.aptoslabs.com/?network=devnet).
This is the primary way to quickly check what is happening on devnet, testnet, or mainnet. We will use it later on to view our deployed contracts.
3. Ensure you are on Devnet network.
Look for “Devnet" in the top right corner, or switch networks by clicking the “Mainnet” dropdown and selecting Devnet

4. Search for your account
Paste your newly created address into the search bar.
Caution
Do not press enter! There is a known bug where searching with Enter does not work.
5. View the search results
Wait for the results to appear, then click the top result.
6. Check the transaction
You should see your newly created account and a transaction with the faucet function, funding it with devnet tokens.
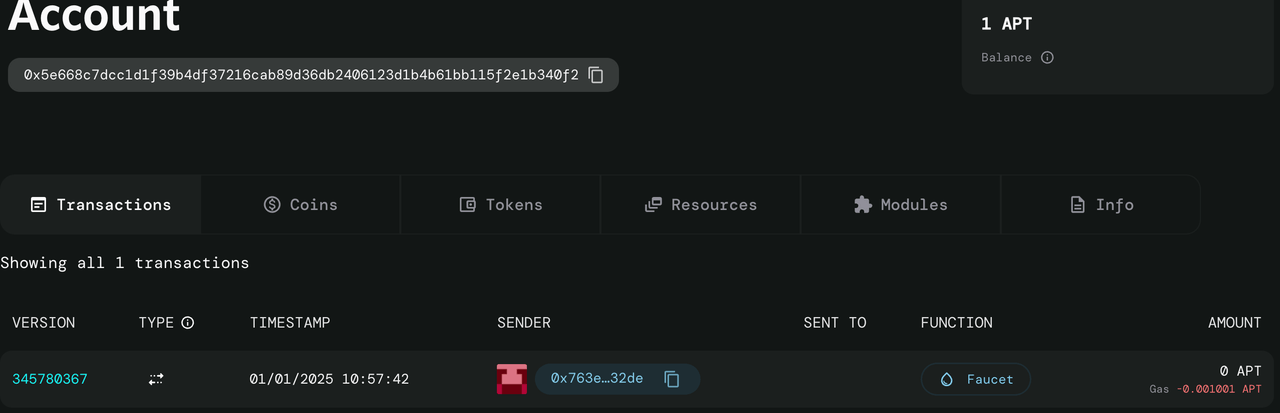
7. Verify your balance
Click the "Coins" tab to see that you have 1 APT of the Aptos Coin. This will allow you to publish and interact with smart contracts on the aptos devnet.
Note
The explorer is an important tool to see the contracts we are deploying, and also offers a way to look up what a contract does. Just search for the address where a contract is deployed and you will be able to see the code for that module.
## 3\. Writing and Compiling Your First Module
[](#3-writing-and-compiling-your-first-module)
Now that we have our environment set up and an account created, let's write and compile our first Move module. Unlike Ethereum where contracts exist independently, Move ties everything to accounts - both modules and their resources. Let's start with a simple example to understand the core concepts.
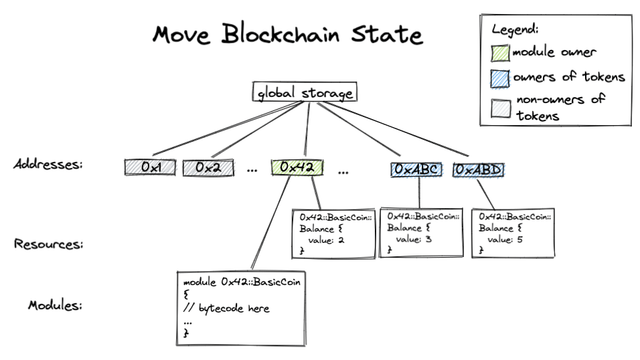
This diagram illustrates the relationship between module ownership, token ownership, and the Move blockchain state. It helps visualize how modules and resources are tied to accounts, emphasizing the unique aspects of Move's design compared to other blockchain platforms.
### What is a Move Module?
[](#what-is-a-move-module)
Move modules are similar to smart contracts in other blockchains, with some key differences:
* **Resources:** Unlike Solidity where state is stored in contract variables, Move uses "resources" - special data types that can only exist in one place at a time and are always tied to an account
* **Module-based**: Rather than deploying entire contracts as independent units like in Solidity, Move code is organized into reusable modules that can share and handle resources across boundaries. Modules are more like standard library packages that can be published together or separately, offering finer-grained control over code organization.
* **Safety by design:** Move's type system and resource semantics help prevent common smart contract vulnerabilities
Note
If you're familiar with Rust, you'll find Move's syntax very similar. If you're coming from Solidity, think of modules as reusable smart contract libraries.
### Your First Move Module
[](#your-first-move-module)
Before we start, go to your VSCode (or Cursor) and install the [Move On Aptos](/build/smart-contracts/move-vscode-extension) VSCode extension.
1. Open VSCode (or Cursor) and navigate to the Extensions tab.
2. Search for `Move On Aptos` published by `aptoslabs` and install the extension.
This extension will help us with the syntax highlighting, auto-completion, and other features that will make our development experience easier.
Our first module will be a simple message storage system that allows accounts to store and retrieve messages. Let's create a new move project within our `my-first-module` folder:
1. Initialize the project
Initialize a new move project with `aptos move init --name my_first_module`
This creates a project structure with a `sources` directory and a `Move.toml` file.
2. Create the module file
Create a new file `sources/message.move` with our module code:
```
module my_first_module::message { use std::string; use std::signer;
struct MessageHolder has key, store, drop { message: string::String, }
public entry fun set_message(account: &signer, message: string::String) acquires MessageHolder { let account_addr = signer::address_of(account);
if (exists(account_addr)) { move_from(account_addr); };
move_to(account, MessageHolder { message }); }
public fun get_message(account_addr: address): string::String acquires MessageHolder { assert!(exists(account_addr), 0); let message_holder = borrow_global(account_addr); message_holder.message }}
```
Let's break down this module:
* We define a `MessageHolder` resource type that can store a string message
* `set_message` allows an account to store a message
* `get_message` allows anyone to retrieve a stored message
* The `acquires` keyword indicates which resources the functions need access to (MessageHolder, in this case)
* `move_to` and `move_from` handle the storage of resources under accounts
Note
Move has some unique characteristics that make it different from other smart contract languages:
1. Resource types are used to represent assets and state that can only exist in one place at a time
2. Ability modifiers like `key`, `store`, and `drop` control how values can be used
3. Explicit acquire annotations tell us which resources a function might access
3. Compile the module
Compile the Move module we just created with `aptos move compile --named-addresses my_first_module=default`
Note
The `--named-addresses` flag maps our module name to our account's address. In Move, modules must be associated with an address at compile time - we're using `'default'` which points to the account we just created.
You should see a message like this if it succeeded:
```
❯ aptos move compile --named-addresses my_first_module=defaultCompiling, may take a little while to download git dependencies...UPDATING GIT DEPENDENCY https://github.com/aptos-labs/aptos-framework.gitINCLUDING DEPENDENCY AptosFrameworkINCLUDING DEPENDENCY AptosStdlibINCLUDING DEPENDENCY MoveStdlibBUILDING my_first_module{ "Result": [ "9ec1cfa30b885a5c9d595f32f3381ec16d208734913b587be9e210f60be9f9ba::message" ]}
```
Great job! We are now ready to test and debug.
## 4\. Testing and Debugging
[](#4-testing-and-debugging)
Testing and debugging are crucial parts of Move module development. Move has built-in support for unit testing and debug printing.
1. Add debug prints
First, let's modify our message module to add some debug prints. Update your `sources/message.move`:
```
module my_first_module::message { use std::string; use std::signer; use std::debug; // Add this for debug prints
struct MessageHolder has key, store, drop { message: string::String, }
public entry fun set_message(account: &signer, message: string::String) acquires MessageHolder { let account_addr = signer::address_of(account); debug::print(&message); // Print the message being set
if (exists(account_addr)) { debug::print(&string::utf8(b"Updating existing message")); // Print debug info move_from(account_addr); } else { debug::print(&string::utf8(b"Creating new message")); // Print when creating new };
move_to(account, MessageHolder { message }); }
public fun get_message(account_addr: address): string::String acquires MessageHolder { assert!(exists(account_addr), 0); let message_holder = borrow_global(account_addr); debug::print(&message_holder.message); // Print the retrieved message message_holder.message }}
```
2. Create test file
Create our tests: a new file `sources/message_tests.move` with:
```
#[test_only] module my_first_module::message_tests { use std::string; use std::signer; use my_first_module::message;
#[test(sender= @my_first_module)] fun test_set_and_get_message(sender: &signer) { // Test setting a message message::set_message(sender, string::utf8(b"Hello World"));
// Verify the message was set correctly let stored_message = message::get_message(signer::address_of(sender)); assert!(stored_message == string::utf8(b"Hello World"), 0) }
#[test(sender=@my_first_module)] fun test_update_message(sender: &signer) { // Test setting a message message::set_message(sender, string::utf8(b"Hello World")); // Test updating the message message::set_message(sender, string::utf8(b"Hello Aptos"));
// Verify the message was updated correctly let stored_message = message::get_message(signer::address_of(sender)); assert!(stored_message == string::utf8(b"Hello Aptos"), 0) } }
```
3. Run the tests
Now run the tests with `aptos move test --named-addresses my_first_module=default`
You should see output if the tests pass: (See below for how to handle errors)
```
INCLUDING DEPENDENCY AptosFramework INCLUDING DEPENDENCY AptosStdlib INCLUDING DEPENDENCY MoveStdlib BUILDING my_first_module Running Move unit tests [debug] "Hello World" [debug] "Creating new message" [debug] "Hello World" [ PASS ] 0x852a264419a80b27771f072b5cae8c8b358d4450e135e134e065247376a4357a::message_tests::test_set_and_get_message [debug] "Hello World" [debug] "Creating new message" [debug] "Hello Aptos" [debug] "Updating existing message" [debug] "Hello Aptos" [ PASS ] 0x852a264419a80b27771f072b5cae8c8b358d4450e135e134e065247376a4357a::message_tests::test_update_message Test result: OK. Total tests: 2; passed: 2; failed: 0 { "Result": "Success" }
```
**If you encounter errors while testing, here are some common issues and solutions:**
* Make sure all module dependencies are properly imported
* Check that your account address matches in the `-named-addresses` parameter
* Verify that test functions have the `#[test]` attribute
* Ensure string literals are properly encoded
Note
### Debugging Tips
[](#debugging-tips)
1. Use `debug::print()` in test functions
2. Debug prints will show up automatically during test execution
3. Remember that debug statements will only work in tests, not in production code. They will have no impact on code performance.
4. To debug module state:
* Print account addresses with `debug::print(&addr)`
* Print string values with `debug::print(&some_string)`
* Print boolean conditions with `debug::print(&some_bool)`
## 5\. Publishing Your Module
[](#5-publishing-your-module)
After successfully compiling and testing your module, you can publish it to the Aptos blockchain. This process deploys your code so that it's accessible on-chain.
1. Publish the module
Publish your module with `aptos move publish --named-addresses my_first_module=default`
You'll see output showing the compilation process and then a prompt asking about gas fees:
```
Compiling, may take a little while to download git dependencies...UPDATING GIT DEPENDENCY https://github.com/aptos-labs/aptos-framework.gitINCLUDING DEPENDENCY AptosFrameworkINCLUDING DEPENDENCY AptosStdlibINCLUDING DEPENDENCY MoveStdlibBUILDING my_first_modulepackage size 1271 bytesDo you want to submit a transaction for a range of [141300 - 211900] Octas at a gas unit price of 100 Octas? [yes/no] >
```
2. Confirm the transaction
Type `y` and press Enter to confirm the transaction.
After confirmation, you'll receive a response showing the transaction details:
```
{ "Result": { "transaction_hash": "0x95fce7344b066abda10c07dbf1ffa83e0d9c7bd400e2b143682a6c8a5f179dc2", "gas_used": 1413, "gas_unit_price": 100, "sender": "9ec1cfa30b885a5c9d595f32f3381ec16d208734913b587be9e210f60be9f9ba", "sequence_number": 0, "success": true, "timestamp_us": 1735351260227638, "version": 273029731, "vm_status": "Executed successfully" }}
```
### (Optional) Seeing Your Contract On-Chain
[](#optional-seeing-your-contract-on-chain)
After successful publication, you can verify your module is on-chain by following these steps:
1. Open the Explorer
Go to the [Aptos Explorer](https://explorer.aptoslabs.com/?network=devnet)
2. Check the transaction
Search for your account address. You should notice that there is a new transaction in your account, the `code::publish_package_txn` function.
3. View your balance
Click the "Coins" tab to see that you now have less than 1 APT of the Aptos Coin.

You have spent a small amount on gas to deploy the contract so should have around `0.99855 APT` remaining.
4. Find your module
Look under the "Modules" tab
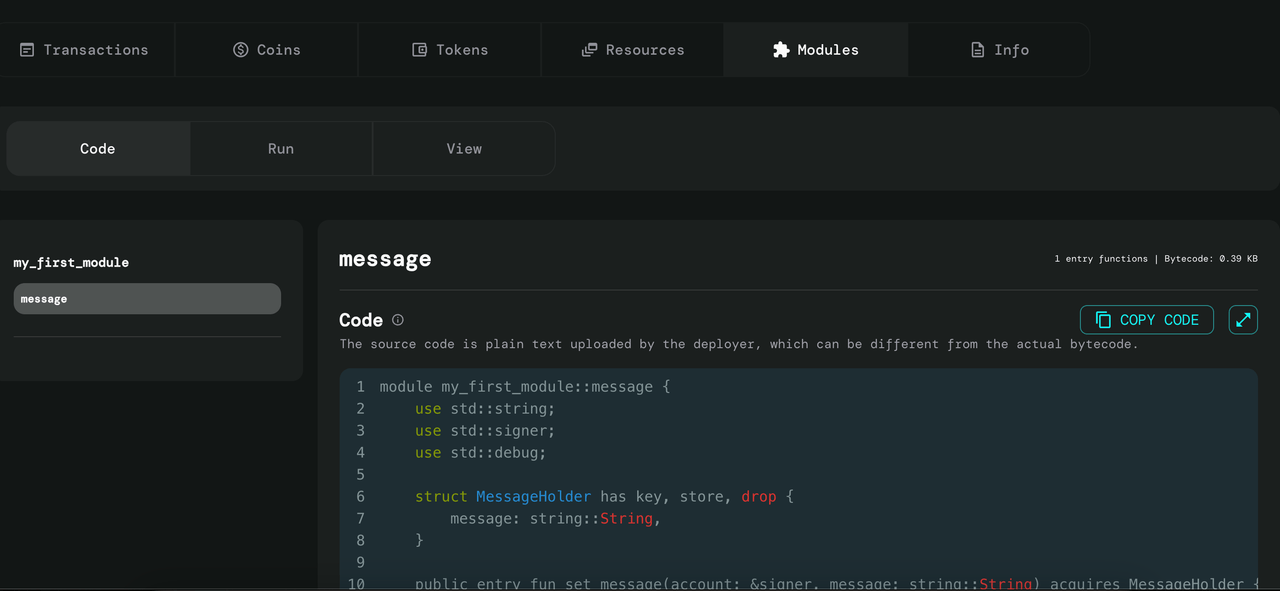
5. Verify the module
You should see your "message" module listed
Note
You can share the explorer link to your module and others can even interact with the module by connecting a wallet.
## 6\. Interacting with Your Module
[](#6-interacting-with-your-module)
Now that your module is published, you can interact with it through the Aptos CLI:
1. Set a message
Set a message using the CLI:
```
aptos move run --function-id 'default::message::set_message' --args 'string:Hello, Aptos!'
```
You'll see a gas fee prompt similar to what you saw during publishing.
2. Confirm the transaction
After confirming with `y`, you should get a success response like:
```
Transaction submitted: https://explorer.aptoslabs.com/txn/0x0c0b1e56a31d037280278327eb8fdfcc469a20213e5e65accf6e7c56af574449?network=devnet{ "Result": { "transaction_hash": "0x0c0b1e56a31d037280278327eb8fdfcc469a20213e5e65accf6e7c56af574449", "gas_used": 445, "gas_unit_price": 100, "sender": "9ec1cfa30b885a5c9d595f32f3381ec16d208734913b587be9e210f60be9f9ba", "sequence_number": 1, "success": true, "timestamp_us": 1735351754495208, "version": 273137362, "vm_status": "Executed successfully" }}
```
3. View your message
View your stored message by checking under Resources on the Explorer.
4. Celebrate!
We did it!
Note
How long did it take you to get through this guide? We want to hear from you!
## Next Steps
[](#next-steps)
Congratulations! You've successfully:
1. Compiled your first Move module
2. Added tests to help debug
3. Published your module on-chain
4. Used your contract through the CLI
Now your published Move module can be connected to just like an API via one of our [many Official SDKs](/build/sdks)!
Here are some **suggested next steps to get a deeper understanding of Move modules**:
1. Try modifying the module to add a new feature. You can use the [Move Book](https://aptos-labs.github.io/move-book/) to build your understanding of writing Move modules.
2. To understand how Move works on-chain, you can learn about Move's [resource system](/network/blockchain/resources).
3. If you're building an application to interact with contracts or look up data from on-chain, learn how to use the SDKs [here](/build/sdks).
4. Join the [Aptos Discord](https://discord.gg/aptoslabs) to connect with other developers.
## Supporting documentation
[](#supporting-documentation)
* [Account basics](/network/blockchain/accounts)
* [TypeScript SDK](/build/sdks/ts-sdk)
* [Python SDK](/build/sdks/python-sdk)
* [REST API specification](/rest-api)
# Accounts
> Understand Aptos accounts, their addresses, authentication schemes, key rotation, sequence numbers, and how they control assets and resources on-chain.
An account on Aptos controls a set of on-chain assets, including tokens and NFTs. These assets are represented by a Move language primitive called a **resource**, which enforces both access control and scarcity.
Each account is identified by a 32-byte address. You can use the [Aptos Name Service](https://www.aptosnames.com/) to register human-readable `.apt` domains for key accounts.
Unlike blockchains where accounts are implicit (just an address with a balance), Aptos accounts are explicit and backed by on-chain resources that enable features like key rotation and native multisig. However, with [Stateless Accounts (AIP-115)](/build/aips/aip-115), you no longer need to set up an account before using it. Any valid address is treated as an account by default, and you can send transactions as long as you hold the private key. The on-chain `Account` resource is created automatically only when first needed (for example, when rotating keys). See [Creating an account](#creating-an-account) for how addresses are derived.
Aptos accounts offer features not available on most other networks:
* **Key rotation.** The account's authentication key can be changed to use a different private key, similar to changing a password.
* **Native multisig.** Accounts support k-of-n multisig using Ed25519 and Secp256k1 ECDSA signature schemes.
There are three types of accounts on Aptos:
* _Standard account_ - This is a typical account corresponding to an address with a corresponding pair of public/private keys.
* [_Resource account_](/build/smart-contracts/resource-accounts) - An autonomous account without a corresponding private key used by developers to store resources or publish modules on-chain.
* [_Object_](/build/smart-contracts/objects) - A complex set of resources stored within a single address representing a single entity.
Note
Account addresses are 32-bytes. They are usually shown as 64 hex characters, with each hex character a nibble. Sometimes the address is prefixed with a 0x. See the [Your First Transaction](/build/guides/first-transaction) for an example of how an address appears, reproduced below:
```
Alice: 0xeeff357ea5c1a4e7bc11b2b17ff2dc2dcca69750bfef1e1ebcaccf8c8018175bBob: 0x19aadeca9388e009d136245b9a67423f3eee242b03142849eb4f81a4a409e59c
```
## Account address
[](#account-address)
Currently, Aptos supports only a single, unified identifier for an account. Accounts on Aptos are universally represented as a 32-byte hex string. A hex string shorter than 32-bytes is also valid; in those scenarios, the hex string can be padded with leading zeroes, e.g., `0x1` => `0x0000000000000...01`. While Aptos standards indicate leading zeroes may be removed from an Address, most applications attempt to eschew that legacy behavior and only support the removal of zeros for special addresses ranging from `0x0` to `0xa`.
## Creating an account
[](#creating-an-account)
When a user requests to create an account, for example, by using the [Aptos SDK](/build/sdks/ts-sdk/account), the following steps are executed:
* Select the authentication scheme for managing the user's account, e.g., Ed25519 or Secp256k1 ECDSA.
* Generate a new private key, public key pair.
* Combine the public key with the public key's authentication scheme to generate a 32-byte authentication key and the account address.
The user should use the private key for signing the transactions associated with this account.
Note
With [Stateless Accounts (AIP-115)](/build/aips/aip-115), you no longer need to create an account on-chain before sending transactions. For example, a new user can submit a [sponsored transaction](/build/guides/sponsored-transactions) from a freshly generated address without first funding the account or registering it on-chain. The steps above still apply for deriving your address from a key pair.
## Account sequence number
[](#account-sequence-number)
The sequence number for an account indicates the number of transactions that have been submitted and committed on-chain from that account. Committed transactions either execute with the resulting state changes committed to the blockchain or abort wherein state changes are discarded and only the transaction is stored.
Every transaction submitted must contain a unique sequence number for the given sender's account. When the Aptos blockchain processes the transaction, it looks at the sequence number in the transaction and compares it with the sequence number in the on-chain account. The transaction is processed only if the sequence number is equal to or larger than the current sequence number. Transactions are only forwarded to other mempools or executed if there is a contiguous series of transactions from the current sequence number. Execution rejects out of order sequence numbers, preventing replay attacks of older transactions and guarantees ordering of future transactions.
Note
Multi-agent transactions (transactions involving multiple signing accounts) only increase the sequence number of the primary signer (sender) account. The sequence number of the secondary signers (receivers) is not increased.
Aptos also supports [orderless transactions](/build/guides/orderless-transactions) which use a unique nonce instead of a sequence number. This enables parallel transaction submission from multiple machines without coordinating sequence numbers. See [AIP-123](https://github.com/aptos-foundation/AIPs/blob/main/aips/aip-123-orderless-transactions.md) for the full specification.
## Authentication key
[](#authentication-key)
The initial account address is set to the authentication key derived during account creation. However, the authentication key may subsequently change, for example, when you generate a new public-private key pair, public keys to rotate the keys. An account address never changes.
The Aptos blockchain supports the following authentication schemes:
1. [Ed25519](https://ed25519.cr.yp.to/)
2. [Secp256k1 ECDSA](https://github.com/aptos-foundation/AIPs/blob/main/aips/aip-49.md)
3. [K-of-N multi-signatures](https://github.com/aptos-foundation/AIPs/blob/main/aips/aip-55.md)
4. A dedicated, now legacy, MultiEd25519 scheme
Note
The Aptos blockchain defaults to Ed25519 signature transactions.
### Ed25519 authentication
[](#ed25519-authentication)
To generate an authentication key and the account address for an Ed25519 signature:
1. **Generate a key-pair**: Generate a fresh key-pair (`privkey_A`, `pubkey_A`). The Aptos blockchain uses the PureEdDSA scheme over the Ed25519 curve, as defined in RFC 8032.
2. **Derive a 32-byte authentication key**: Derive a 32-byte authentication key from the `pubkey_A`:
```
auth_key = sha3-256(pubkey_A | 0x00)
```
where `|` denotes concatenation. The `0x00` is the 1-byte single-signature scheme identifier.
3. Use this initial authentication key as the permanent account address.
### MultiEd25519 authentication
[](#multied25519-authentication)
With K-of-N multisig authentication, there are a total of N signers for the account, and at least K of those N signatures must be used to authenticate a transaction.
To generate a K-of-N multisig account's authentication key and the account address:
1. **Generate key-pairs**: Generate `N` ed25519 public keys `p_1`, ..., `p_n`.
2. Decide on the value of `K`, the threshold number of signatures needed for authenticating the transaction.
3. **Derive a 32-byte authentication key**: Compute the authentication key as described below:
```
auth_key = sha3-256(p_1 | . . . | p_n | K | 0x01)
```
The `0x01` is the 1-byte multisig scheme identifier.
4. Use this initial authentication key as the permanent account address.
### Generalized authentication
[](#generalized-authentication)
Generalized authentication supports both Ed25519 and Secp256k1 ECDSA. Like the previous authentication schemes, these schemes contain a scheme value, `0x02` and `0x03` for single and multikey respectively, but also each key contains a prefix value to indicate its key type:
| Key type | Prefix byte | | --------------------------------- | ----------- | | Ed25519 generalized scheme | `0x00` | | Secp256k1Ecdsa generalized scheme | `0x01` | | Secp256r1Ecdsa WebAuthn scheme | `0x02` | | Keyless | `0x03` |
For a single key Secp256k1 ECDSA account, using public key `pubkey`, the authentication key would be derived as follows:
```
auth_key = sha3-256(0x01 | pubkey | 0x02)
```
Where
* the first entry, `0x01`, represents the use of a Secp256k1 ECDSA key;
* the last entry, `0x02`, represents the authentication scheme.
For a 1-of-2 multi-key account containing, a single Secp256k1 ECDSA public key, `pubkey_0`, and a single Ed25519 public key, `pubkey_1`, where one signature suffices, the authentication key would be derived as follows:
```
auth_key = sha3-256(0x02 | 0x01 | pubkey_0 | 0x00 | pubkey_1 | 0x01 | 0x03)
```
Where
* the first entry, `0x02`, represents the total number of keys as a single byte;
* the second-to-last entry, `0x01`, represents the required number of signatures as a single byte;
* the last entry, `0x03`, represents the authentication scheme.
## Rotating the keys
[](#rotating-the-keys)
An Account on Aptos can rotate keys so that potentially compromised keys cannot be used to access the accounts. Keys can be rotated via the `account::rotate_authentication_key` function.
Refreshing the keys is generally regarded as good hygiene in the security field. However, this presents a challenge for system integrators who are used to using a mnemonic to represent both a private key and its associated account. To simplify this for the system integrators, Aptos provides an on-chain mapping via aptos account lookup-address. The on-chain data maps an effective account address as defined by the current mnemonic to the actual account address.
For more information, see [`account.move`](https://github.com/aptos-labs/aptos-core/blob/a676c1494e246c31c5e96d3363d99e2422e30f49/aptos-move/framework/aptos-framework/sources/account.move#L274).
## State of an account
[](#state-of-an-account)
The state of each account comprises both the code (Move modules) and the data (Move resources). An account may contain an arbitrary number of Move modules and Move resources:
* **Move modules**: Move modules contain code, for example, type and procedure declarations; but they do not contain data. A Move module encodes the rules for updating the Aptos blockchain's global state.
* **Move resources**: Move resources contain data but no code. Every resource value has a type declared in a module published on the Aptos blockchain.
## Access control with signers
[](#access-control-with-signers)
The sender of a transaction is represented by a signer. When a function in a Move module takes `signer` as an argument, the Aptos Move VM translates the identity of the account that signed the transaction into a signer in a Move module entry point. See the below Move example code with `signer` in the `initialize` and `withdraw` functions. When a `signer` is not specified in a function, for example, the below `deposit` function, then no signer-based access controls will be provided for this function:
```
module Test::Coin { struct Coin has key { amount: u64 }
public fun initialize(account: &signer) { move_to(account, Coin { amount: 1000 }); }
public fun withdraw(account: &signer, amount: u64): Coin acquires Coin { let balance = &mut borrow_global_mut(Signer::address_of(account)).amount; *balance = *balance - amount; Coin { amount } }
public fun deposit(account: address, coin: Coin) acquires Coin { let balance = &mut borrow_global_mut(account).amount; *balance = *balance + coin.amount; Coin { amount: _ } = coin; }}
```
# Transactions and States
> Understand how transactions modify the blockchain state on Aptos, including transaction types, execution states, and the versioned database model.
The Aptos blockchain stores three types of data:
* **Transactions**: Transactions represent an intended operation being performed by an account on the blockchain (e.g., transferring assets).
* **States**: The (blockchain ledger) state represents the accumulation of the output of execution of transactions, the values stored within all [resources](/network/blockchain/resources).
* [**Events**](/network/blockchain/events): Ancillary data published by the execution of a transaction.
Note
Only transactions can change the ledger state.
## Transactions
[](#transactions)
Aptos transactions contain information such as the sender’s account address, authentication from the sender, the desired operation to be performed on the Aptos blockchain, and the amount of gas the sender is willing to pay to execute the transaction.
### Transaction states
[](#transaction-states)
A transaction may end in one of the following states:
* Committed on the blockchain and executed. This is considered as a successful transaction.
* Committed on the blockchain and aborted. The abort code indicates why the transaction failed to execute.
* Discarded during transaction submission due to a validation check such as insufficient gas, invalid transaction format, or incorrect key.
* Discarded after transaction submission but before attempted execution. This could be caused by timeouts or insufficient gas due to other transactions affecting the account.
The sender’s account will be charged gas for any committed transactions.
During transaction submission, the submitter is notified of successful submission or a reason for failing validations otherwise.
A transaction that is successfully submitted but ultimately discarded may have no visible state in any accessible Aptos node or within the Aptos network. A user can attempt to resubmit the same transaction to re-validate the transaction. If the submitting node believes that this transaction is still valid, it will return an error stating that an identical transaction has been submitted.
The submitter can try to increase the gas cost by a trivial amount to help make progress and adjust for whatever may have been causing the discarding of the transaction further downstream.
Note
See [Aptos Blockchain Deep Dive](/network/blockchain/blockchain-deep-dive) for a comprehensive description of the Aptos transaction lifecycle.
### Contents of a Transaction
[](#contents-of-a-transaction)
A signed transaction on the blockchain contains the following information:
* **Signature**: The sender uses a digital signature to verify that they signed the transaction (i.e., authentication).
* **Sender address**: The sender's [account address](/network/blockchain/accounts#account-address).
* **Sender public key**: The public authentication key that corresponds to the private authentication key used to sign the transaction.
* **Payload**: Indicates an action or set of actions Alice's behalf. In the case this is a Move function, it directly calls into Move bytecode on the chain. Alternatively, it may be Move bytecode peer-to-peer [transaction script](/network/glossary#transaction-script). It also contains a list of inputs to the function or script. For this example, it is a function call to transfer an amount of Aptos Coins from Alice account to Bob's account, where Alice's account is implied by sending the transaction and Bob's account and the amount are specified as transaction inputs.
* [**Gas unit price**](/network/glossary#gas-unit-price): The amount the sender is willing to pay per unit of gas, to execute the transaction. This is represented in [Octas](/network/glossary#octa).
* [**Maximum gas amount**](/network/glossary#maximum-gas-amount): The [maximum gas amount](/network/blockchain/gas-txn-fee#specifying-gas-fees-within-a-transaction) in APT the sender is willing to pay for this transaction. Gas charges are equal to the base gas cost covered by computation and IO multiplied by the gas price. Gas costs also include storage with an APT-fixed priced storage model. This is represented as [Octas](/network/glossary#octa).
* **Gas price** (in specified gas units): This is the amount the sender is willing to pay per unit of [gas](/network/blockchain/gas-txn-fee) to execute the transaction. [Gas](/network/blockchain/gas-txn-fee) is a way to pay for computation and storage. A gas unit is an abstract measurement of computation with no inherent real-world value.
* **Sequence number**: This is an unsigned integer that must be equal to the sender's account [sequence number](/network/blockchain/accounts#account-sequence-number) at the time of execution.
* **Expiration time**: A timestamp after which the transaction ceases to be valid (i.e., expires).
### Types of transaction payloads
[](#types-of-transaction-payloads)
Within a given transaction, the two most common types of payloads include:
* An entry point
* [A script (payload)](/build/smart-contracts/scripts)
Currently, the SDKs [Python](/build/sdks/python-sdk) and [Typescript](/build/sdks/ts-sdk) support both. This guide points out many of those entry points, such as `coin::transfer` and `aptos_account::create_account`.
All operations on the Aptos blockchain should be available via entry point calls. While one could submit multiple transactions calling entry points in series, many such operations may benefit from being called atomically from a single transaction. A script payload transaction can call any entry point or public function defined within any module.
Note
See the tutorial on [Your First Transaction](/build/guides/first-transaction) for generating valid transactions.
Tip
See [Transaction Payloads and BCS](/network/blockchain/transaction-payloads) for the entry function, script, multisig, versioned, and encrypted payload formats and their BCS layouts.
Note
The Aptos REST API supports generating BCS-encoded transactions from JSON. This is useful for rapid prototyping, but be cautious using it in Mainnet as this places a lot of trust on the fullnode generating the transaction.
Tip
See also: [Encrypted Pending Transactions](/build/guides/encrypted-pending-transactions) — submit a transaction whose Move payload stays encrypted while pending, on networks that support the feature (AIP-144).
## States
[](#states)
The Aptos blockchain's ledger state, or global state, represents the state of all accounts in the Aptos blockchain. Each validator node in the blockchain must know the latest version of the global state to execute any transaction.
Anyone can submit a transaction to the Aptos blockchain to modify the ledger state. Upon execution of a transaction, a transaction output is generated. A transaction output contains zero or more operations to manipulate the ledger state called **write sets** emitting a vector of resulting events, the amount of gas consumed, and the executed transaction status.
### Proofs
[](#proofs)
The Aptos blockchain uses proof to verify the authenticity and correctness of the blockchain data.
Data within the Aptos blockchain is replicated across the network. Each validator and fullnode's [storage](/network/blockchain/validator-nodes#storage) is responsible for persisting the agreed upon blocks of transactions and their execution results to the database.
The blockchain is represented as an ever-growing [Merkle tree](/network/glossary#merkle-trees), where each leaf appended to the tree represents a single transaction executed by the blockchain.
All operations executed by the blockchain and all account states can be verified cryptographically. These cryptographic proofs ensure that:
* The validator nodes agree on the state.
* The client does not need to trust the entity from which it is receiving data. For example, if a client fetches the last **n** transactions from an account, a proof can attest that no transactions were added, omitted or modified in the response. The client may also query for the state of an account, ask whether a specific transaction was processed, and so on.
### Versioned database
[](#versioned-database)
The ledger state is versioned using an unsigned 64-bit integer corresponding to the number of transactions the system has executed. This versioned database allows the validator nodes to:
* Execute a transaction against the ledger state at the latest version.
* Respond to client queries about ledger history at both current and previous versions.
## Transactions change ledger state
[](#transactions-change-ledger-state)
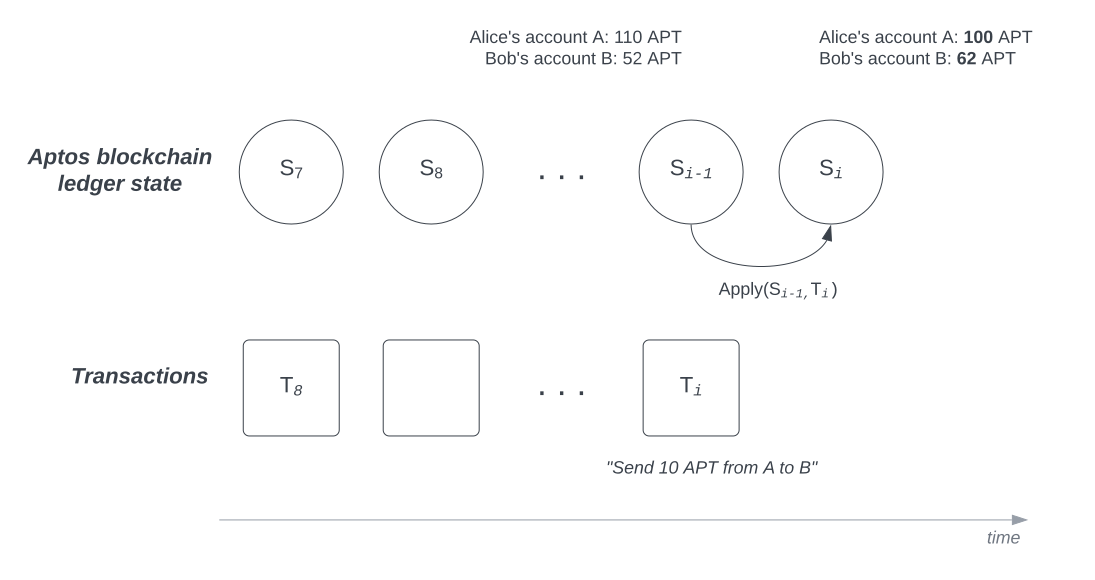 
The above figure shows how executing transaction T_i_ changes the state of the Aptos blockchain from S_i-1_ to S_i_.
In the figure:
* Accounts **A** and **B**: Represent Alice's and Bob's accounts on the Aptos blockchain.
* **S_i-1_** : Represents the (_i-1_)-the state of the blockchain. In this state, Alice's account **A** has a balance of 110 APT (Aptos coins), and Bob's account **B** has a balance of 52 APT.
* **T_i_** : This is the _i_\-th transaction executed on the blockchain. In this example, it represents Alice sending 10 APT to Bob.
* **Apply()**: This is a deterministic function that always returns the same final state for a specific initial state and a specific transaction. If the current state of the blockchain is **S_i-1_**, and transaction **T_i_** is executed on the state **S_i-1_**, then the new state of the blockchain is always **S_i_**. The Aptos blockchain uses the [Move language](https://aptos-labs.github.io/move-book/) to implement the deterministic execution function **Apply()**.
* **S_i_** : This is the _i_\-the state of the blockchain. When the transaction **T_i_** is applied to the blockchain, it generates the new state **S_i_** (an outcome of applying **Apply(S_i-1_, T_i_)** to **S_i-1_** and **T_i_**). This causes Alice’s account balance to be reduced by 10 to 100 APT and Bob’s account balance to be increased by 10 to 62 APT. The new state **S_i_** shows these updated balances.
## Size limits
[](#size-limits)
As part of the gas schedule, there are on-chain configurable limits for the sizes of [the transaction itself](https://github.com/aptos-labs/aptos-core/blob/8074588b5c9c4424fa247c2c9ec5572981ee31cd/aptos-move/aptos-gas-schedule/src/gas_schedule/transaction.rs#L71-L81) and [its outputs](https://github.com/aptos-labs/aptos-core/blob/8074588b5c9c4424fa247c2c9ec5572981ee31cd/aptos-move/aptos-gas-schedule/src/gas_schedule/transaction.rs#L152-L177).
| Limit Type | Current Per Transaction Limit | | ---------------------- | ----------------------------- | | transaction | 64KB | | governance transaction | 1MB | | a single write op | 1MB | | all write ops combined | 10MB | | number of write ops | 8192 | | a single event | 1MB | | all events combined | 10MB |
# SDKs Overview
> Comprehensive software development kits for building on Aptos blockchain in TypeScript, Python, Go, Rust, C#, C++, Unity and more languages
## Official SDKs
[](#official-sdks)
Use these Aptos software development kits (SDKs), in combination with the [Aptos CLI](/build/cli) for your development on the Aptos blockchain.
[Typescript SDK](/build/sdks/ts-sdk) Aptos Typescript SDK (recommended)
[Python SDK](/build/sdks/python-sdk) Aptos Python SDK
[Go SDK](/build/sdks/go-sdk) Aptos Go SDK
[C#/.NET SDK](/build/sdks/dotnet-sdk) Aptos .NET SDK
[Rust SDK](/build/sdks/rust-sdk) Aptos Rust SDK
[C++ / Unreal SDK](/build/sdks/cpp-sdk) Aptos C++ / Unreal SDK
[Unity SDK](/build/sdks/unity-sdk) Aptos Unity SDK
[Wallet Adapter](/build/sdks/wallet-adapter) Aptos Wallet Adapter
[Forklift](/build/sdks/forklift) Testing & scripting framework for Move contracts with Network Forking support
## [Community SDKs](/build/sdks/community-sdks)
[](#community-sdks)
SDKs provided by the community for Aptos. These may not be fully vetted by the Aptos team, and may still be in development. They are still provided as a resource for all developers.
[Kotlin SDK](/build/sdks/community-sdks/kotlin-sdk) Aptos Kotlin Multiplatform SDK by Kaptos
[Swift SDK](/build/sdks/community-sdks/swift-sdk) Aptos Swift SDK by Alcove
# Aptos APIs
> Access the Aptos blockchain through various APIs including REST API, GraphQL, and specialized endpoints for different use cases
The Aptos Blockchain network can be accessed by several APIs, depending on your use-case.
## Aptos Fullnode
[](#aptos-fullnode)
This API - embedded into Fullnodes - provides a simple, low latency, yet low-level way of _reading_ state and _submitting_ transactions to the Aptos Blockchain. It also supports transaction simulation.
[Aptos Fullnode REST API (Mainnet)](/build/apis/fullnode-rest-api?network=mainnet) Mainnet API playground for Aptos Fullnode REST API
[Aptos Fullnode REST API (Testnet)](/build/apis/fullnode-rest-api?network=testnet) Testnet API playground for Aptos Fullnode REST API
[Aptos Fullnode REST API (Devnet)](/build/apis/fullnode-rest-api?network=devnet) Devnet API playground for Aptos Fullnode REST API
## Indexer
[](#indexer)
[Indexer GraphQL API](/build/indexer) This GraphQL API offers a high-level, opinionated GraphQL interface to read state from the Aptos Blockchain. It's ideal for interacting with NFTs, Aptos Objects, or custom Move contracts. Learn more about the Indexer-powered GraphQL API here.
[Transaction Stream API](/build/indexer/txn-stream) This GRPC API streams historical and real-time transaction data to an indexing processor. It's used by Aptos Core Indexing and can also support custom app-specific indexing processors for real-time blockchain data processing. Learn more here.
## Faucet (Only Testnet/Devnet)
[](#faucet-only-testnetdevnet)
[Faucet API](/build/apis/faucet-api) This API provides the ability to receive test tokens on devnet. Its primary purpose is the development and testing of applications and Move contracts before deploying them to mainnet. On testnet you can mint at the mint page.
The code of each of the above-mentioned APIs is open-sourced on [GitHub](https://github.com/aptos-labs/aptos-core). As such anyone can operate these APIs and many independent operators and builders worldwide choose to do so.
### Aptos Labs operated API Deployments
[](#aptos-labs-operated-api-deployments)
[Aptos Labs](https://aptoslabs.com) operates a deployment of these APIs on behalf of [Aptos Foundation](https://aptosnetwork.com/foundation) for each [Aptos Network](/network/nodes/networks) and makes them available for public consumption.
These APIs allow for limited access on a per-IP basis without an API key (anonymous access). To get much higher rate limits you can sign up for an [Geomi](https://geomi.dev/) account.
# Exchange Integration Guide
> Comprehensive guide for integrating Aptos and its assets into cryptocurrency exchanges with balance tracking and testing.
This describes how to integrate Aptos and Aptos assets into an exchange. It provides generic information for tracking balances, transferring assets, and testing the integration.
## Overview
[](#overview)
This document will guide you through the following tasks to integrate with Aptos:
* Infrastructure
* Address standards
* Asset standards
* Retrieving balances
* Tracking balance changes
* Transferring assets
* Testing the integration
## Infrastructure
[](#infrastructure)
It's suggested that you run your own [full node](/network/nodes/full-node) to interact with the Aptos blockchain. This will allow you to query the blockchain for the latest state and submit transactions. You can also use the [Indexer](/build/indexer) to query for on-chain data efficiently.
## Address Standards
[](#address-standards)
### Addresses
[](#addresses)
A single address can be represented in three ways. We recommend you show all leading zeros, and the `0x`. Here is an example of all three representations for the framework address `0x1`:
* `0x00000000000000000000000000000001` - A full representation of 32-bytes in hex with a leading `0x`. This is preferred.
* `0x1` - The short representation of the address with a leading `0x`. This is kept around for compatibility, but preferred with all leading 0s.
* `00000000000000000000000000000001` - A full representation of 32-bytes in hex without a leading `0x`. This is kept around for compatibility, but preferred with leading 0x.
For example SDKs will handle this parsing automatically, and we suggest you use the SDKs directly to handle it for you.
```
import { AccountAddress } from "@aptos-labs/ts-sdk";const address = AccountAddress.from("0x1");address.toStringLong(); // 0x00000000000000000000000000000001
```
There is additionally, Aptos Name Service (ANS) for friendly .apt names. For more information about addresses and Aptos Names, see our page on [Accounts](/network/blockchain/accounts).
## Account Standards
[](#account-standards)
Accounts must exist prior to sending a transaction to the blockchain. This is done by creating an account resource, which can be created by simply calling `0x1::aptos_account::transfer` with a zero amount to the account you want to create. Optionally, `0x1::aptos_account::create_account` can be used to create an account with a zero balance.
```
import { Aptos, Ed25519Account, Ed25519PrivateKey } from "@aptos-labs/ts-sdk";
const aptos = new Aptos();const account = new Ed25519Account({privateKey: new Ed25519PrivateKey("private key")})const transaction = await aptos.transferCoinTransaction({sender: account.accountAddress, recipient: "receiver address", amount: 100000000})const pendingTransaction = await aptos.transaction.signAndSubmitTransaction({signer: account, transaction})const committedTransaction = await aptos.waitForTransaction({transactionHash: pendingTransaction.hash});
```
## Asset Standards
[](#asset-standards)
Aptos provides two standards for fungible tokens, similar to ERC-20 tokens on Ethereum:
* An earlier [Coin standard](/build/smart-contracts/aptos-coin) used by assets on Aptos.
* A newer [Fungible Asset Standard](/build/smart-contracts/fungible-asset) which is more featured.
Additionally, there is a migratory period for assets from Coin to Fungible Asset standards. We will call this from now on **migrated coins**. Migrated coins may have two forms, but either can be used interchangeably with Coin standards. This is important to note when querying balances, to use coin functions and not fungible asset functions. The FA standard can only deal with the FA form.
Note
APT, the native token of Aptos, is a migrated coin. This means it can be used with both the Coin and Fungible Asset standards.
### Coin Standard (tl;dr)
[](#coin-standard-tldr)
A **coin** has an associated contract that holds the on-chain struct that represents the coin. The coin is represented as a struct name e.g. `0x1::aptos_coin::AptosCoin` for `APT`.
All coins are stored in an account resource called `0x1::coin::CoinStore`. Coins must be registered prior to using the `CoinStore`, but if using the proper functions e.g. `0x1::aptos_account::transfer` or `0x1::aptos_account::transfer_coins`, this will be done automatically.
Coins can be _migrated_ to a fungible asset. In order to support a migrated asset, continue calling the coin functions as will be mentioned later.
More info can be found at: [Coin Standard](/build/smart-contracts/aptos-coin)
### Fungible Asset Standard (tl;dr)
[](#fungible-asset-standard-tldr)
A **fungible asset** has an associated metadata address that holds the metadata for the fungible asset. This is commonly called the fa metadata address. The asset is represented as an address e.g. `0xA` for `APT`.
All fungible assets are stored in an `object`, which is called a `fungible asset store`.
For exchanges, the most important store is `primary_fungible_store`, which is the default store for fungible assets. This is directly connected to an owner. From this point on in this guide, we will only talk about supporting `primary_fungible_store` for fungible assets.
More info can be found at: [Fungible Asset Standard](/build/smart-contracts/fungible-asset)
## Retrieving Balances
[](#retrieving-balances)
Retrieving current balances for assets are different for each standard. Integration is considered complete when it can handle both.
Balances are always returned in their subunits. For example, `APT` is returned in `octas` (1e-8 APT). So, when an API returns a balance of `100000000`, this is `1 APT`. If it returns `100`, this is `0.000001 APT`.
### Coin (and migrated coins) Balances
[](#coin-and-migrated-coins-balances)
Note
Note: This includes APT and any other coin that was migrated to a fungible asset. If the asset is a migrated coin, use this over fungible asset balance. The fungible asset balance will not include the coin portion of the balance.
To retrieve the balance of a coin, or a coin that was migrated to a fungible asset, you can use the `0x1::coin::balance(account address)` view function. This will combine the coin and coin migrated to fungible asset balances.
```
import { Aptos, AptosConfig, Network } from "@aptos-labs/ts-sdk";
const config = new AptosConfig({ network: Network.DEVNET });const aptos = new Aptos(config);
const coinType = "0x1::aptos_coin::AptosCoin";const account = "0x00000000000000000000000000000001";const [balanceStr] = await aptos.view<[string]>({ payload: { function: "0x1::coin::balance", typeArguments: [coinType], functionArguments: [account] }});const balance = parseInt(balanceStr, 10);
```
A specific ledger version (transaction height) can be provided to get the balance at that point in time. The below example shows for ledger version `1,000,000`.
```
import { Aptos, AptosConfig, Network } from "@aptos-labs/ts-sdk";
const config = new AptosConfig({ network: Network.DEVNET });const aptos = new Aptos(config);
const coinType = "0x1::aptos_coin::AptosCoin";const account = "0x00000000000000000000000000000001";const [balanceStr] = await aptos.view<[string]>({ payload: { function: "0x1::coin::balance", typeArguments: [coinType], functionArguments: [account], options: { ledgerVersion: 1_000_000 } }});const balance = parseInt(balanceStr, 10);
```
### Fungible Asset Balances
[](#fungible-asset-balances)
To retrieve the balance of a fungible asset, you can use the `0x1::primary_fungible_store::balance<0x1::object::ObjectCore>(account address, fungible asset metadata address)` view function. Note, that this will not include the balance of coins if it's a migrated coin.
```
import { Aptos, AptosConfig, Network } from "@aptos-labs/ts-sdk";
const config = new AptosConfig({ network: Network.DEVNET });const aptos = new Aptos(config);
const faMetadataAddress = "0xA";const account = "0x00000000000000000000000000000001";const [balanceStr] = await aptos.view<[string]>({ payload: { function: "0x1::primary_fungible_store::balance", typeArguments: ["0x1::object::ObjectCore"], functionArguments: [account, faMetadataAddress] }});const balance = parseInt(balanceStr, 10);
```
A specific ledger version (transaction height) can be provided to get the balance at that point in time. The below example shows for ledger version `1,000,000`.
```
import { Aptos, AptosConfig, Network } from "@aptos-labs/ts-sdk";
const config = new AptosConfig({ network: Network.DEVNET });const aptos = new Aptos(config);
const faMetadataAddress = "0xA";const account = "0x00000000000000000000000000000001";const [balanceStr] = await aptos.view<[string]>({ payload: { function: "0x1::primary_fungible_store::balance", typeArguments: ["0x1::object::ObjectCore"], functionArguments: [account, faMetadataAddress] }, options: { ledgerVersion: 1_000_000 }});const balance = parseInt(balanceStr, 10);
```
Besides SDK, you can also directly use aptos node's [balance API endpoint](/build/apis/fullnode-rest-api#tag/accounts/GET/accounts/%7Baddress%7D/balance/%7Basset_type%7D) to get the balance of a migrated coin or fungible asset.
## Tracking Balance Changes
[](#tracking-balance-changes)
Balance changes can be queried in one of two ways:
1. By watching for events that change the balance for each transaction.
2. By querying the indexer for indexed balance change events.
In the past, it was able to use the `events` endpoint for an account to get the transactions that changed the balance. This is still possible, but will be deprecated in the future, and is not recommended for new integrations.
### Coin Balance Changes
[](#coin-balance-changes)
Coin balances are tracked as two items, write set changes, and events. Write set changes are end state of the coin balance, and events are the events that are emitted when a coin is withdrawn or deposited.
Here is an [example of a coin transfer](https://explorer.aptoslabs.com/txn/1747361321?network=mainnet). The coin transfer can be tracked as an individual transaction [here](https://fullnode.mainnet.aptoslabs.com/v1/transactions/by_version/1747361321) from the REST API.
We'll break it down into a few parts:
1. The general transaction details tell information about the transaction. The most important thing here is the transaction version is `1747361321`. This gives us total order of all transactions on the blockchain. Think of it like block height, but for transactions.
Transaction Details
```
{ "version": "1747361321", "hash": "0x7c56ad56c7d02bb11887e535b9f1b221626d5b0d4cb5a1ffbadc358c1db515ea", "state_change_hash": "0xc901b5e9e0965201e8205977720d7dea8a3709ee0d818fd5ec752cac13eaf18a", "event_root_hash": "0x0077cb7df9db9ee7194c489db177fe9a325bcf3f1309ea99ed934085e5592041", "state_checkpoint_hash": null, "gas_used": "999", "success": true, "vm_status": "Executed successfully", "accumulator_root_hash": "0xb531e918441ff0a37b49856e0f1b80c329146461582287cf9788964d25e31a68",}
```
2. The Write set `changes` are the end state of the transaction. It shows all resources that were modified by the transaction, and what it's final state was.
In this case, we only care about coin store changes.
Coin Store Changes
```
"changes": [ { "address": "0x559d4f690c683fca7c539237aa8dc4c6ec09886b7016bf66f2cdeffef55468f0", "state_key_hash": "0xb2bfa7198457291a0e582b912be2bf8577feff08e352c9f16935a55ebd202dcc", "data": { "type": "0x1::coin::CoinStore<0x1::aptos_coin::AptosCoin>", "data": { "coin": { "value": "903837250" }, "deposit_events": { "counter": "10", "guid": { "id": { "addr": "0x559d4f690c683fca7c539237aa8dc4c6ec09886b7016bf66f2cdeffef55468f0", "creation_num": "2" } } }, "frozen": false, "withdraw_events": { "counter": "52485", "guid": { "id": { "addr": "0x559d4f690c683fca7c539237aa8dc4c6ec09886b7016bf66f2cdeffef55468f0", "creation_num": "3" } } } } }, "type": "write_resource" }, { "address": "0x5d6233bb8d7f8bd714af196339e9fb3104c9d66f38867b2a0585c4f7b9d04d28", "state_key_hash": "0xa45b7cfe18cc0ef1d6588f0f548a6a6a260d5e6bbab174507ed40cd21b7bd082", "data": { "type": "0x1::coin::CoinStore<0x1::aptos_coin::AptosCoin>", "data": { "coin": { "value": "10" }, "deposit_events": { "counter": "1", "guid": { "id": { "addr": "0x5d6233bb8d7f8bd714af196339e9fb3104c9d66f38867b2a0585c4f7b9d04d28", "creation_num": "2" } } }, "frozen": false, "withdraw_events": { "counter": "0", "guid": { "id": { "addr": "0x5d6233bb8d7f8bd714af196339e9fb3104c9d66f38867b2a0585c4f7b9d04d28", "creation_num": "3" } } } } }, "type": "write_resource" }],
```
3. Events are the events that were emitted by the transaction. In this case, we only care about the `0x1::coin::Withdraw` and `0x1::coin::Deposit` events.
The Coin withdraw event is emitted when coins are withdrawn from an account. The account's balance will decrease by that amount in the field `data.amount`. To determine the matching asset, you must match the `guid` in the `withdraw_events` to the `guid` in the `changes` section for a `CoinStore`. But if the `CoinStore` is not found in the `changes`, it means it got deleted, and a `CoinStoreDeleteEvent` must be present instead. Then you can match the `guid` with `deleted_withdraw_event_handle_creation_number` and `event_handle_creation_address`.
Coin Withdraw Event
```
{ "events": [ { "guid": { "creation_number": "3", "account_address": "0xf8e25f6c8ce40a15107fb4b4d288ca03dd434d057392f2ccb5fde505a300a0bf" }, "sequence_number": "0", "type": "0x1::coin::WithdrawEvent", "data": { "amount": "100000" } }, ]}
```
Coin Store Deletion Event
```
{ "events": [ { "guid": { "creation_number": "0", "account_address": "0x0" }, "sequence_number": "0", "type": "0x1::coin::CoinStoreDeletion", "data": { "coin_type": "0x1::aptos_coin::AptosCoin", "deleted_deposit_event_handle_creation_number": "2", "deleted_withdraw_event_handle_creation_number": "3", "event_handle_creation_address": "0xf8e25f6c8ce40a15107fb4b4d288ca03dd434d057392f2ccb5fde505a300a0bf" } } ]}
```
The Coin deposit event is emitted when coins are deposited into an account. The account's balance will increase by that amount in the field `data.amoount`. To determine the matching asset, you must match the `guid` in the `deposit_events` to the `guid` in the `changes` section for a `CoinStore`. Similarly, if the `CoinStore` is not found in the `changes`, it means it got deleted, and a `CoinStoreDeleteEvent` must be present instead. Then you can match the `guid` with `deleted_deposit_event_handle_creation_number` and `event_handle_creation_address`.
Coin Deposit Event
```
{ "events": [{ "guid": { "creation_number": "2", "account_address": "0x5d6233bb8d7f8bd714af196339e9fb3104c9d66f38867b2a0585c4f7b9d04d28" }, "sequence_number": "0", "type": "0x1::coin::DepositEvent", "data": { "amount": "10" } }]}
```
4. Gas usage only is tracked for APT. There is no direct event for tracking gas, but it can be calculated from the transaction. Using the `gas_used` field, and the `gas_unit_price` field, you can calculate the total gas used. In this case, the `gas_used` is `999` and the `gas_unit_price` is `100`, so the total gas deducted from the sender(`0x559d4f690c683fca7c539237aa8dc4c6ec09886b7016bf66f2cdeffef55468f0`) is `999 * 100 = 99900 subunits` Remember that the subunits are used here. The value in the gas token `APT` is `0.00099900 APT`.
Gas Information
```
{ "gas_used": "999", "max_gas_amount": "100000", "gas_unit_price": "100", "sender": "0x559d4f690c683fca7c539237aa8dc4c6ec09886b7016bf66f2cdeffef55468f0",}
```
5. Overall, you need both the events and the changes to determine the amount transferred of the account. The final balances will show in the changes alone. If you watch all of these events, you will be able to handle all possible transactions. Below is the full example of the transaction response.
Full Response
```
{ "version": "1747361321", "hash": "0x7c56ad56c7d02bb11887e535b9f1b221626d5b0d4cb5a1ffbadc358c1db515ea", "state_change_hash": "0xc901b5e9e0965201e8205977720d7dea8a3709ee0d818fd5ec752cac13eaf18a", "event_root_hash": "0x0077cb7df9db9ee7194c489db177fe9a325bcf3f1309ea99ed934085e5592041", "state_checkpoint_hash": null, "gas_used": "999", "success": true, "vm_status": "Executed successfully", "accumulator_root_hash": "0xb531e918441ff0a37b49856e0f1b80c329146461582287cf9788964d25e31a68", "changes": [{ "address": "0x559d4f690c683fca7c539237aa8dc4c6ec09886b7016bf66f2cdeffef55468f0", "state_key_hash": "0xb2bfa7198457291a0e582b912be2bf8577feff08e352c9f16935a55ebd202dcc", "data": { "type": "0x1::coin::CoinStore<0x1::aptos_coin::AptosCoin>", "data": { "coin": { "value": "903837250"}, "deposit_events": { "counter": "10", "guid": { "id": { "addr": "0x559d4f690c683fca7c539237aa8dc4c6ec09886b7016bf66f2cdeffef55468f0", "creation_num": "2"}}}, "frozen": false, "withdraw_events": { "counter": "52485", "guid": { "id": { "addr": "0x559d4f690c683fca7c539237aa8dc4c6ec09886b7016bf66f2cdeffef55468f0", "creation_num": "3"}}}}}, "type": "write_resource"},{ "address": "0x559d4f690c683fca7c539237aa8dc4c6ec09886b7016bf66f2cdeffef55468f0", "state_key_hash": "0xa3f2635d084b3cc01ae545c96ee15901549dab594363a46bf18e3d575c83102d", "data": { "type": "0x1::account::Account", "data": { "authentication_key": "0x559d4f690c683fca7c539237aa8dc4c6ec09886b7016bf66f2cdeffef55468f0", "coin_register_events": { "counter": "1", "guid": { "id": { "addr": "0x559d4f690c683fca7c539237aa8dc4c6ec09886b7016bf66f2cdeffef55468f0", "creation_num": "0"}}}, "guid_creation_num": "4", "key_rotation_events": { "counter": "0", "guid": { "id": { "addr": "0x559d4f690c683fca7c539237aa8dc4c6ec09886b7016bf66f2cdeffef55468f0", "creation_num": "1"}}}, "rotation_capability_offer": { "for": { "vec": []}}, "sequence_number": "104628", "signer_capability_offer": { "for": { "vec": []}}}}, "type": "write_resource"},{ "address": "0x5d6233bb8d7f8bd714af196339e9fb3104c9d66f38867b2a0585c4f7b9d04d28", "state_key_hash": "0xa45b7cfe18cc0ef1d6588f0f548a6a6a260d5e6bbab174507ed40cd21b7bd082", "data": { "type": "0x1::coin::CoinStore<0x1::aptos_coin::AptosCoin>", "data": { "coin": { "value": "10"}, "deposit_events": { "counter": "1", "guid": { "id": { "addr": "0x5d6233bb8d7f8bd714af196339e9fb3104c9d66f38867b2a0585c4f7b9d04d28", "creation_num": "2"}}}, "frozen": false, "withdraw_events": { "counter": "0", "guid": { "id": { "addr": "0x5d6233bb8d7f8bd714af196339e9fb3104c9d66f38867b2a0585c4f7b9d04d28", "creation_num": "3"}}}}}, "type": "write_resource"},{ "address": "0x5d6233bb8d7f8bd714af196339e9fb3104c9d66f38867b2a0585c4f7b9d04d28", "state_key_hash": "0xba04f5a13812778031f67322e9801be65a846224e46f1360a6008402fcd0e0e0", "data": { "type": "0x1::account::Account", "data": { "authentication_key": "0x5d6233bb8d7f8bd714af196339e9fb3104c9d66f38867b2a0585c4f7b9d04d28", "coin_register_events": { "counter": "1", "guid": { "id": { "addr": "0x5d6233bb8d7f8bd714af196339e9fb3104c9d66f38867b2a0585c4f7b9d04d28", "creation_num": "0"}}}, "guid_creation_num": "4", "key_rotation_events": { "counter": "0", "guid": { "id": { "addr": "0x5d6233bb8d7f8bd714af196339e9fb3104c9d66f38867b2a0585c4f7b9d04d28", "creation_num": "1"}}}, "rotation_capability_offer": { "for": { "vec": []}}, "sequence_number": "0", "signer_capability_offer": { "for": { "vec": []}}}}, "type": "write_resource"},{ "state_key_hash": "0x6e4b28d40f98a106a65163530924c0dcb40c1349d3aa915d108b4d6cfc1ddb19", "handle": "0x1b854694ae746cdbd8d44186ca4929b2b337df21d1c74633be19b2710552fdca", "key": "0x0619dc29a0aac8fa146714058e8dd6d2d0f3bdf5f6331907bf91f3acd81e6935", "value": "0x9f9835f429758d010000000000000000", "data": null, "type": "write_table_item"} ], "sender": "0x559d4f690c683fca7c539237aa8dc4c6ec09886b7016bf66f2cdeffef55468f0", "sequence_number": "104627", "max_gas_amount": "100000", "gas_unit_price": "100", "expiration_timestamp_secs": "1727826277", "payload": { "function": "0x1::aptos_account::transfer", "type_arguments": [], "arguments": [ "0x5d6233bb8d7f8bd714af196339e9fb3104c9d66f38867b2a0585c4f7b9d04d28", "10" ], "type": "entry_function_payload"}, "signature": { "public_key": "0xfd448fada2bac29c5f3213277e001ca8851d5644578e79484b0426c41357a457", "signature": "0x40d8a6ee9150aa5736bee23ce1b1b851790bc0aa7e2485c0760d5808027040a2ef4170b88962867b045197576c5e89a4c640bf43586e6b3ead2b510b59acc20a", "type": "ed25519_signature"}, "events": [{ "guid": { "creation_number": "0", "account_address": "0x5d6233bb8d7f8bd714af196339e9fb3104c9d66f38867b2a0585c4f7b9d04d28"}, "sequence_number": "0", "type": "0x1::account::CoinRegisterEvent", "data": { "type_info": { "account_address": "0x1", "module_name": "0x6170746f735f636f696e", "struct_name": "0x4170746f73436f696e"}}},{ "guid": { "creation_number": "3", "account_address": "0x559d4f690c683fca7c539237aa8dc4c6ec09886b7016bf66f2cdeffef55468f0"}, "sequence_number": "52484", "type": "0x1::coin::WithdrawEvent", "data": { "amount": "10"}},{ "guid": { "creation_number": "2", "account_address": "0x5d6233bb8d7f8bd714af196339e9fb3104c9d66f38867b2a0585c4f7b9d04d28"}, "sequence_number": "0", "type": "0x1::coin::DepositEvent", "data": { "amount": "10"}},{ "guid": { "creation_number": "0", "account_address": "0x0"}, "sequence_number": "0", "type": "0x1::transaction_fee::FeeStatement", "data": { "execution_gas_units": "6", "io_gas_units": "5", "storage_fee_octas": "98800", "storage_fee_refund_octas": "0", "total_charge_gas_units": "999"}} ], "timestamp": "1727825677775812", "type": "user_transaction"}
```
### Fungible Asset Balance Changes
[](#fungible-asset-balance-changes)
For fungible assets, the balance changes are tracked in the `primary_fungible_store`. The primary fungible store address is deterministic, and will always be tracked by the owner of the store.
An example: [https://api.mainnet.aptoslabs.com/v1/transactions/by\\\_version/1750174030](https://api.mainnet.aptoslabs.com/v1/transactions/by%5C_version/1750174030)
There are a few steps when tracking fungible assets:
1. There will be two types of events for fungible assets. `0x1::fungible_asset::Deposit` and `0x1::fungible_asset::Withdraw`.
`Withdraw` events are similar to the coin events, where the balance will decrease by the amount in the `data.amount` field. And similarly `Deposit` events will increase the balance by the amount in the `data.amount` field.
Note that, I've omitted the sequence number, and GUID fields, as they do not apply to module events.
Each event has a `store` field, which in this case is `0x8a9d57692a9d4deb1680eaf107b83c152436e10f7bb521143fa403fa95ef76a`. This is the address of the `FungibleStore` for the asset, where the balance is stored. Note this, for the next step.
Fungible Asset Events
```
{ "events": [ { "type": "0x1::fungible_asset::Withdraw", "data": { "amount": "1", "store": "0x8a9d57692a9d4deb1680eaf107b83c152436e10f7bb521143fa403fa95ef76a" } }, { "type": "0x1::fungible_asset::Deposit", "data": { "amount": "1", "store": "0x8a9d57692a9d4deb1680eaf107b83c152436e10f7bb521143fa403fa95ef76a" } } ]}
```
2. Next, we take a look at the `0x1::fungible_asset::FungibleStore` changes. This will show the end state of the balance for the fungible asset. The balance is in the `data.balance` field. The `address` field will match the `store` field from the events. The identifier of the fungible asset, is the `metadata` field. It is the address of the `metadata` for the fungible asset.
Additionally, to figure out the actual owner of the assets, you will need to look at the owner of the store. In this case, you will need the `0x1::object::ObjectCore`, where the `address` field matches the `store` field from the events. The `owner` field will show the asset owner's address. similar to the coin events, if the `ObjectCore` is not found in the `changes`, it means it got deleted, and a `FungibleStoreDeletion` event must be present instead. Then you can match the `store` fields between the `Withdraw`/`Deposit` events and the `FungibleStoreDeletion` event.
Fungible Asset Changes
```
{ "changes":[ { "address": "0x8a9d57692a9d4deb1680eaf107b83c152436e10f7bb521143fa403fa95ef76a", "state_key_hash": "0x5b587931247dd5b43874ab29c3305c0ee7d26e7571fed3aea409375530e3a62c", "data": { "type": "0x1::fungible_asset::FungibleStore", "data": { "balance": "126691270443", "frozen": false, "metadata": { "inner": "0x2ebb2ccac5e027a87fa0e2e5f656a3a4238d6a48d93ec9b610d570fc0aa0df12" } } }, "type": "write_resource" }, { "address": "0x8a9d57692a9d4deb1680eaf107b83c152436e10f7bb521143fa403fa95ef76a", "state_key_hash": "0x5b587931247dd5b43874ab29c3305c0ee7d26e7571fed3aea409375530e3a62c", "data": { "type": "0x1::object::ObjectCore", "data": { "allow_ungated_transfer": false, "guid_creation_num": "1125899906842628", "owner": "0xc67545d6f3d36ed01efc9b28cbfd0c1ae326d5d262dd077a29539bcee0edce9e", "transfer_events": { "counter": "0", "guid": { "id": { "addr": "0x8a9d57692a9d4deb1680eaf107b83c152436e10f7bb521143fa403fa95ef76a", "creation_num": "1125899906842624" } } } } }, "type": "write_resource" } ]}
```
FungibleStore Deletion Event
```
{ "guid": { "creation_number": "0", "account_address": "0x0" }, "sequence_number": "0", "type": "0x1::fungible_asset::FungibleStoreDeletion", "data": { "metadata": "0x2ebb2ccac5e027a87fa0e2e5f656a3a4238d6a48d93ec9b610d570fc0aa0df12", "owner": "0xcf3906e2c9bc7e489c3b09d5ed5d90d8d403a68a50fe52932116b26e5878af26", "store": "0xa6ab8518e5f28a5f27247a895aa8b3de4a917209c6841b16187e8d64a67de242" }}
```
### Coins migrated to Fungible Asset Balance Changes
[](#coins-migrated-to-fungible-asset-balance-changes)
For coins migrated to fungible assets, it is just simply tracking of the two above. A coin migrated to a fungible asset will have both the coin store changes and the primary fungible asset store changes. The amounts would need to be aggregated together, and otherwise, handled as a coin.
The Fungible asset metadata address is the hash of the coin type and 0xA
```
address = sha3_256(0xA | coin_type | 0xFE)
```
Here is an example of a migrated coin with APT: [https://api.mainnet.aptoslabs.com/v1/transactions/by\\\_version/1642580695](https://api.mainnet.aptoslabs.com/v1/transactions/by%5C_version/1642580695)
Full response
```
{ "version": "1642580695", "hash": "0xe67ba1c4242d5c1de42eb8419558c4edf2318e185a3940a00f4150b519d06508", "state_change_hash": "0x07c5ec97afdf731c2778fccb37fe209369b28dcf6dcf11c3cf13b83c962f7f96", "event_root_hash": "0xad349cbea90bef601dfae9df822f5698af296951fc5f94359fcacc1e69e9fa3d", "state_checkpoint_hash": null, "gas_used": "545", "success": true, "vm_status": "Executed successfully", "accumulator_root_hash": "0x88e81bde70f32a86e46b288a917a44b2868a46973fac7fad16b5e780f48b0e67", "changes": [{ "address": "0xa", "state_key_hash": "0x1db5441d8fa4229c5844f73fd66da4ad8176cb8793d8b3a7f6ca858722030043", "data": { "type": "0x1::coin::PairedCoinType", "data": { "type": { "account_address": "0x1", "module_name": "0x6170746f735f636f696e", "struct_name": "0x4170746f73436f696e"}}}, "type": "write_resource"},{ "address": "0xa", "state_key_hash": "0x1db5441d8fa4229c5844f73fd66da4ad8176cb8793d8b3a7f6ca858722030043", "data": { "type": "0x1::coin::PairedFungibleAssetRefs", "data": { "burn_ref_opt": { "vec": [{ "metadata": { "inner": "0xa"}} ]}, "mint_ref_opt": { "vec": [{ "metadata": { "inner": "0xa"}} ]}, "transfer_ref_opt": { "vec": [{ "metadata": { "inner": "0xa"}} ]}}}, "type": "write_resource"},{ "address": "0xa", "state_key_hash": "0x1db5441d8fa4229c5844f73fd66da4ad8176cb8793d8b3a7f6ca858722030043", "data": { "type": "0x1::fungible_asset::ConcurrentSupply", "data": { "current": { "max_value": "340282366920938463463374607431768211455", "value": "47948384"}}}, "type": "write_resource"},{ "address": "0xa", "state_key_hash": "0x1db5441d8fa4229c5844f73fd66da4ad8176cb8793d8b3a7f6ca858722030043", "data": { "type": "0x1::fungible_asset::Metadata", "data": { "decimals": 8, "icon_uri": "", "name": "Aptos Coin", "project_uri": "", "symbol": "APT"}}, "type": "write_resource"},{ "address": "0xa", "state_key_hash": "0x1db5441d8fa4229c5844f73fd66da4ad8176cb8793d8b3a7f6ca858722030043", "data": { "type": "0x1::object::ObjectCore", "data": { "allow_ungated_transfer": true, "guid_creation_num": "1125899906842625", "owner": "0x1", "transfer_events": { "counter": "0", "guid": { "id": { "addr": "0xa", "creation_num": "1125899906842624"}}}}}, "type": "write_resource"},{ "address": "0xa", "state_key_hash": "0x1db5441d8fa4229c5844f73fd66da4ad8176cb8793d8b3a7f6ca858722030043", "data": { "type": "0x1::primary_fungible_store::DeriveRefPod", "data": { "metadata_derive_ref": { "self": "0xa"}}}, "type": "write_resource"},{ "address": "0x7ed92ce166e251fc133f6b4d46a6b41307962e3b6864c2231110b3808648188", "state_key_hash": "0x5ce89e323a23fb5570694dfb687d474d44563638c5ef774a2364d8347f5732b8", "data": { "type": "0x1::coin::MigrationFlag", "data": { "dummy_field": false}}, "type": "write_resource"},{ "address": "0x7ed92ce166e251fc133f6b4d46a6b41307962e3b6864c2231110b3808648188", "state_key_hash": "0x5ce89e323a23fb5570694dfb687d474d44563638c5ef774a2364d8347f5732b8", "data": { "type": "0x1::fungible_asset::FungibleStore", "data": { "balance": "37949184", "frozen": false, "metadata": { "inner": "0xa"}}}, "type": "write_resource"},{ "address": "0x7ed92ce166e251fc133f6b4d46a6b41307962e3b6864c2231110b3808648188", "state_key_hash": "0x5ce89e323a23fb5570694dfb687d474d44563638c5ef774a2364d8347f5732b8", "data": { "type": "0x1::object::ObjectCore", "data": { "allow_ungated_transfer": false, "guid_creation_num": "1125899906842625", "owner": "0xa746e980ae21949a4f084db7403430f00bce3c9a1da4101ffcf0bf45ebd35e7e", "transfer_events": { "counter": "0", "guid": { "id": { "addr": "0x7ed92ce166e251fc133f6b4d46a6b41307962e3b6864c2231110b3808648188", "creation_num": "1125899906842624"}}}}}, "type": "write_resource"},{ "address": "0x8a4613c356c21a45045e06dcc404bfee363aabd65a774d4d43defd71289239b2", "state_key_hash": "0x7c2d6e31d4ac5bbf93e19412437c0c288766b240674f71f457b9e3ef68be5003", "data": { "type": "0x1::fungible_asset::FungibleStore", "data": { "balance": "10000", "frozen": false, "metadata": { "inner": "0xa"}}}, "type": "write_resource"},{ "address": "0x8a4613c356c21a45045e06dcc404bfee363aabd65a774d4d43defd71289239b2", "state_key_hash": "0x7c2d6e31d4ac5bbf93e19412437c0c288766b240674f71f457b9e3ef68be5003", "data": { "type": "0x1::object::ObjectCore", "data": { "allow_ungated_transfer": false, "guid_creation_num": "1125899906842625", "owner": "0x5", "transfer_events": { "counter": "0", "guid": { "id": { "addr": "0x8a4613c356c21a45045e06dcc404bfee363aabd65a774d4d43defd71289239b2", "creation_num": "1125899906842624"}}}}}, "type": "write_resource"},{ "address": "0xa746e980ae21949a4f084db7403430f00bce3c9a1da4101ffcf0bf45ebd35e7e", "state_key_hash": "0xfb7c1f2762da89f00a222f93bd771b478edb4361475c4a518178564be8616dd6", "data": { "type": "0x1::account::Account", "data": { "authentication_key": "0xa746e980ae21949a4f084db7403430f00bce3c9a1da4101ffcf0bf45ebd35e7e", "coin_register_events": { "counter": "14", "guid": { "id": { "addr": "0xa746e980ae21949a4f084db7403430f00bce3c9a1da4101ffcf0bf45ebd35e7e", "creation_num": "0"}}}, "guid_creation_num": "44", "key_rotation_events": { "counter": "0", "guid": { "id": { "addr": "0xa746e980ae21949a4f084db7403430f00bce3c9a1da4101ffcf0bf45ebd35e7e", "creation_num": "1"}}}, "rotation_capability_offer": { "for": { "vec": []}}, "sequence_number": "52", "signer_capability_offer": { "for": { "vec": []}}}}, "type": "write_resource"} ], "sender": "0xa746e980ae21949a4f084db7403430f00bce3c9a1da4101ffcf0bf45ebd35e7e", "sequence_number": "51", "max_gas_amount": "817", "gas_unit_price": "100", "expiration_timestamp_secs": "1724196316", "payload": { "function": "0x1::primary_fungible_store::transfer", "type_arguments": [ "0x1::fungible_asset::Metadata" ], "arguments": [{ "inner": "0xa"}, "0x5", "10000" ], "type": "entry_function_payload"}, "signature": { "public_key": "0x330e75a102e37270b788caee8dd819e5badedd5fa17fe9f72017732e9bb98c60", "signature": "0xd4666df2887cf2d8192230e4a03d842ea75a86ffbc46a9a16a9baede6ff646c6b2bcafc524d3a4a7a66c223b5db576beb5cfefbd549620e69097c0a364c7a800", "type": "ed25519_signature"}, "events": [{ "guid": { "creation_number": "0", "account_address": "0x0"}, "sequence_number": "0", "type": "0x1::fungible_asset::Withdraw", "data": { "amount": "10000", "store": "0x7ed92ce166e251fc133f6b4d46a6b41307962e3b6864c2231110b3808648188"}},{ "guid": { "creation_number": "0", "account_address": "0x0"}, "sequence_number": "0", "type": "0x1::fungible_asset::Deposit", "data": { "amount": "10000", "store": "0x8a4613c356c21a45045e06dcc404bfee363aabd65a774d4d43defd71289239b2"}},{ "guid": { "creation_number": "0", "account_address": "0x0"}, "sequence_number": "0", "type": "0x1::fungible_asset::Withdraw", "data": { "amount": "54500", "store": "0x7ed92ce166e251fc133f6b4d46a6b41307962e3b6864c2231110b3808648188"}},{ "guid": { "creation_number": "0", "account_address": "0x0"}, "sequence_number": "0", "type": "0x1::transaction_fee::FeeStatement", "data": { "execution_gas_units": "6", "io_gas_units": "7", "storage_fee_octas": "53240", "storage_fee_refund_octas": "0", "total_charge_gas_units": "545"}} ], "timestamp": "1724196287102837", "type": "user_transaction"}
```
## Transferring Assets
[](#transferring-assets)
### Coin (or migrated coin) Transfers
[](#coin-or-migrated-coin-transfers)
Note
APT, the native token of Aptos, is a migrated coin. Please use the `aptos_account::transfer` functions to transfer APT tokens.
We suggest you use `0x1::aptos_account::transfer_coins(receiver address, amount)` for transferring coins. It will register the coin if it hasn't been registered yet, and create the associated account if it hasn't been created yet. This will continue to work with any coins that were migrated to a fungible asset, including APT.
Coins can be transferred in the following ways:
* [`0x1::aptos_account::transfer_coins(receiver address, amount)`](https://github.com/aptos-labs/aptos-core/blob/main/aptos-move/framework/aptos-framework/sources/aptos_account.move#L108-L112) - Transfer a coin to another account.
* [`0x1::aptos_account::batch_transfer_coins(receiver addresses, amounts)`](https://github.com/aptos-labs/aptos-core/blob/main/aptos-move/framework/aptos-framework/sources/aptos_account.move#L93-L106) - Transfer a coin to multiple accounts.
* [`0x1::aptos_account::transfer(receiver address, amount)`](https://github.com/aptos-labs/aptos-core/blob/main/aptos-move/framework/aptos-framework/sources/aptos_account.move#L74-L91) - Transfer specifically APT to another account.
### Fungible Asset Transfers
[](#fungible-asset-transfers)
We suggest you use `0x1::primary_fungible_store::transfer<0x1::object::ObjectCore>(receiver address, amount)` for transferring fungible assets. It will send the associated fungible asset, and create a primary store for the asset if it hasn't been created yet.
Caution
Note: This will not create an account for the user if it hasn't been created yet. You will need to call `0x1::aptos_account::create_account(account address)` to create the account before the user can submit transactions.
## Testing
[](#testing)
In order to check that everything is working correctly, we've provided these checks.
### Balance Checks
[](#balance-checks)
To test balance checks, you can check the balance for the account `0x5` for the asset `0x1::aptos_coin::AptosCoin`. The balance should show `0.002 APT`, where 0.001 APT is a coin, and 0.001 APT is a migrated coin (fungible asset).
If your balance is not correct, see [Coin and Migrated Coin Balances](#coin-and-migrated-coins-balances) for more information.
### Balance Change / Transfer Checks
[](#balance-change--transfer-checks)
#### Check Coin Transfer
[](#check-coin-transfer)
To test a transfer, create a transaction to transfer 0.001 APT to another account. The transaction should be successful, and the balance should be updated, where the balance is 0.001 APT smaller and minus the gas cost associated.
#### Check Fungible Asset Transfer
[](#check-fungible-asset-transfer)
To test a transfer, you can fund an account with the fungible asset here [https://test-token-faucet.vercel.app/](https://test-token-faucet.vercel.app/) and then transfer the fungible asset to another account. The balance should be updated according to the change, and you should be able to track the mint on the website.
## Stablecoin Addresses
[](#stablecoin-addresses)
| Token Name | Token Symbol | Token Address | Source of Address | | -------------------- | ------------ | -------------------------------------------------------------------------------------------------------------------------------------------------------------------------------------------------------------------- | ------------------------------------------------------------------------------------------ | | Tether USD | USDt | [0x357b0b74bc833e95a115ad22604854d6b0fca151cecd94111770e5d6ffc9dc2b](https://explorer.aptoslabs.com/fungible_asset/0x357b0b74bc833e95a115ad22604854d6b0fca151cecd94111770e5d6ffc9dc2b?network=mainnet) | [Aptos Foundation](https://aptosnetwork.com/currents/global-finance-moves-faster-on-aptos) | | USDC | USDC | [0xbae207659db88bea0cbead6da0ed00aac12edcdda169e591cd41c94180b46f3b](https://explorer.aptoslabs.com/fungible_asset/0xbae207659db88bea0cbead6da0ed00aac12edcdda169e591cd41c94180b46f3b?network=mainnet) | [Circle](https://developers.circle.com/stablecoins/usdc-on-main-networks) | | Ondo US Dollar Yield | USDY | [0xcfea864b32833f157f042618bd845145256b1bf4c0da34a7013b76e42daa53cc::usdy::USDY](https://explorer.aptoslabs.com/coin/0xcfea864b32833f157f042618bd845145256b1bf4c0da34a7013b76e42daa53cc::usdy::USDY?network=mainnet) | [Ondo Finance](https://ondo.finance/usdy) |
## FAQ
[](#faq)
### What is the finality of a transaction?
[](#what-is-the-finality-of-a-transaction)
Aptos uses a BFT consensus algorithm, so transactions are finalized immediately after committing to the blockchain.
### What is the transaction fee on a transaction?
[](#what-is-the-transaction-fee-on-a-transaction)
Transaction fees are variable, but for most cases here are fixed. Check out [simulating transactions](/network/blockchain/gas-txn-fee#estimating-gas-consumption-via-simulation) to get an idea of the fee.
# Indexer API Access
> Access Aptos Indexer GraphQL API for historical data, transactions, fungible assets, and tokens with SDK integration and direct endpoints
Aptos Labs hosts a public version of the Indexer GraphQL API that anyone can use to get basic historical and aggregate data about transactions, fungible assets, and tokens from on-chain.
You can explore it by hand by viewing the Hasura Explorer below for the network you are interested in.
You can also access the API via the GraphQL endpoints below. For more information on the format of data in each field / table, please see the [table reference page](/build/indexer/indexer-api/indexer-reference).
## SDK Access (Primary Method)
[](#sdk-access-primary-method)
The primary way to use the Indexer is to access it through the [TypeScript SDK](/build/sdks/ts-sdk/fetch-data-via-sdk).
The TypeScript SDK will automatically handle rate limits, and can seamlessly allow for both [Fullnode REST API](/build/apis/fullnode-rest-api) access and Indexer access depending on what data is needed.
## Hasura Explorer (Manual Queries)
[](#hasura-explorer-manual-queries)
Note
For detailed reference material about the contents of these tables, see the [Indexer Table Reference page](/build/indexer).
Choose a network to explore the free Aptos-Hosted Indexer API using the Hasura Explorer:
[Mainnet](https://cloud.hasura.io/public/graphiql?endpoint=https://api.mainnet.aptoslabs.com/v1/graphql) Hasura GraphQL Explorer for Aptos Mainnet
[Testnet](https://cloud.hasura.io/public/graphiql?endpoint=https://api.testnet.aptoslabs.com/v1/graphql) Hasura GraphQL Explorer for Aptos Testnet
[Devnet](https://cloud.hasura.io/public/graphiql?endpoint=https://api.devnet.aptoslabs.com/v1/graphql) Hasura GraphQL Explorer for Aptos Devnet
## GraphQL API Endpoints (Direct Access)
[](#graphql-api-endpoints-direct-access)
If you need to directly make GraphQL queries to the Aptos-Labs hosted Indexer API, then use the following endpoints:
* **Mainnet:** `https://api.mainnet.aptoslabs.com/v1/graphql`
* **Testnet:** `https://api.testnet.aptoslabs.com/v1/graphql`
* **Devnet:** `https://api.devnet.aptoslabs.com/v1/graphql`
### Rate limits
[](#rate-limits)
Learn more about the rate limits that apply to the Aptos Labs hosted indexer API by reading the [Geomi docs](https://geomi.dev/docs/admin/billing).
If you need a higher rate limit, consider the following solutions:
1. Get an API Key from [Geomi](https://geomi.dev/). Learn more about API keys at the [Geomi docs site](https://geomi.dev/docs/api-keys).
2. Run the Aptos Indexer API yourself. See the guide to self-hosting [here](/build/indexer/txn-stream/self-hosted).
# Aptos CLI – Install, Setup, and Use the Command-Line Interface
> Learn how to install, configure, and use the Aptos CLI to compile Move contracts, interact with the blockchain, run a local network, and manage nodes.
The Aptos command line interface (CLI) is a tool to help you compile and test Move contracts. It can also help you quickly play with Aptos features on-chain.
For more advanced users, the CLI can also be used to run a private Aptos network (to help test code locally) and can be helpful managing a network node.
## 📥 Install the Aptos CLI
[](#-install-the-aptos-cli)
[Mac](/build/cli/install-cli/install-cli-mac) Install Aptos CLI via homebrew
[Windows](/build/cli/install-cli/install-cli-windows) Install Aptos CLI on Windows via powershell script or pre-compiled binary
[Linux](/build/cli/install-cli/install-cli-linux) Install Aptos CLI on Linux via shell script or pre-compiled binary
[Advanced (Install Specific Versions)](/build/cli/install-cli/install-cli-specific-version) Build a specific version of the Aptos CLI from source
## ⚙️ Setup the Aptos CLI
[](#️-setup-the-aptos-cli)
[Setup the CLI](/build/cli/setup-cli) Setup and configure the Aptos CLI
[Advanced (Move Prover)](/build/cli/setup-cli/install-move-prover) Setup and install the Move Prover
## 🛠️ Using the Aptos CLI
[](#️-using-the-aptos-cli)
[Move Contracts](/build/cli/working-with-move-contracts) Compile, Publish, Simulate, and Benchmark Move Contracts
[Trying things On-chain](/build/cli/trying-things-on-chain) Interact with Aptos, create accounts, query accounts, use a hardware device like Ledger
[Running a Local Network](/build/cli/running-a-local-network) Run a local node / network
# Smart Contracts
> Learn to write secure, efficient smart contracts on Aptos using the Move programming language with examples, tutorials, and developer resources
Aptos contracts are written using Move, a next generation language for secure, sandboxed, and formally verified programming which is used for multiple chains. Move allows developers to write programs that flexibly manage and transfer assets while providing security and protections against attacks on those assets.
## 📖 Learn Move
[](#-learn-move)
[Why Move?](/build/smart-contracts/why-move) Learn why Aptos uses the Move Language
[Create Package](/build/smart-contracts/create-package) Get started by learning how to create a Move package
[Objects](/build/smart-contracts/objects) Learn how to use the Object standard on Aptos to create composable and flexible primitives on chain
## 👨💻 Move Examples
[](#-move-examples)
[Aptos Move Examples](https://github.com/aptos-labs/aptos-core/tree/main/aptos-move/move-examples) 30+ examples on how to develop Move on Aptos
[Move Tutorial](https://github.com/aptos-labs/aptos-core/tree/main/aptos-move/move-examples/move-tutorial) Covers the basics of programming with Move
[Your first Move Module](/build/guides/first-move-module) A example of how to publish your first move module
Here is a `hello_blockchain` example of move
hello\_blockchain.move
```
module hello_blockchain::message { use std::error; use std::signer; use std::string; use aptos_framework::event;
//:!:>resource struct MessageHolder has key { message: string::String, } //<:!:resource
#[event] struct MessageChange has drop, store { account: address, from_message: string::String, to_message: string::String, }
/// There is no message present const ENO_MESSAGE: u64 = 0;
#[view] public fun get_message(addr: address): string::String acquires MessageHolder { assert!(exists(addr), error::not_found(ENO_MESSAGE)); borrow_global(addr).message }
public entry fun set_message(account: signer, message: string::String) acquires MessageHolder { let account_addr = signer::address_of(&account); if (!exists(account_addr)) { move_to(&account, MessageHolder { message, }) } else { let old_message_holder = borrow_global_mut(account_addr); let from_message = old_message_holder.message; event::emit(MessageChange { account: account_addr, from_message, to_message: copy message, }); old_message_holder.message = message; } }
#[test(account = @0x1)] public entry fun sender_can_set_message(account: signer) acquires MessageHolder { let addr = signer::address_of(&account); aptos_framework::account::create_account_for_test(addr); set_message(account, string::utf8(b"Hello, Blockchain"));
assert!( get_message(addr) == string::utf8(b"Hello, Blockchain"), ENO_MESSAGE ); }}
```
## ⚒️ Developer Resources
[](#️-developer-resources)
### FAQ and Discussions
[](#faq-and-discussions)
* [Aptos Dev Discussions](https://github.com/aptos-labs/aptos-developer-discussions/discussions) for Q&A about Move.
### Move IDE plugins
[](#move-ide-plugins)
* Move on Aptos extension for [VSCode](https://marketplace.visualstudio.com/items?itemName=AptosLabs.move-on-aptos) and [OpenVSX](https://open-vsx.org/extension/aptoslabs/move-on-aptos).
* [Move language plugin for JetBrains IDEs](https://plugins.jetbrains.com/plugin/14721-move-language)
### External Resources
[](#external-resources)
* [Aptos Move by Example](https://move-developers-dao.gitbook.io/aptos-move-by-example)
* [Teach yourself Move on Aptos](https://github.com/econia-labs/teach-yourself-move).
* [Formal Verification, the Move Language, and the Move Prover](https://www.certik.com/resources/blog/2wSOZ3mC55AB6CYol6Q2rP-formal-verification-the-move-language-and-the-move-prover)
* [Collection of nestable Move resources](https://github.com/taoheorg/taohe)
We have a new Move on Aptos compiler that supports Move 2. See [this page](/build/smart-contracts/compiler_v2) for more information.
# AI Tools for Aptos Development
> Use AI tools like Claude, Cursor, and GitHub Copilot to build on Aptos faster. Access the Aptos MCP server and LLMs.txt documentation feeds.
Aptos provides first-class support for AI-powered development workflows. Whether you're using an AI coding assistant or an AI chat tool, you can give it deep knowledge of the Aptos blockchain, Move language, SDKs, and APIs.
## AskAptos Chatbot
[](#askaptos-chatbot)
The AskAptos chatbot is built into the documentation site — look for it in the top-right corner of the navigation bar. It can answer questions about Aptos concepts, help you plan implementations, and point you to the right documentation pages.
## Aptos MCP Server
[](#aptos-mcp-server)
The [Model Context Protocol (MCP)](https://modelcontextprotocol.io/) lets AI coding tools directly call Aptos APIs, query on-chain data, and generate correct Aptos code — without needing to copy-paste documentation.
[Claude Code](/build/ai/aptos-mcp/claude) Set up the Aptos MCP server for Claude Code
[Cursor](/build/ai/aptos-mcp/cursor) Set up the Aptos MCP server for Cursor
## Aptos Agent Skills
[](#aptos-agent-skills)
[Aptos Agent Skills](https://github.com/aptos-labs/aptos-agent-skills) provides pre-built AI skills that give coding assistants deep Aptos expertise — covering Move smart contracts, the TypeScript SDK, and full-stack dApp scaffolding.
```
npx skills add aptos-labs/aptos-agent-skills
```
This command uses the [Skills CLI](https://www.npmjs.com/package/skills), which is invoked via `npx`. If `npx skills` is not available in your environment, ensure you have Node.js and npm installed and refer to the Skills CLI documentation for installation and troubleshooting details.
[Aptos Agent Skills](/build/ai/aptos-agent-skills) Browse available skills for Move development, TypeScript SDK, and project scaffolding
## LLMs.txt Documentation Feeds
[](#llmstxt-documentation-feeds)
The [LLMs.txt standard](https://llmstxt.org/) provides machine-readable documentation feeds that AI tools can ingest to understand the full Aptos documentation. We publish three feeds to suit different context window sizes:
| Feed | URL | Best for | | ------------------ | ------------------------------------ | ------------------------------------------------------------------------- | | **llms.txt** | [`/llms.txt`](/llms.txt) | Structured index with page titles, descriptions, and per-page `.md` links | | **llms-small.txt** | [`/llms-small.txt`](/llms-small.txt) | Condensed docs for smaller context windows | | **llms-full.txt** | [`/llms-full.txt`](/llms-full.txt) | Full documentation — all pages concatenated |
Some clients resolve `/.well-known/llms.txt`; production serves the same index via a redirect to [`/llms.txt`](/llms.txt) ([`https://aptos.dev/.well-known/llms.txt`](https://aptos.dev/.well-known/llms.txt)).
The [`llms.txt`](/llms.txt) router also surfaces machine-readable **API** links—[`/aptos-spec.json`](/aptos-spec.json) (OpenAPI 3 JSON for the node REST API) and [`/rest-api`](/rest-api) (HTML reference)—plus **MCP**, Agent Skills, Explorer, GitHub, standards, and Indexer GraphQL `.md` links in one place.
[How to use LLMs.txt with AI tools](/llms-txt) Instructions for Cursor, GitHub Copilot, Claude.ai, ChatGPT, Windsurf, and more
## Agent discovery endpoints
[](#agent-discovery-endpoints)
The docs site publishes a handful of standardized discovery documents so coding agents can bootstrap from a single root. Every page also returns a [`Link`](https://www.rfc-editor.org/rfc/rfc8288) response header and matching `` tags that advertise the same URLs.
| Endpoint | Purpose | | ------------------------------------------------------------------------------------ | ---------------------------------------------------------------------------------------------------------------------------------------------------------------------------------------------------------------------------------------------------------------- | | [`/.well-known/api-catalog`](/.well-known/api-catalog) | [RFC 9727](https://www.rfc-editor.org/rfc/rfc9727) linkset pointing at the REST API spec, documentation, Indexer GraphQL, and the LLMs.txt feeds. | | [`/.well-known/mcp/server-card.json`](/.well-known/mcp/server-card.json) | [MCP Server Card (SEP-2127)](https://github.com/modelcontextprotocol/modelcontextprotocol/pull/2127) describing the [`@aptos-labs/aptos-mcp`](https://www.npmjs.com/package/@aptos-labs/aptos-mcp) server. | | [`/.well-known/agent-skills/index.json`](/.well-known/agent-skills/index.json) | [Agent Skills Discovery](https://github.com/cloudflare/agent-skills-discovery-rfc) index for [aptos-agent-skills](https://github.com/aptos-labs/aptos-agent-skills) with per-skill SHA-256 digests. | | [`/.well-known/oauth-protected-resource`](/.well-known/oauth-protected-resource) | [OAuth 2.0 Protected Resource Metadata (RFC 9728)](https://www.rfc-editor.org/rfc/rfc9728) for the Google-authenticated [Aptos Testnet Faucet](/network/faucet). Lists the resource identifier, authorization servers, and supported scopes. | | [`/.well-known/openid-configuration`](/.well-known/openid-configuration) | [OpenID Connect Discovery 1.0](https://openid.net/specs/openid-connect-discovery-1_0.html) document advertising the issuer, authorization/token endpoints, JWKS URI, and supported grant types used by the [Aptos Testnet Faucet](/network/faucet) sign-in flow. | | [`/.well-known/oauth-authorization-server`](/.well-known/oauth-authorization-server) | [OAuth 2.0 Authorization Server Metadata (RFC 8414)](https://www.rfc-editor.org/rfc/rfc8414) mirror of the OIDC discovery document for clients that prefer the pure OAuth 2.0 endpoint name. | | [`/robots.txt`](/robots.txt) | Includes [Content Signals](https://contentsignals.org/) (`ai-train=yes, search=yes, ai-input=yes`) so agents know Aptos docs are opted in. |
The OAuth/OIDC discovery documents apply only to the [Aptos Testnet Faucet](/network/faucet); the rest of `aptos.dev` is unauthenticated public documentation. Agents that need to fund a testnet account can call `/.well-known/oauth-protected-resource` to discover the faucet's resource identifier and the OIDC issuers (Firebase + Google) that mint the bearer tokens it accepts on `Authorization: Bearer …`.
### Markdown content negotiation
[](#markdown-content-negotiation)
Any docs URL that has a `.md` mirror (for example [`/build/sdks`](/build/sdks) → [`/build/sdks.md`](/build/sdks.md)) will also respond to `Accept: text/markdown` with `Content-Type: text/markdown`:
```
curl -H "Accept: text/markdown" https://aptos.dev/build/sdks
```
HTML stays the default for browsers that send the usual `Accept: text/html`.
### WebMCP
[](#webmcp)
Chrome and other browsers that implement the [WebMCP proposal](https://webmachinelearning.github.io/webmcp/) can discover the following tools on every docs page via `navigator.modelContext`: `aptos-docs.search`, `aptos-docs.open-doc`, `aptos-docs.fetch-doc-markdown`, and `aptos-docs.list-llms-feeds`.
# Aptos Network Nodes
> Learn about validator nodes, validator fullnodes, and public fullnodes that power the Aptos network
The Aptos network consists of three node types: validator nodes, validator fullnodes (VFNs), and public fullnodes (PFNs). To participate in consensus, you are required to run a validator node and stake the minimum amount of utility coins. VFNs and PFNs are not required to participate in consensus, but they are necessary to distribute blockchain data and enable ecosystem services, e.g., indexing, querying, and RESTful API services (see [Aptos APIs](/build/apis)). VFNs can only be run by validator operators, while PFNs can be run by anyone. You can learn more about the different types of nodes in the [Blockchain Deep Dive](/network/blockchain) section.
This section provides detailed, step-by-step instructions on how to deploy and operate Aptos nodes in different environments. It also describes everything you need to stake and participate in consensus and governance.
## Quick Links
[](#quick-links)
### Validation on Aptos
[](#validation-on-aptos)
Everything you need to know about how validation, staking and governance works on Aptos.
[How validation works](/network/blockchain/staking#validation-on-the-aptos-blockchain) Validator-leader proposes and earns rewards on success.
[Validator states](/network/blockchain/staking#validator-state-and-stake-state) Learn how a validator gets into a validator set.
### Staking
[](#staking)
[Staking on Aptos](/network/blockchain/staking) A comprehensive guide to how staking works on Aptos.
[Governance](/network/blockchain/governance) Who can propose, who can vote, and how an AIP is resolved.
[Owner](/network/nodes/validator-node/connect-nodes/staking-pool-operations) Describes the owner operations performed for staking.
[Voter](/network/nodes/validator-node/connect-nodes/staking-pool-voter) Describes the voter operations performed for staking.
### Validators and VFNs
[](#validators-and-vfns)
A comprehensive guide to deploying nodes, staking operations and participate in consensus.
[Node requirements](/network/nodes/validator-node/node-requirements) Details the compute and storage resources you need. Read this first before anything.
[Running validator node](/network/nodes/validator-node/deploy-nodes) In the cloud or on-premises, Docker or source, you will read step-by-step instructions here.
[Node health](/network/nodes/validator-node/verify-nodes/node-liveness-criteria) You can verify your node health using several options.
[Connecting to Aptos network](/network/nodes/validator-node/connect-nodes/connect-to-aptos-network) Steps to connect your nodes to an Aptos network.
[Staking pool operations](/network/nodes/validator-node/connect-nodes/staking-pool-operations) Step-by-step guide for how to perform staking pool operations.
[Shutting down nodes](/network/nodes/validator-node/modify-nodes/shutting-down-nodes) Leave the validator set first, and then shut down your node.
### Public Fullnodes (PFNs)
[](#public-fullnodes-pfns)
A section with detailed, step-by-step instructions on everything related to Aptos PFNs.
[Deploy a PFN](/network/nodes/full-node/deployments) Follow this section to deploy a PFN.
[Indexer PFN](/build/indexer/legacy/indexer-fullnode) Describes how to run an indexer PFN on the Aptos network.
### Common Operations
[](#common-operations)
[Develop with localnet](/network/nodes/localnet/local-development-network) Run a localnet for development (including validator nodes).
[Upgrade your PFN](/network/nodes/full-node/modify/update-fullnode-with-new-releases) Upgrade your node with new releases.
[Bootstrap from a snapshot](/network/nodes/bootstrap-fullnode/bootstrap-fullnode) Use a snapshot to bootstrap a new node.
[Bootstrap from a backup](/network/nodes/bootstrap-fullnode/aptos-db-restore) Use data restore to bootstrap a new node.
# Aptos Glossary
> Comprehensive glossary of terms and concepts used throughout the Aptos ecosystem and documentation
## A
[](#a)
### Accumulator Root Hash
[](#accumulator-root-hash)
* An **accumulator root hash** is the root hash of a [Merkle accumulator](https://eprint.iacr.org/2009/625.pdf).
### Account
[](#account)
* An **account** in the Aptos blockchain is a container for an arbitrary number of [Move modules](#move-module) and [Move resources](#move-resources).
* The state of each account is composed of both code and data.
* The account is identified by [account address](#account-address).
See [Accounts](/network/blockchain/accounts) for more information.
### Account Address
[](#account-address)
* An **account address** is the address of an Aptos account.
* Account address refers to a specific destination on the Aptos network. The address dictates the destination and source of a specific amount of assets exchanged by two parties on the blockchain.
* Aptos addresses are 64-character hex string (32 bytes). Often times these strings are prefixed with `0x` and for first 16 addresses, the leading 0s are excluded (ex. `0x1`)
See [Accounts](/network/blockchain/accounts) for more information.
### API
[](#api)
* An **Application Programming Interface (API)** is a set of protocols and tools that allow users to interact with Aptos blockchain nodes and client networks via external applications. Aptos offers a REST API to communicate with our nodes.
* See [documentation](/build/apis) for more details.
### APT
[](#apt)
**Aptos token (APT)** is the Aptos blockchain native token used for paying network and transaction fees.
### Aptos
[](#aptos)
**Aptos** is a Layer 1 blockchain for everyone. It uses the Move programming language and launched its mainnet on 2022-10-17 to redefine the web3 user experience. The Aptos blockchain is dedicated to creating better user experiences through increased speed, security, scalability, reliability and usability with low transaction costs. The word "Aptos" means "The People" in the Ohlone language. Learn more about the Aptos blockchain on the [official Aptos website](https://aptosnetwork.com).
### AptosBFT
[](#aptosbft)
* **AptosBFT** is the Aptos protocol's BFT consensus algorithm.
* AptosBFT is based on Jolteon.
### Aptos Blockchain
[](#aptos-blockchain)
* The **Aptos blockchain** is a ledger of immutable transactions agreed upon by the validators on the Aptos network (the network of validators).
### Aptos Name Service (ANS)
[](#aptos-name-service-ans)
* The **Aptos Name Service (ANS)** is a decentralized naming address service for the Aptos blockchain. An Aptos name is a human-readable _.apt_ domain name that is used in place of a public key, for example _love.apt_.
* This service also allows users to register subdomain names in addition to the registered domain. Find out more at: [Aptosnames.com](https://www.aptosnames.com/)
### Aptos Core
[](#aptos-core)
**Aptos-core** is the [open-source repository](https://github.com/aptos-labs/aptos-core/) containing the code for Aptos Network software. Aptos-core contains software for
* the Aptos blockchain itself, which generates and stores the immutable ledger of confirmed transactions and
* the validation process, which implements the consensus algorithm to validate transactions and add them to the Aptos blockchain immutable ledger.
### Aptos Ecosystem
[](#aptos-ecosystem)
* **Aptos ecosystem** refers to various components of the Aptos blockchain network and their interactions. The Aptos ecosystem includes the community, [community-driven projects](https://aptosnetwork.com/ecosystem/directory), and [events](https://aptosnetwork.com/events).
### Aptos Explorer
[](#aptos-explorer)
* The **[Aptos Explorer](https://explorer.aptoslabs.com/)** is an interface that helps users examine details of the Aptos blockchain, including account information, validators, and transactions.
* The Aptos Explorer help users validate their work in Aptos wallets and other tools in the blockchain.
### Aptos Framework
[](#aptos-framework)
The **Aptos Framework** defines the public API for blockchain updates and the structure of on-chain data. It defines the business logic and access control for the three key pillars of Aptos functionality: payments, treasury, and on-chain governance. It is implemented as a set of modules written in the Move programming language and stored on-chain as Move bytecode.
### Aptos Node
[](#aptos-node)
An **Aptos node** is a peer entity of the Aptos network that tracks the state of the Aptos blockchain. There are two types of Aptos nodes, [validators](#validator) and [fullnodes](#fullnodes).
### Aptos Protocol
[](#aptos-protocol)
* **Aptos protocol** is the specification of how transactions are submitted, ordered, executed, and recorded within the Aptos network.
### AptosAccount
[](#aptosaccount)
* A **`AptosAccount`** is a Move resource that holds all the administrative data associated with an account, such as sequence number, balance, and authentication key.
* A **`AptosAccount`** is the only resource that every account is guaranteed to contain.
### AptosAccount module
[](#aptosaccount-module)
* **The AptosAccount module** is a Move module that contains the code for manipulating the administrative data held in a particular `AptosAccount.T` resource.
* Code for checking or incrementing sequence numbers, withdrawing or depositing currency, and extracting gas deposits is included in the AptosAccount module.
### Aptos Devnet
[](#aptos-devnet)
* See [devnet](#devnet).
## B
[](#b)
### Blocks
[](#blocks)
* On Aptos, blocks are a batch of [transactions](#transaction) committed at the same time.
* Block number is analogous to "block height" in blockchain literature.
* Transactions are referenced by ledger version rather than by block.
### BlockSTM
[](#blockstm)
* **BlockSTM** is the state-of-the-art dynamic parallelism execution engine developed by the Aptos Labs team.
* Dynamic parallelism allows developers to flexibly write applications without facing design constraints of statically declaring write sets of transactions.
* It has been adopted across the industry by multiple blockchains.
* More details can be found in [the blog post](https://medium.com/aptoslabs/block-stm-how-we-execute-over-160k-transactions-per-second-on-the-aptos-blockchain-3b003657e4ba) and [presentation at a16z crypto](https://www.youtube.com/watch?v=2SE5tqPzhyw)
### Byzantine (Validator)
[](#byzantine-validator)
* A **validator** that does not follow the specification of the consensus protocol, and wishes to compromise the correct execution of the protocol.
* BFT algorithms traditionally support up to one-third of the algorithm's voting power being held by Byzantine validators.
### Byzantine Fault Tolerance (BFT)
[](#byzantine-fault-tolerance-bft)
* **Byzantine Fault Tolerance** (BFT) is the ability of a distributed system to provide safety and liveness guarantees in the presence of faulty, or "[Byzantine](https://en.wikipedia.org/wiki/Byzantine_fault)," validators below a certain threshold.
* The Aptos blockchain uses AptosBFT, a consensus protocol based on [Jolteon](#jolteon).
* BFT algorithms typically operate with a number of entities, collectively holding NNN votes (which are called "validators" in the Aptos network’s application of the system).
* NNN is chosen to withstand some number of validators holding fff votes, which might be malicious.
* In this configuration, NNN is typically set to 3f+13f + 13f+1. Validators holding up to fff votes will be allowed to be faulty — offline, malicious, slow, etc. As long as 2f+12f + 12f+1 votes are held by [honest](#honest-validator) validators, they will be able to reach consensus on consistent decisions.
* This implies that BFT consensus protocols can function correctly, even if up to one-third of the voting power is held by validators that are compromised or fail.
## C
[](#c)
### CLI
[](#cli)
* **Command line interface** refers to the Aptos CLI used for developing on the Aptos blockchain, operating nodes, and debugging issues. Find out more at [the Aptos CLI page](/build/cli).
### Client
[](#client)
* **Client** is software that receives information from the blockchain and manages transactions. Clients interact with the blockchain through the Aptos nodes.
### Code Labs
[](#code-labs)
* **Code labs and tutorials** depict various workflows - such as the use of the Aptos CLI in minting non-fungible tokens (NFTs) - in order for users to understand how the process works and employ related functions in their code. If users have the necessary funds in their accounts, they can follow the same code lab and tutorial steps used in devnet, testnet and mainnet networks.
### Consensus
[](#consensus)
* **Consensus** is a component of a validator.
* The consensus component is responsible for coordination and agreement amongst all validators on the block of transactions to be executed, their order, and the execution results.
* The Aptos blockchain is formed with these agreed-upon transactions and their corresponding execution results.
* The consensus component is accountable for achieving security, trust, and agreement among all validators on the Aptos blockchain.
### Consensus Protocol
[](#consensus-protocol)
* A **consensus protocol** is collectively executed by n validators to accept or reject a transaction and to agree on the ordering of transactions and execution results.
* See [BFT](#byzantine-fault-tolerance-bft).
## D
[](#d)
### Dapps
[](#dapps)
* **Decentralized applications (dapps)** are programs or digital applications that run on the Aptos blockchain autonomously. Smart contracts are commonly used to achieve this function.
### Devnet
[](#devnet)
* The **Aptos devnet** is a publicly deployed instance of the Aptos network that runs using a set of validator test nodes.
* The devnet is a demonstration of the Aptos network that is built for experimenting with new ideas
* The devnet simulates a digital payment system and the coins on the devnet have _no real world value_.
* The devnet is the network by which developers are given the opportunity to test given protocols. It is similar to testnet as it operates independently of the mainnet yet is reset weekly.
## E
[](#e)
### Ed25519
[](#ed25519)
* **Ed25519** is our supported digital signature scheme.
* More specifically, the Aptos network uses the PureEdDSA scheme over the Ed25519 curve, as defined in RFC 8032.
### Encrypted Mempool
[](#encrypted-mempool)
* **Encrypted mempool** is the protocol feature (AIP-144) in which a transaction's **Move executable payload** is encrypted while the transaction is **pending** (for example in mempool and during dissemination), then decrypted by validators for execution right after the block is confirmed.
* Also known as **encrypted pending transactions** in consumer-facing material.
* The submitting client uses the fullnode’s current **ledger `encryption_key`** (per-epoch batch threshold encryption on BLS12-381). Gas limits, signatures, sender metadata, and sometimes a **claimed entry function** may still be visible depending on payload type—this is **payload confidentiality**, not full transaction anonymity.
* Encrypted submissions pay a minimum gas-unit price of **200 Octas/gas-unit** (twice the base minimum) to cover validator decryption cost. **Keyless**, **federated keyless**, and **account abstraction** signers are not supported.
* Example: an app builds `aptos.transaction.build.simple` with `options.encrypted` and `options.authenticationKey` on the TypeScript SDK so a transfer’s arguments are not sent as plaintext before commit.
See [Encrypted Pending Transactions](/build/guides/encrypted-pending-transactions) for more information.
### Encrypted Pending Transactions
[](#encrypted-pending-transactions)
* **Encrypted pending transactions** is the consumer-facing name for the protocol feature defined in AIP-144. See [Encrypted Mempool](#encrypted-mempool) for the full definition, and the [Encrypted Pending Transactions](/build/guides/encrypted-pending-transactions) guide for the product-level overview.
### Epoch
[](#epoch)
* An **epoch** is the period of time between reconfigurations of the validator set and other administrative actions by the blockchain. On Aptos mainnet currently, it is every 2 hours.
### Event
[](#event)
* An **event** is the user-facing representation of the effects of executing a transaction.
* A transaction may be designed to emit any number of events as a list. For example, a `Coin` transfer emits a `WithdrawEvent` for the sender account and a `DepositEvent` for the recipient account.
* In the Aptos protocol, events provide evidence that the successful execution of a transaction resulted in a specific effect. The `DepositEvent` (in the above example) allows the recipient to confirm that a payment was received into their account.
* Events are persisted on the blockchain and are used to answer queries by [clients](#client).
### Execution
[](#execution)
* **Execution** in the Aptos blockchain is an Aptos node component that manages the block of transactions. The execution component stores successful transactions.
### Expiration Time
[](#expiration-time)
A transaction ceases to be valid after its **expiration time**. If it is assumed that:
* Time\_CTime\\\_CTime\_C is the current time that is agreed upon between validators (Time\_CTime\\\_CTime\_C is not the local time of the client);
* Time\_ETime\\\_ETime\_E is the expiration time of a transaction T\_NT\\\_NT\_N; and
* Time\_C\>Time\_ETime\\\_C > Time\\\_ETime\_C\>Time\_E and transaction T\_NT\\\_NT\_N has not been included in the blockchain, then there is a guarantee that T\_NT\\\_NT\_N will never be included in the blockchain.
## F
[](#f)
### Faucet
[](#faucet)
* The **faucet** is a service that mints APT on devnet. For testnet see the [mint page](/network/faucet).
* APT on devnet and testnet has no real world value, it is only for development purposes.
* To use a faucet, see [Faucet API](/build/apis/faucet-api).
### Fullnodes
[](#fullnodes)
* **Fullnodes** are clients that ensure data are stored up-to-date on the network. They replicate blockchain state and transactions from other fullnodes and validator nodes.
### Fungible Asset
[](#fungible-asset)
* A **fungible asset** is an asset, such as a currency, share, in-game resource, etc., that is interchangeable with another identical asset without any loss in its value. For example, APT is a fungible asset because you can exchange one APT for another.
* Follow the [Asset Standards](/build/smart-contracts/aptos-standards#asset-standards) to create fungible assets on the Aptos blockchain.
* Next generation of the Coin standard that addresses shortcomings of `aptos_framework::coin` such as lack of guaranteed enforcement of freeze and burn and advanced functionalities such as programmable transfers, e.g., approve in ERC-20.
### Fungible Token
[](#fungible-token)
* For the legacy Aptos Token Standard (aptos\_token::token), a **fungible token** is a token that is interchangeable with other identical tokens (i.e., tokens that share the same `TokenId`). This means the tokens have the same `creator address`, `collection name`, `token name`, and `property version`.
* For the Aptos Digital Asset Standard (aptos\_token\_objects::token), a \* _fungible token_\* is a fungible asset with metadata object that includes a Digital Asset resource.
### Fungible Unit
[](#fungible-unit)
* A **fungible unit** is an individual unit of a fungible asset. These units are identical and interchangeable without any loss in value. For example, each [Octa](#octa) (the smallest unit of APT) is a fungible unit.
## G
[](#g)
### Gas
[](#gas)
* **Gas** is a way to pay for computation and storage on a blockchain network. All transactions on the Aptos network cost a certain amount of gas.
* The gas required for a transaction depends on the size of the transaction, the computational cost of executing the transaction, and the amount of additional global state created by the transaction (e.g., if new accounts are created).
* The purpose of gas is regulating demand for the limited computational and storage resources of the validators, including preventing denial of service ( DoS) attacks.
See [Gas and Storage Fees](/network/blockchain/gas-txn-fee) for more information.
### Gas Unit Price
[](#gas-unit-price)
* Each transaction specifies the **gas unit price** the sender is willing to pay per unit of gas.
* The price of gas required for a transaction depends on the current demand for usage of the network.
* Gas price is expressed in [Octas](#octa).
See [Gas and Storage Fees](/network/blockchain/gas-txn-fee) for more information.
## H
[](#h)
### Honest (Validator)
[](#honest-validator)
* **Honesty** means a validator that faithfully executes the consensus protocol and is not Byzantine.
## I
[](#i)
### Indexer
[](#indexer)
* **[Indexer](/build/indexer)** is the component of Aptos that retrieves, processes, and efficiently stores raw data in the database to provide speedy access to the Aptos blockchain state.
* At a high level, indexer gets data from a gRPC stream and runs processors to transform raw blockchain data and serve transformed data via GraphQL endpoint.
## J
[](#j)
### Jolteon
[](#jolteon)
* **Jolteon** is a recent proposal for a [BFT](#byzantine-fault-tolerance-bft) consensus protocol.
* AptosBFT, the Aptos network's consensus algorithm, is based on Jolteon.
* It simplifies the reasoning about safety, and it addresses some performance limitations of previous consensus protocols. In particular, it reduces latency by 33% compared to HotStuff.
## L
[](#l)
### Leader
[](#leader)
* A **leader** is a validator that proposes a block of transactions for the consensus protocol.
* In leader-based protocols, nodes must agree on a leader to make progress.
* Leaders are selected by a function that takes the current [round number](#round-number) as input.
## M
[](#m)
### Mainnet
[](#mainnet)
* **Mainnet** refers to a working, fully-operational blockchain. A mainnet network has been fully deployed and performs the functionality of transferring digital currency from a sender to a recipient.
### Maximum Gas Amount
[](#maximum-gas-amount)
* The **Maximum Gas Amount** of a transaction is the maximum gas amount in gas units that the sender is ready to pay for the transaction.
* The transaction can be successfully executed only if the gas used does not exceed the maximum gas amount.
* The gas charged is equal to the gas price multiplied by units of gas required to process this transaction.
* If the transaction runs out of gas while it is being executed or the account runs out of balance during execution, then the sender will be charged for gas used and the transaction will fail.
See [Gas and Storage Fees](/network/blockchain/gas-txn-fee) for more information.
### Mempool
[](#mempool)
* **Mempool** is one of the components of the validator. It holds an in-memory buffer of transactions that have been submitted but not yet agreed upon and executed. Mempool receives transactions from other [full nodes](#fullnodes).
* Transactions in the mempool of a validator are added from the JSON-RPC Service of the current node and from the mempool of other Aptos nodes.
* When the current validator is the leader, its consensus component pulls the transactions from its mempool and proposes the order of the transactions that form a block. The validator quorum then votes on the proposal.
### Merkle Trees
[](#merkle-trees)
* **Merkle tree** is a type of authenticated data structure that allows for efficient verification of data integrity and updates.
* The Aptos network treats the entire blockchain as a single data structure that records the history of transactions and states over time.
* The [Merkle tree](https://en.wikipedia.org/wiki/Merkle_tree) implementation simplifies the work of apps accessing the blockchain. It allows apps to:
* Read any data from any point in time.
* Verify the integrity of the data using a unified framework.
### Merkle Accumulator
[](#merkle-accumulator)
* The **[Merkle Accumulator](https://www.usenix.org/legacy/event/sec09/tech/full_papers/crosby.pdf)** is an _append-only_ Merkle tree that the Aptos blockchain uses to store the ledger.
* A Merkle accumulator can provide proofs that a transaction was included in the chain ("proof of inclusion").
* They are also called "history trees" in literature.
### Module
[](#module)
* A **module** in the Move programming language may either be a program or library that can create, transfer, or store assets.
### Move
[](#move)
* **Move** is a new programming language that implements all the transactions on the Aptos blockchain.
* It has two different kinds of code — [Move scripts](#move-script) and [Move modules](#move-module).
* Move is a safe and secure programming language for web3 that emphasizes access control and scarcity. It is the programming language used to build the Aptos blockchain. You can read more about it in [Move on Aptos](/network/blockchain/move).
### Move Bytecode
[](#move-bytecode)
* Move programs are compiled into **Move bytecode**.
* Move bytecode is used to express Move scripts and Move modules.
### Move Module
[](#move-module)
* A **Move module** defines the rules for updating the global state of the Aptos blockchain.
* In the Aptos protocol, a Move module is a **smart contract**.
* Each user-submitted transaction includes a Move script. The Move script invokes procedures of one or more Move modules to update the global state of the blockchain according to the rules.
### Move Resources
[](#move-resources)
* **Move resources** contain data that can be accessed according to the \* _procedures_\* declared in a Move **module.**
* Move resources can never be copied, reused, or lost. This protects Move programmers from accidentally or intentionally losing track of a resource.
### Move Script
[](#move-script)
* Each transaction submitted by a user includes a **Move script**.
* These transactions, also known as Move scripts, represent the operations a client submits to a validator.
* The operation could be a request to move coins from user A to user B, or it could involve interactions with published [Move modules](#move-module) (smart contracts).
* The Move script is an arbitrary program that interacts with resources published in the global storage of the Aptos blockchain by calling the procedures of a module. It encodes the logic for a transaction.
* A single Move script can send funds to multiple recipients and invoke procedures from several different modules.
* A Move script **is not** stored in the global state and cannot be invoked by other Move scripts. It is a single-use program.
To see example uses of Move scripts, follow [Move scripts](/build/smart-contracts/scripts/script-tutorial).
### Move Virtual Machine (MVM)
[](#move-virtual-machine-mvm)
* The **Move virtual machine** executes Move scripts written in [Move bytecode](#move-bytecode) to produce an execution result. This result is used to update the blockchain **state**.
* The virtual machine is part of a [validator](#validator).
* The Move virtual machine (MoveVM) processes each validator node that translates transactions along with the current blockchain ledger state to produce a changeset as input or storage delta as output.
## N
[](#n)
### Node
[](#node)
* A **node** is a peer entity of the Aptos network that tracks the state of the Aptos blockchain.
* An Aptos node consists of logical components. [Mempool](#mempool), [consensus](#consensus), and the [Move virtual machine](#move-virtual-machine-mvm) are examples of node components.
### Nonce
[](#nonce)
* **Nonce** is a number only used once, a random or semi-random number that is generated for a specific use for authentication protocols and cryptographic hash functions.
## O
[](#o)
### Octa
[](#octa)
* An **Octa** is the smallest unit of [APT](#apt). 1 APT = 108 Octas.
### Open-Source Community
[](#open-source-community)
* **Open-source community** is a term used for a group of developers who work on open-source software. If you're reading this glossary, then you are part of the Aptos project's developer community.
## P
[](#p)
### Proof
[](#proof)
* A **proof** is a way to verify the accuracy of data in the blockchain.
* Every operation in the Aptos blockchain can be verified cryptographically that it is indeed correct and that data has not been omitted.
* For example, if a user queries the information within a particular executed transaction, they will be provided with a cryptographic proof that the data returned to them is correct.
### Proof-of-Stake (PoS)
[](#proof-of-stake-pos)
**Proof-of-Stake (PoS)** is a security mechanism that serves in confirming the uniqueness and legitimacy of blockchain transactions. The PoS consensus mechanism is leveraged by the Aptos blockchain powered by a network of validators, which in turn update the system and process transactions.
## Q
[](#q)
### Quorum Store
[](#quorum-store)
* **Quorum Store** is the component that disseminates transactions (in batches) within the validator set.
* It significantly improves consensus throughput by removing the leader bottleneck.
* It decouples data dissemination from metadata ordering, allowing validators to disseminate data asynchronously in parallel.
* More details can be found in the [blog post](https://medium.com/aptoslabs/quorum-store-how-consensus-horizontally-scales-on-the-aptos-blockchain-988866f6d5b0)
## R
[](#r)
### Randapp
[](#randapp)
* A [dapp](#dapps) that uses randomness for its functionality.
### Resource Account
[](#resource-account)
* A **resource account** is used to manage resources independent of an account managed by a user. For example, a developer may use a resource account to manage an account for module publishing, say managing a contract.
* The contract itself does not require a signer post initialization. A resource account gives you the means for the module to provide a signer to other modules and sign transactions on behalf of the module.
See [Resource accounts](/build/smart-contracts/resource-accounts) for instructions on use.
### REST API Service
[](#rest-api-service)
* The **REST API Service** component is the external interface of an Aptos node. Any incoming client request, such as submitted transactions or queries, must first go through the REST Service. A client needs to go through the REST Service component to access storage or any other component in the system. This filters requests and protects the system.
* Whenever a client submits a new transaction, the REST Service passes it to [mempool](#mempool).
### Round
[](#round)
* A **round** consists of achieving consensus on a block of transactions and their execution results.
### Round Number
[](#round-number)
* A **round number** is a shared counter used to select leaders during an [epoch](#epoch) of the consensus protocol.
## S
[](#s)
### SDKs
[](#sdks)
* Aptos **software development kits (SDKs)** are sets of tools that enable a developer to quickly create a custom app on the Aptos platform. Find out more at [Use the Aptos SDKs](/build/sdks).
### Sequence Number
[](#sequence-number)
* The **sequence number** for an account indicates the number of transactions that have been submitted and committed on chain from that account. It is incremented every time a transaction sent from that account is executed or aborted and stored in the blockchain.
* A transaction is executed only if it matches the current sequence number for the sender account. This helps sequence multiple transactions from the same sender and prevents replay attacks.
* If the current sequence number of an account A is X, then a transaction T on account A will only be executed if T's sequence number is X.
* These transactions will be held in mempool until they are the next sequence number for that account (or until they expire).
* When the transaction is applied, the sequence number of the account will become X+1. The account has a strictly increasing sequence number.
### Sender
[](#sender)
* _Alternate name_: Sender address.
* **Sender** is the address that originates the transaction. A transaction must be signed by the sender but can have more than one signer.
### Shoal
[](#shoal)
* Method for decreasing latency for BFT protocols. See the [Shoal paper](https://arxiv.org/pdf/2306.03058.pdf)
### Smart Contract
[](#smart-contract)
* **Smart contract** refers to a computer program that automatically and directly carries out the contract's terms.
* See [Move Module](#move-module) for related details.
### State
[](#state)
* A **state** in the Aptos protocol is a snapshot of the distributed database.
* A transaction modifies the database and produces a new and updated state.
### State Root Hash
[](#state-root-hash)
* **State root hash** is a [Merkle hash](https://en.wikipedia.org/wiki/Merkle_tree) over all keys and values the state of the Aptos blockchain at a given version.
## T
[](#t)
### Table
[](#table)
* A [**table**](https://github.com/aptos-labs/aptos-core/blob/main/aptos-move/framework/aptos-stdlib/doc/table.md) implements the Table type and in Aptos is used to store information as key-value data within an account at large scale.
See [`table.move`](https://github.com/aptos-labs/aptos-core/blob/main/aptos-move/framework/aptos-stdlib/sources/table.move) for the associated Aptos source file.
### Testnet
[](#testnet)
* **Testnet** describes the Aptos network that is not fully functional yet more stable than devnet; it is an alternative network to mainnet to be used for testing.
### Tokens
[](#tokens)
* **Tokens** are digital units of value issued on a blockchain. They can be redeemed for assets or value held. Tokens can be of the types: Fungible Token (FT), Non-Fungible Token (NFT), and Semi-Fungible Token (SFT).
### Transaction
[](#transaction)
* A raw **transaction** contains the following fields:
* [Sender (account address)](#account-address)
* [Move script](#move-script)
* [Gas price](#gas-unit-price)
* [Maximum gas amount](#maximum-gas-amount)
* [Sequence number](#sequence-number)
* [Expiration time](#expiration-time)
* A signed transaction is a raw transaction with the digital signature.
* An executed transaction changes the state of the Aptos blockchain.
### Transaction Script
[](#transaction-script)
* See [Move script](#move-script)
### Trusted Setup
[](#trusted-setup)
* The **trusted setup** is the pair of binary blobs (`digest_key.bin` and `pp.bin`) consumed by Aptos validator consensus before participating in distributed key generation (DKG).
* Aptos Labs publishes the blobs in the [`aptos-labs/aptos-networks`](https://github.com/aptos-labs/aptos-networks) repository and rotates them periodically. All validators in a network must load the same bytes.
* VFNs and PFNs do not need these files.
See [Update Trusted Setup](/network/nodes/validator-node/modify-nodes/update-trusted-setup) for the operator runbook covering download, CLI verification, and rotation.
## V
[](#v)
### Validator
[](#validator)
* _Alternate name_: Validators.
* A **validator** is an entity of the Aptos ecosystem that validates on the Aptos blockchain. It receives requests from clients and runs consensus, execution, and storage.
* A validator maintains the history of all the transactions on the blockchain.
* Internally, a validator needs to keep the current state, to execute transactions, and to calculate the next state.
* Aptos validators are in charge of verifying transactions.
### Validator Nodes
[](#validator-nodes)
* **Validator nodes** are a unique class of fullnodes that take part in consensus, specifically a Byzantine Fault Tolerance (BFT) consensus protocol in Aptos. Validators agree upon transactions to be added to the Aptos blockchain as well as the order in which they are added.
### Version
[](#version)
* A **version** is a sequentially increasing number that increments for every [transaction](#transaction).
* On aptos, transactions are globally ordered and every transaction has a version (often called "height" in blockchain literature.)
* Transaction version 0 is the first transaction (genesis transaction), and a transaction version 100 is the 101st transaction in the blockchain.
## W
[](#w)
### Well-Formed Transaction
[](#well-formed-transaction)
An Aptos transaction is **well-formed** if each of the following conditions are true for the transaction:
* The transaction has a valid signature.
* An account exists at the sender address.
* It includes a public key, and the hash of the public key matches the sender account's authentication key.
* The sequence number of the transaction matches the sender account's sequence number.
* The sender account's balance is greater than the [maximum gas amount](#maximum-gas-amount).
* The expiration time of the transaction has not passed.
# LLMs.txt
> How to get tools like Cursor, GitHub Copilot, ChatGPT, and Claude to understand Aptos documentation.
## What is LLMs.txt?
[](#what-is-llmstxt)
We support [LLMs.txt](https://llmstxt.org/) files for making the Aptos documentation available to large language models (LLMs). This feature helps AI tools better understand the Aptos blockchain, its Move language, SDKs, and development patterns.
## Available Routes
[](#available-routes)
We provide the following LLMs.txt routes to help AI tools access our documentation:
* [llms.txt](/llms.txt) - A compact routing file that points AI tools to the most useful Aptos docs and machine-readable exports
* [llms-small.txt](/llms-small.txt) - A curated low-token subset of the most useful Aptos documentation for IDE assistants and smaller context windows
* [llms-full.txt](/llms-full.txt) - The full rendered Aptos documentation corpus for large-context ingestion
**Well-known URL:** Some tools look for [`https://aptos.dev/.well-known/llms.txt`](https://aptos.dev/.well-known/llms.txt). That URL permanently redirects to [`/llms.txt`](/llms.txt) (same content).
The [`llms.txt`](/llms.txt) index also lists **structured API assets** that are not prose docs—for example the [Aptos Fullnode OpenAPI spec](/aptos-spec.json) (JSON) and the [REST API reference](/rest-api) (HTML) generated from that spec.
It also surfaces **agent tooling** (Aptos MCP, Agent Skills, Explorer, GitHub org) and key **Markdown** deep links (AI hub, standards, Indexer GraphQL reference) so models can fetch the right surface without guessing URLs.
## Per-Page Markdown Access
[](#per-page-markdown-access)
Every documentation page is also available as rendered Markdown by appending `.md` to the URL:
| Page URL | Markdown URL | | ----------------------------------------------------- | -------------------------------------------------------- | | `https://aptos.dev/build/guides/first-transaction` | `https://aptos.dev/build/guides/first-transaction.md` | | `https://aptos.dev/build/sdks/ts-sdk` | `https://aptos.dev/build/sdks/ts-sdk.md` | | `https://aptos.dev/zh/build/guides/first-transaction` | `https://aptos.dev/zh/build/guides/first-transaction.md` |
This is useful for AI tools that need to fetch individual pages with minimal tokens, rather than ingesting the full documentation. The [llms.txt](/llms.txt) file acts as a compact router, while [llms-small.txt](/llms-small.txt) and [llms-full.txt](/llms-full.txt) provide curated and comprehensive corpus exports.
## Usage with AI Tools
[](#usage-with-ai-tools)
### Claude Code
[](#claude-code)
Add Aptos documentation context to [Claude Code](https://docs.anthropic.com/en/docs/agents-and-tools/claude-code/overview) projects:
1. Add `https://aptos.dev/llms.txt` to your project's `CLAUDE.md` file as a reference
2. Claude Code will read the index and fetch relevant pages via `.md` URLs as needed
3. For deeper integration with on-chain tools, see [Aptos MCP for Claude Code](/build/ai/aptos-mcp/claude)
### Cursor
[](#cursor)
Use the `@Docs` feature in Cursor to include the LLMs.txt files in your project. This helps Cursor provide more accurate code suggestions and documentation for Aptos development.
[Read more about @Docs in Cursor](https://docs.cursor.com/context/@-symbols/@-docs)
### GitHub Copilot
[](#github-copilot)
GitHub Copilot can leverage the information in these LLMs.txt files to provide better assistance when developing Aptos applications. You can reference these files in your GitHub Copilot Chat by using the following URLs:
```
https://aptos.dev/llms.txthttps://aptos.dev/llms-small.txthttps://aptos.dev/llms-full.txt
```
### Windsurf
[](#windsurf)
Reference the LLMs.txt files using `@` or in your `.windsurfrules` files to enhance Windsurf's understanding of Aptos development.
[Read more about Windsurf Memories](https://docs.codeium.com/windsurf/memories#memories-and-rules)
### Claude.ai
[](#claudeai)
Add Aptos documentation as a knowledge source in [Claude Projects](https://claude.ai):
1. Open [Claude.ai](https://claude.ai) and create or open a Project
2. Click **Add content**
3. Paste `https://aptos.dev/llms-full.txt` as a URL source
4. Claude will now have Aptos documentation context in all conversations within that Project
### ChatGPT
[](#chatgpt)
Reference the Aptos docs directly in ChatGPT conversations:
* Paste `https://aptos.dev/llms-full.txt` into your message and ask ChatGPT to read it before answering Aptos questions
* For [custom GPTs](https://openai.com/index/introducing-gpts/): add `https://aptos.dev/llms.txt` as a knowledge source in the GPT Builder
### Other AI Tools
[](#other-ai-tools)
Any AI tool that supports LLMs.txt can use these routes to better understand Aptos. Simply point your tool to any of the routes above.
# Aptos Agent Skills
> Pre-built AI skills for Claude Code, Cursor, and GitHub Copilot to write Move smart contracts, use the Aptos TypeScript SDK, and build full Aptos dApps.
[Aptos Agent Skills](https://github.com/aptos-labs/aptos-agent-skills) is a collection of pre-built AI skills that give coding assistants like Claude Code, Cursor, and GitHub Copilot deep expertise in Aptos development. The skills cover Move smart contracts, the TypeScript SDK, and full-stack dApp scaffolding.
[Aptos Agent Skills on GitHub](https://github.com/aptos-labs/aptos-agent-skills) Browse the source code, skill definitions, and contribution guidelines
## Installation
[](#installation)
### Using the Skills CLI (recommended)
[](#using-the-skills-cli-recommended)
```
npx skills add aptos-labs/aptos-agent-skills
```
This installs the skills into your project so your AI coding assistant can use them automatically.
### Claude Code Plugin
[](#claude-code-plugin)
```
claude plugin add aptos-labs/aptos-agent-skills
```
### Manual Installation
[](#manual-installation)
Clone the repository and copy the skills into your project's `.claude/skills/aptos/` directory:
```
git clone https://github.com/aptos-labs/aptos-agent-skills.gitcp -r aptos-agent-skills/skills/* .claude/skills/aptos/
```
## Available Skills
[](#available-skills)
### Move Skills
[](#move-skills)
These skills help AI assistants write, test, audit, and deploy Move smart contracts:
| Skill | Description | | ---------------------------- | --------------------------------------------------------------------- | | **write-contracts** | Write Move smart contracts following Aptos best practices | | **generate-tests** | Generate comprehensive unit and integration tests for Move modules | | **security-audit** | Audit Move contracts for common vulnerabilities and security issues | | **deploy-contracts** | Deploy Move modules to Aptos devnet, testnet, or mainnet | | **search-aptos-examples** | Search official Aptos example contracts for reference implementations | | **analyze-gas-optimization** | Analyze and optimize Move code for gas efficiency | | **modernize-move** | Upgrade Move code to use the latest Aptos Move features |
### TypeScript SDK Skills
[](#typescript-sdk-skills)
These skills help AI assistants use the Aptos TypeScript SDK correctly:
| Skill | Description | | ------------------------- | ----------------------------------------------------------- | | **use-ts-sdk** | General guidance for using the Aptos TypeScript SDK | | **ts-sdk-client** | Configure and use the Aptos client for network interactions | | **ts-sdk-account** | Create and manage Aptos accounts and key pairs | | **ts-sdk-address** | Work with Aptos addresses and address formats | | **ts-sdk-transactions** | Build, simulate, sign, and submit transactions | | **ts-sdk-view-and-query** | Query on-chain data and call view functions | | **ts-sdk-types** | Use TypeScript types from the SDK correctly | | **ts-sdk-wallet-adapter** | Integrate wallet connections in frontend applications |
### Project Skills
[](#project-skills)
| Skill | Description | | ------------------------ | ------------------------------------------------------------------------------ | | **create-aptos-project** | Scaffold a new Aptos project with Move contracts, TypeScript SDK, and frontend |
## Recommended Workflow
[](#recommended-workflow)
For a typical Aptos dApp, use the skills in this order:
1. **Scaffold** — Use `create-aptos-project` to set up the project structure
2. **Write** — Use `write-contracts` to create your Move smart contracts
3. **Test** — Use `generate-tests` to create comprehensive test coverage
4. **Audit** — Use `security-audit` to check for vulnerabilities
5. **Deploy** — Use `deploy-contracts` to publish to devnet or testnet
6. **Frontend** — Use `ts-sdk-wallet-adapter` and other SDK skills to build the UI
## Community Skills
[](#community-skills)
The repository includes a `community-skills/` directory where anyone can contribute additional skills. To add your own:
1. Create a new skill file following the existing format
2. Submit a pull request to the [aptos-agent-skills repository](https://github.com/aptos-labs/aptos-agent-skills)
See the [CONTRIBUTING.md](https://github.com/aptos-labs/aptos-agent-skills/blob/main/CONTRIBUTING.md) for details on the contribution process.
# Aptos Model Context Protocol (MCP)
> Learn how to use the Aptos MCP server to build applications with AI tools like Cursor and Claude Code
The [Aptos MCP server](https://github.com/aptos-labs/aptos-npm-mcp) (`npx @aptos-labs/aptos-mcp`) provides tools, prompts, and resources to help developers build applications on the Aptos blockchain through [Geomi](https://geomi.dev). It is designed to be used with AI tools like Cursor, Claude Code, and others that support the [Model Context Protocol](https://modelcontextprotocol.io/).
## Getting Started
[](#getting-started)
### Prerequisites
[](#prerequisites)
* [node and npm](https://nodejs.org/en)
* Build Bot Api Key
### Generate a Build Bot Api Key
[](#generate-a-build-bot-api-key)
To be able to make Geomi actions like managing API keys, etc., follow these instructions to generate a new Bot API Key to use with the MCP.
* Go to [https://geomi.dev/](https://geomi.dev/)
* Click on your name in the bottom left corner
* Click on "Bot Keys"
* Click on the "Create Bot Key" button
* Copy the Bot Key and paste it into the MCP configuration file as an env arg: `APTOS_BOT_KEY=`
### Supported Interfaces
[](#supported-interfaces)
We've provided guides for Cursor and Claude Code to help you integrate the Aptos MCP into your development environment. If you're using a different AI tool, follow the steps for your favorite AI tool, and refer to the documentation for Cursor or Claude Code for examples.
[Claude Code](/build/ai/aptos-mcp/claude) Set up for Claude Code
[Cursor](/build/ai/aptos-mcp/cursor) Set up for Cursor
# Setting up Aptos MCP with Claude Code
> Step-by-step guide to configure and use Aptos MCP with Claude Code for blockchain development
1. Install the `claude-code` package
```
npm install -g @anthropic-ai/claude-code
```
2. Locate where Claude Code stores its configuration, usually on Mac it is at `~/.claude.json`
3. Edit the `mcpServers` object in the `json` file with
```
{ "mcpServers": { "aptos-mcp": { "command": "npx", "args": ["-y", "@aptos-labs/aptos-mcp"], "type": "stdio", "env": { "APTOS_BOT_KEY": "" } } }}
```
4. Obtain your `APTOS_BOT_KEY`:
* Visit [Geomi](https://geomi.dev/) and log in with your account.
* Navigate to the API Keys section and create a new key.
* Copy the generated key for use in the next step.
5. Make sure to update the `APTOS_BOT_KEY` with the key you generated in the previous step.
6. Navigate to your project
```
cd your-awesome-project
```
7. In a new terminal window type:
```
claude
```
8. You can now use Claude Code to interact with the Aptos MCP. Prompt the agent with `what aptos mcp version are you using?` to verify the connection. The agent should reply with something like:
```
I'm using Aptos MCP version 0.0.2.
```
# Setting up Aptos MCP with Cursor
> Complete guide to integrate Aptos MCP with Cursor IDE for enhanced blockchain development workflows
1. Open the Cursor IDE
2. On the project root folder, create a `.cursor` folder
3. In the `.cursor` folder, create a `mcp.json` file
4. Paste this content
```
{ "mcpServers": { "aptos-mcp": { "command": "npx", "args": ["-y", "@aptos-labs/aptos-mcp"], "env": { "APTOS_BOT_KEY": "" } } }}
```
5. Obtain your `APTOS_BOT_KEY`:
* Visit [Geomi](https://geomi.dev/) and log in with your account.
* Navigate to the API Keys section and generate a new key.
* Copy the generated key for use in the next step.
6. Make sure to update the `APTOS_BOT_KEY` in the `mcp.json` file with the key you just generated.
### Verify Cursor runs your MCP
[](#verify-cursor-runs-your-mcp)
1. Open Cursor Settings: `cursor -> settings -> cursor settings`
2. Head to the `MCP` or `Tools & Integrations` section
3. Make sure it is enabled and showing a green color indicator

4. Click the “refresh” icon to update the MCP.
5. Make sure the Cursor AI window dropdown is set to `Agent`

6. Prompt the agent with `what aptos mcp version are you using?` to verify the connection. The agent should reply with something like:
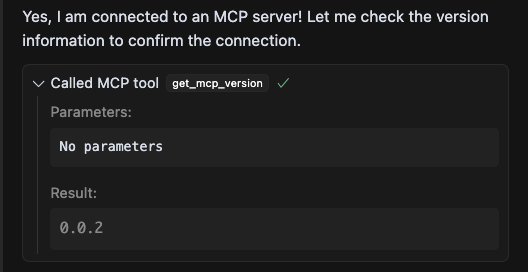
# Aptos Improvement Proposals (AIPs)
> Learn about Aptos Improvement Proposals - how the community proposes changes and improvements to the Aptos protocol
Aptos Improvement Proposals (AIPs) are a way for the Aptos community to propose changes, improvements, and new features to the Aptos protocol. AIPs are designed to be a collaborative process that allows anyone in the community to contribute ideas and feedback.
AIPs are documented in the [AIPs repository](https://github.com/aptos-foundation/AIPs) and are administered by the Aptos Foundation. Each AIP is assigned a unique number and goes through a rigorous review process before it is accepted or rejected.
## What do AIPs cover?
[](#what-do-aips-cover)
AIPs can cover a wide range of topics, including:
* Node protocol changes - Mempool changes, consensus changes, etc.
* Framework (smart contract) changes - New modules, new functions, etc.
* Governance changes - Changes to the way the Aptos Foundation operates, changes to the way AIPs are processed, etc.
## What is this section of the docs mostly about?
[](#what-is-this-section-of-the-docs-mostly-about)
This section of the docs is mostly about AIPs that are relevant to developers and providing FAQs and quick information about them.
# AIP-115: Stateless Accounts
> Learn about AIP-115 which introduces stateless accounts that operate without explicitly created Account resources
[AIP-115](https://github.com/aptos-foundation/AIPs/blob/main/aips/aip-115.md) covers stateless accounts.
## General FAQ
[](#general-faq)
### What is a Stateless Account?
[](#what-is-a-stateless-account)
A Stateless Account is a new behavior for Aptos accounts that allows them to operate without requiring an explicitly created `0x1::account::Account` resource. Instead, these accounts use default behaviors until an action necessitates the creation of the resource. This change simplifies account management and reduces unnecessary resource creation, making it easier for developers and users to interact with the Aptos blockchain.
### How is it different from a regular account?
[](#how-is-it-different-from-a-regular-account)
Technically, there is no separate account type. All accounts are the same under the hood. The difference is that accounts without a resource behave in a "stateless" manner using default values. The account resource is only created on-demand when needed.
### How does it work?
[](#how-does-it-work)
When an account signs its first transaction sequence number transaction, it will not have the `0x1::account::Account` resource created. Instead, it will create the `0x1::account::Account` resource only when an action that requires to increment the sequence number.
For an orderless transaction, the account resource is not needed at all, and the account resource will not be created.
## Technical Details FAQ
[](#technical-details-faq)
### What is the default auth\_key for Stateless Accounts?
[](#what-is-the-default-auth_key-for-stateless-accounts)
If the `0x1::account::Account` resource does not exist, the auth\_key defaults to the account address itself. This allows the account to sign and submit transactions without needing a resource.
### What is the sequence number of a Stateless Account?
[](#what-is-the-sequence-number-of-a-stateless-account)
It defaults to `0` if the account resource does not exist. In the future, with Orderless Transactions, the sequence number may be eliminated entirely.
### When is the account resource automatically created?
[](#when-is-the-account-resource-automatically-created)
The resource is created when an action that requires on-chain state, such as:
* Rotating the authentication key
* Using capabilities or features that rely on the account resource such as sequence number
* Explicitly calling functions that access fields in the account resource
### Does creating the account resource incur extra gas cost?
[](#does-creating-the-account-resource-incur-extra-gas-cost)
Yes. The creation of the resource is deferred, and the corresponding gas and storage fees are only charged at the moment of actual creation, not beforehand.
### Any behavior change to account module at the Move level?
[](#any-behavior-change-to-account-module-at-the-move-level)
`0x1::account::exists_at` always returns true, as all on-chain account addresses are considered valid and treated as existing by default. There is no move function in the module to check whether the underlying account resource really exists since the goal is to make it transparent to users. As a result, any logic that first checks whether an account exists before attempting to create it is now obsolete.
### Can users force-create the account resource upfront?
[](#can-users-force-create-the-account-resource-upfront)
Yes. Users can explicitly call functions like `0x1::account::create_account_if_does_not_exist` to create the resource manually, if desired.
### Any behavior change to API?
[](#any-behavior-change-to-api)
If you rely on the following API behavior, please adjust correspondingly. `GET /accounts/{address}` will never return “404 not found” but the default authentication key and sequence number mentioned above for stateless accounts. Therefore, if it is desired to check whether the account resource exists or not, try `GET /accounts/{address}/resource/0x1::account::Account`
### Do existing accounts get affected?
[](#do-existing-accounts-get-affected)
No. Existing accounts with resources already created will continue to work exactly as they do now. Stateless Account behavior only applies to accounts that have not yet created a resource.
### Do dApps / CEX need to change anything?
[](#do-dapps--cex-need-to-change-anything)
Maybe. Previously, checking whether an account existed often relied on calling APIs that return a 404 error if the account resource was not found. Applications would then use this as a signal to warn users (e.g., "This account does not exist"). Under the new model, all addresses are considered valid, and such 404-based existence checks are no longer reliable or meaningful. However, we are not banning this pattern—developers may still choose to warn users that an account may not have performed any on-chain activity and thus might not have a resource created yet.
If you still want to detect whether an account has an associated resource, you can refer to the method described in Q9 or check whether the sequence\_number is 0. But be aware that with the introduction of orderless transactions, some accounts may only submit transactions that never create a resource, which could result in false negatives.
We recommend designing your application to be robust regardless of whether the account resource exists, and to avoid assuming resource presence as a proxy for account existence.
Examples:
* A wallet might check for an account to see if it’s a new account, and provide a user a warning. With this change, instead a mitigation like Q9 will be needed.
* A custodial wallet may send funds to initialize an account with gas. With this change, it will need to check the account’s balance instead of just the account existing.
### Is this compatible with Orderless Transactions?
[](#is-this-compatible-with-orderless-transactions)
Yes. Orderless Transactions and Stateless Accounts are complementary. Once Orderless Transactions are enabled, sequence numbers will no longer be needed, enabling truly stateless usage.
## Will all accounts become Stateless in the future?
[](#will-all-accounts-become-stateless-in-the-future)
No. Stateless Accounts are not a new account type. It simply allows accounts to behave with default logic until the account resource is needed. This lazy resource creation, does not transform existing account state. All accounts can behave in a stateless way by default, but they will still create the standard resource if and when advanced features are used.
# AIP-88: Block Epilogue Transactions
> Understanding AIP-88 which introduces block epilogue transactions to provide information about executed blocks
[AIP-88](https://github.com/aptos-foundation/AIPs/blob/main/aips/aip-88.md) covers block epilogue transactions, which are a new type of transaction that give information about the block after it has been executed. These transactions can only be created by the consensus and are not user-initiated. They contain information about gas usage in the block and will contain more information in the future.
It replaces the previous `StateCheckpoint` transaction type, which was used to "sometimes" signal the end of a block. The new `BlockEpilogue` transaction is now sometimes created at the end of a block instead, and it is guaranteed to be the last transaction in the block. The only case this does not apply is the last block of an epoch, which will have no `BlockEpilogue` transaction.
## General FAQ
[](#general-faq)
### What is in the Block Epilogue Transaction?
[](#what-is-in-the-block-epilogue-transaction)
The block epilogue transaction contains a `BlockEndInfo` enum. It is purposely designed to be an enum so that it can be extended in the future without breaking existing code. The current version is `V0` and contains the following fields:
```
module 0x1::epilogue { enum BlockEndInfo { V0 { /// Whether block gas limit was reached block_gas_limit_reached: bool, /// Whether block output limit was reached block_output_limit_reached: bool, /// Total gas_units block consumed block_effective_block_gas_units: u64, /// Total output size block produced block_approx_output_size: u64, }, }}
```
These mainly contain information about the gas usage in the block for debugging purposes.
The JSON output will look like this:
```
{ "version":"1912", "hash":"0x54a8efc93fc94f5b545dadb63da3d4dc192125c717b336dc446d55a5b553913f", "state_change_hash":"0xafb6e14fe47d850fd0a7395bcfb997ffacf4715e0f895cc162c218e4a7564bc6", "event_root_hash":"0x414343554d554c41544f525f504c414345484f4c4445525f4841534800000000", "state_checkpoint_hash":"0x841a43956ca09a02b1c1cdadc65f24c390170aa666015a2e8f7ec5c9d6a3875f", "gas_used":"0", "success":true, "vm_status":"Executed successfully", "accumulator_root_hash":"0x6561976b4560ff25239dffc6cada70e7008dd42fc4d3df2eca6a86b6d2ec384d", "changes":[], "timestamp":"1719263322836578", "block_end_info": { "block_gas_limit_reached":false, "block_output_limit_reached":false, "block_effective_block_gas_units":0, "block_approx_output_size":1163 }, "type":"block_epilogue_transaction"}
```
## Compatibility FAQ
[](#compatibility-faq)
### What does this mean for my dApp?
[](#what-does-this-mean-for-my-dapp)
If you process transactions in your dApp, and expect the last transaction in a block to be a `StateCheckpoint`, you will need to update your code to handle the `BlockEpilogue` transaction instead.
Note that, the `BlockEpilogue` transaction is guaranteed to be the last transaction of a block except for the last block of an epoch, which will not have a `BlockEpilogue` transaction.
### What apps are likely to be affected?
[](#what-apps-are-likely-to-be-affected)
Apps that index all transactions such as block explorers and centralized exchange indexer processors may be affected. However, most of these are informational and do not affect the core functionality of the dApp.
### What can I do to process the new transaction type?
[](#what-can-i-do-to-process-the-new-transaction-type)
If you're using the Aptos Go SDK or the Aptos TypeScript SDK, you can update to the latest version, which will automatically handle the new transaction type.
# Aptos Labs Geomi
> Access Aptos Labs APIs, gas station services, and no-code indexing through the Geomi developer portal
[Geomi](https://geomi.dev) is your gateway to access Aptos Labs provided APIs in a quick and easy fashion to power your dapp. Beyond API access it offers gas station and no code indexing services.
Learn more about Geomi at the dedicated [Geomi docs site](https://geomi.dev/docs).
# Data Providers
> Access Aptos blockchain data through SQL interfaces and analytics dashboards for aggregated data analysis
# Data Providers
[](#data-providers)
In addition to the API run by Aptos full nodes, we also provide a few different ways to get Aptos blockchain data.
## Overview of aptos data endpoints
[](#overview-of-aptos-data-endpoints)
[REST API](/build/apis/fullnode-rest-api) allows you to query the full node directly and will have the latest data (historical data will be missing unless it's an archival full node).
[GRPC transaction stream](/build/indexer/txn-stream/aptos-hosted-txn-stream) is a stream layer we built that serves typed version of above data
[GraphQL](/build/indexer) is an endpoint where we provide product tables (such as transfers and balances) that can be queried
Product tables are parsed out from transaction and logic is [public](https://github.com/aptos-labs/aptos-indexer-processors-v2), some vendors have implemented similar parsing logic to create a subset of tables and made them available to query.
## SQL Tables
[](#sql-tables)
Indexer (the stack that powers our GraphQL endpoint) defines several processors that create different product tables in Postgres.
This type of data is often used for analytics since it allows for aggregations.
### Core tables
[](#core-tables)
These contain raw data very similar to what is found in REST API. Note that (transaction) version is often used instead of transaction hash.
* Blocks - version, block height, epoch, timestamp
* Transactions - version, type, sender, entry function, gas
* Signatures - signature types, signer, fee payer address
* Events - type and data for events
On chain data is stored as: [table items](/build/smart-contracts/table), [resources](/network/blockchain/resources) or [modules](/build/smart-contracts/modules-on-aptos) (executable)
* (write set) changes - change index, change type (write or delete on what type of data), resource address
* Table items - table key, table handle, decoded key (content and type), value (content and type)
* (move) resources - resource address, resource type, data
* (move) modules - bytecode for deployed modules, friends and exposed functions
## Vendors for core tables and metrics:
[](#vendors-for-core-tables-and-metrics)
We have a few options that will let you access this data using SQL or UIs for building dashboards.
### Google bigquery public dataset
[](#google-bigquery-public-dataset)
Provides data through [google public data](https://console.cloud.google.com/marketplace/product/bigquery-public-data/crypto-aptos-mainnet-us)
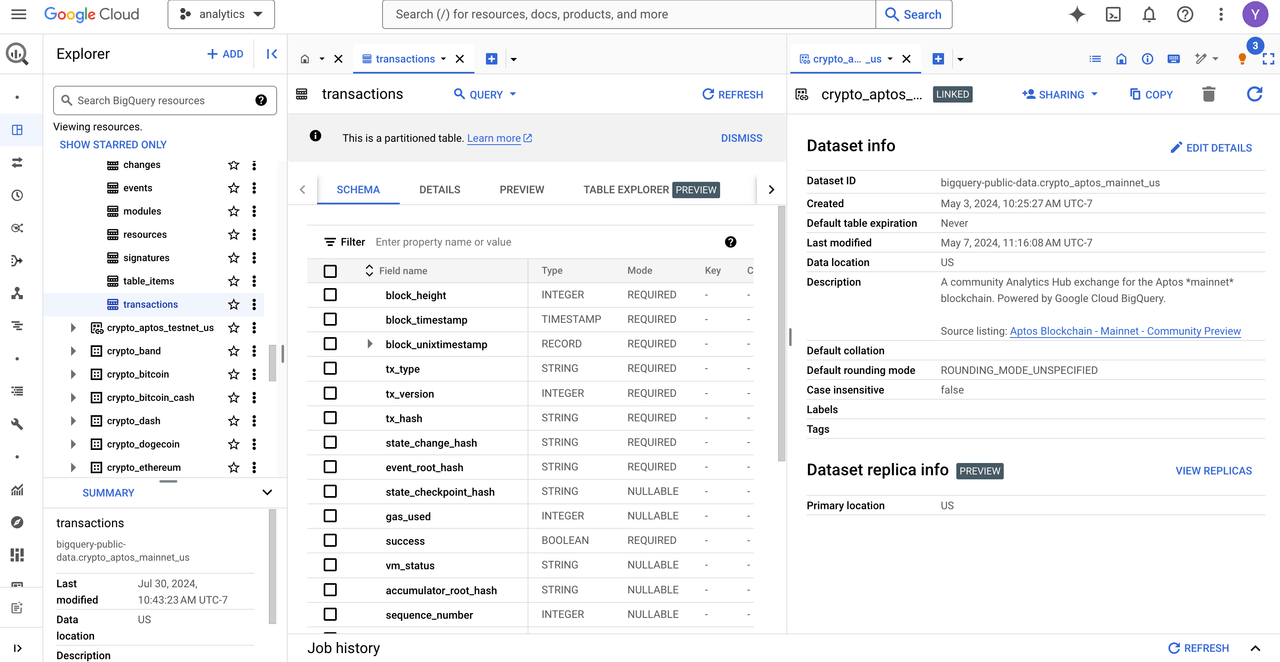
We also have sample analytics queries [using the above resources](https://github.com/aptos-labs/explorer/tree/main/analytics)
### Dune
[](#dune)
We have a dashboard here: [https://dune.com/aptos/aptos-chain-metrics-overview](https://dune.com/aptos/aptos-chain-metrics-overview)
### Allium
[](#allium)
Data source for many downstream vendors such as defillama and rwa.xyz. Raw data is available: [https://docs.allium.so/historical-data/supported-blockchains/move-ecosystem/aptos](https://docs.allium.so/historical-data/supported-blockchains/move-ecosystem/aptos) They also have transfers for stablecoins [https://docs.allium.so/historical-data/stablecoins#stablecoin-metrics](https://docs.allium.so/historical-data/stablecoins#stablecoin-metrics)
### Artemis
[](#artemis)
Provides [topline metrics](https://app.artemis.xyz/asset/aptos) as well as chart builder
### Nansen
[](#nansen)
Provides [topline metrics](https://app.nansen.ai/macro/blockchains?chain=aptos) with additional functionality with account.
### Sentio
[](#sentio)
They have a [guide](https://docs.sentio.xyz/docs/aptos) and data is found in data source -> external project -> sentio/aptos-overview They also provide [stack tracing](https://app.sentio.xyz/explorer) of transactions
### RWA.xyz
[](#rwaxyz)
High level metrics for RWAs in [dashboard](https://app.rwa.xyz/networks/aptos). You'll need to make an account to access stablecoin details.
### Pangea
[](#pangea)
Provides [raw data](https://docs.pangea.foundation/api-reference/aptosvm/reference), coin/fa transfers, and some dex parsing.
### Other vendors
[](#other-vendors)
We also have some partners who target more enterprise use cases
* [Token Terminal](https://tokenterminal.com/resources/articles/aptos-data-partnership)
* [The Tie](https://www.thetie.io/insights/news/introducing-aptos-ecosystem-dashboard-and-on-chain-data/)
* [Elliptic](https://www.elliptic.co/media-center/elliptic-partners-with-aptos-foundation-as-a-data-integration-provider-to-offer-compliance-screening-and-risk-services-for-aptos-network)
## Vendors for real-time data
[](#vendors-for-real-time-data)
* [Geomi](https://geomi.dev/) (prev. Aptos Build)
* Provides [API key](https://geomi.dev/docs/start) for higher rate limits on REST API and GRPC transaction stream.
* Provides [no code indexing](https://geomi.dev/docs/no-code-indexing) to parse and turn events into tables that can be queried.
* [NODEREAL](https://nodereal.io/aptos) for REST API endpoint
* [SHINAMI](https://docs.shinami.com/reference/api-references-overview) for REST API and GraphQL endpoints
* [QuickNode](https://www.quicknode.com/chains/apt) for REST API endpoint
Additional RPC vendors can be found [here](https://aptosnetwork.com/ecosystem/directory/category/rpc)
## Tips for analyzing data
[](#tips-for-analyzing-data)
* Aptos [data overview](https://medium.com/aptoslabs/data-analyst-guide-to-aptos-pt-1-816367edc1c5) (pt.1)
* Parsing [Defi Swaps](https://medium.com/aptoslabs/data-analyst-guide-to-aptos-defi-swaps-pt2-e343ac6be84e) (pt.2)
* Calculating [supply and volume](https://medium.com/aptoslabs/data-analyst-guide-to-aptos-supply-and-volume-pt-3-535e312946ad) (pt.3)
* [Aptos Explorer analytics queries](https://github.com/aptos-labs/explorer/tree/main/analytics)
* [Aptos Spellbook on Dune](https://github.com/duneanalytics/spellbook/tree/main/dbt_subprojects/daily_spellbook/models/aptos)
* Module bytecode can be decompiled with [Revela](https://revela.verichains.io/) or aptos cli with `aptos move decompile --decompiler-version v2`
# Faucet API
> Get free APT tokens on devnet and testnet for development and testing purposes using the faucet API
The faucet allows users to get `APT` on devnet. On testnet you can only mint at the [mint page](/network/faucet). It is not available on Mainnet.
The endpoints for each faucet are:
* Devnet: [https://faucet.devnet.aptoslabs.com](https://faucet.devnet.aptoslabs.com)
## Using the faucet
[](#using-the-faucet)
Each SDK has integration for devnet to use the faucet. Below are a few examples, but you can see more information on each individual [SDK's documentation](/build/sdks).
### Using the faucet in a wallet
[](#using-the-faucet-in-a-wallet)
Most wallets, such as [Petra](https://aptosnetwork.com/ecosystem/directory/petra), will have a faucet button for devnet. See full list of [Aptos Wallets](https://aptosnetwork.com/ecosystem/projects/wallets).
### Using the faucet in the Aptos CLI
[](#using-the-faucet-in-the-aptos-cli)
Once you've [set up your CLI](/build/cli/setup-cli), you can simply call fund-with-faucet. The amount used is in Octas (1 APT = 100,000,000 Octas).
```
aptos account fund-with-faucet --account 0xd0f523c9e73e6f3d68c16ae883a9febc616e484c4998a72d8899a1009e5a89d6 --amount 100000000
```
### Using the faucet in the TypeScript SDK
[](#using-the-faucet-in-the-typescript-sdk)
Here is an example funding the account `0xd0f523c9e73e6f3d68c16ae883a9febc616e484c4998a72d8899a1009e5a89d6` with 1 APT in Devnet. The amount used is in Octas (1 APT = 100,000,000 Octas).
```
import { Aptos, AptosConfig, Network } from "@aptos-labs/ts-sdk";
const aptos = new Aptos(new AptosConfig({network: Network.Devnet}));aptos.fundAccount({accountAddress: "0xd0f523c9e73e6f3d68c16ae883a9febc616e484c4998a72d8899a1009e5a89d6", amount: 100000000});
```
### Using the faucet in the Go SDK
[](#using-the-faucet-in-the-go-sdk)
Here is an example funding the account `0xd0f523c9e73e6f3d68c16ae883a9febc616e484c4998a72d8899a1009e5a89d6` with 1 APT in Devnet. The amount used is in Octas (1 APT = 100,000,000 Octas).
```
import "github.com/aptos-labs/aptos-go-sdk"
func main() { client, err := aptos.NewClient(aptos.LocalnetConfig) if err != nil { panic(err) }
client.Fund("0xd0f523c9e73e6f3d68c16ae883a9febc616e484c4998a72d8899a1009e5a89d6", 100000000)}
```
### Calling the faucet: Other languages not supported by SDKs
[](#calling-the-faucet-other-languages-not-supported-by-sdks)
If you are trying to call the faucet in other languages, you have two options:
1. Generate a client from the [OpenAPI spec](https://github.com/aptos-labs/aptos-core/blob/main/crates/aptos-faucet/doc/spec.yaml).
2. Call the faucet on your own.
For the latter, you will want to build a query similar to this:
```
curl -X POST'https://faucet.devnet.aptoslabs.com/mint?amount=10000&address=0xd0f523c9e73e6f3d68c16ae883a9febc616e484c4998a72d8899a1009e5a89d6'
```
This means mint 10000 [octas](/network/glossary#Octa) to address `0xd0f523c9e73e6f3d68c16ae883a9febc616e484c4998a72d8899a1009e5a89d6`.
# Fullnode REST API
> Low-level REST API for reading state, submitting transactions, and simulating operations on the Aptos blockchain
This API - embedded into Fullnodes - provides a simple, low latency, yet low-level way of reading state and submitting transactions to the Aptos Blockchain. It also supports transaction simulation. For more advanced queries, we recommend using the [Indexer GraphQL API](/build/indexer).
## Fullnode REST API Explorer
[](#fullnode-rest-api-explorer)
[Mainnet Fullnode REST API](https://fullnode.mainnet.aptoslabs.com/v1/spec#/) REST API Explorer for Mainnet
[Testnet Fullnode REST API](https://fullnode.testnet.aptoslabs.com/v1/spec#/) REST API Explorer for Testnet
[Devnet Fullnode REST API](https://fullnode.devnet.aptoslabs.com/v1/spec#/) REST API Explorer for Devnet
## Understanding rate limits
[](#understanding-rate-limits)
As with the [Aptos Indexer](/build/indexer/indexer-api), the Aptos REST API has rate limits based on compute units. You can learn more about how the ratelimiting works by reading the [Geomi docs](https://geomi.dev/docs/admin/billing).
## Viewing current and historical state
[](#viewing-current-and-historical-state)
Most integrations into the Aptos blockchain benefit from a holistic and comprehensive overview of the current and historical state of the blockchain. Aptos provides historical transactions, state, and events, all the result of transaction execution.
* Historical transactions specify the execution status, output, and tie to related events. Each transaction has a unique version number associated with it that dictates its global sequential ordering in the history of the blockchain ledger.
* The state is the representation of all transaction outputs up to a specific version. In other words, a state version is the accumulation of all transactions inclusive of that transaction version.
* As transactions execute, they may emit events. [Events](/network/blockchain/events) are hints about changes in on-chain data.
Note
Ensure the [fullnode](/network/nodes/networks) you are communicating with is up-to-date. The fullnode must reach the version containing your transaction to retrieve relevant data from it. There can be latency from the fullnodes retrieving state from [validator fullnodes](/network/blockchain/fullnodes), which in turn rely upon [validator nodes](/network/blockchain/validator-nodes) as the source of truth.
The storage service on a node employs two forms of pruning that erase data from nodes:
* state
* events, transactions, and everything else
While either of these may be disabled, storing the state versions is not particularly sustainable.
Events and transactions pruning can be disabled via setting the [`enable_ledger_pruner`](https://github.com/aptos-labs/aptos-core/blob/cf0bc2e4031a843cdc0c04e70b3f7cd92666afcf/config/src/config/storage_config.rs#L141) to `false` in `storage_config.rs`. This is default behavior in Mainnet. In the near future, Aptos will provide indexers that mitigate the need to directly query from a node.
The REST API offers querying transactions and events in these ways:
* [Transactions for an account](https://api.devnet.aptoslabs.com/v1/spec#/operations/get_account_transactions)
* [Transactions by version](https://api.devnet.aptoslabs.com/v1/spec#/operations/get_transaction_by_version)
* [Events by event handle](https://api.devnet.aptoslabs.com/v1/spec#/operations/get_events_by_event_handle)
## Reading state with the View function
[](#reading-state-with-the-view-function)
View functions do not modify blockchain state when called from the API. A [View function](https://github.com/aptos-labs/aptos-core/blob/main/api/src/view_function.rs) and its [input](https://github.com/aptos-labs/aptos-core/blob/main/api/types/src/view.rs) can be used to read potentially complex on-chain state using Move. For example, you can evaluate who has the highest bid in an auction contract. Here are related files:
* [`view_function.rs`](https://github.com/aptos-labs/aptos-core/blob/main/api/src/tests/view_function.rs) for an example
* related [Move](https://github.com/aptos-labs/aptos-core/blob/90c33dc7a18662839cd50f3b70baece0e2dbfc71/aptos-move/framework/aptos-framework/sources/coin.move#L226) code
* [specification](https://github.com/aptos-labs/aptos-core/blob/90c33dc7a18662839cd50f3b70baece0e2dbfc71/api/doc/spec.yaml#L8513).
The view function operates like the Aptos simulation API, though with no side effects and an accessible output path. View functions can be called via the `/view` endpoint. Calls to view functions require the module and function names along with input type parameters and values.
A function does not have to be immutable to be tagged as `#[view]`, but if the function is mutable it will not result in state mutation when called from the API. If you want to tag a mutable function as `#[view]`, consider making it private so that it cannot be maliciously called during runtime.
In order to use the View functions, you need to [publish the module](/build/cli/working-with-move-contracts) through the [Aptos CLI](/build/cli).
In the Aptos CLI, a view function request would look like this:
```
aptos move view --function-id devnet::message::get_message --profile devnet --args address:devnet{ "Result": [ "View functions rock!" ]}
```
In the TypeScript SDK, a view function request would look like this:
```
import { Aptos } from "@aptos-labs/ts-sdk";
const aptos = new Aptos();const [balance] = aptos.view<[string]>({ function: "0x1::coin::balance", typeArguments: ["0x1::aptos_coin::AptosCoin"], functionArguments: [alice.accountAddress]});
expect(balance).toBe("100000000");
```
The view function returns a list of values as a vector. By default, the results are returned in JSON format; however, they can be optionally returned in Binary Canonical Serialization (BCS) encoded format.
# Formatting Move Contracts
> Learn how to format and beautify Move smart contract code using the movefmt tool integrated into the Aptos CLI with configuration options.
`movefmt` is a formatter tool that makes Move code much easier to write, read, and maintain — greatly improving the development experience on Aptos.
## Installation
[](#installation)
`movefmt` is integrated into the Aptos CLI. To begin using it, first install it using the CLI update command.
```
# Install movefmt for first time usageaptos update movefmt
```
To install a specific version of `movefmt`:
```
# Install movefmt with the target aptos update movefmt --target-version
```
The latest release of `movefmt` can be found [here](https://github.com/movebit/movefmt/releases).
## Format your code
[](#format-your-code)
Similar to compilation and testing, you can use the following command to format the Move package:
```
# Format the Move packageaptos move fmt
```
Different ways of emitting the formatting result is supported:
```
# Format and overwrite all the target move files in the package.# This is the default behavior if `--emit-mode` is not explicitly specifiedaptos move fmt --emit-mode=overwrite
# Print the formatting result to terminalaptos move fmt --emit-mode=std-out
# Print the formatting result to new files with the suffix `.fmt.out` in the same directoryaptos move fmt --emit-mode=new-file
# Print the difference between before and after formattingaptos move fmt --emit-mode=diff
```
`movefmt` also provides different options to configure how the code will be formatted. Here is the default configuration:
```
max_width = 90 # each line can have at most 90 charactersindent_size = 4 # the indent is 4 spacestab_spaces = 4 # each tab is identical to 4 spaceshard_tabs = false # when a tab is inserted, it will be automatically replaced by 4 spaces
```
To override the default option, users can either specify a configuration file `movefmt.toml` and put it in Move package directory or manually specify it in the command line:
```
# When formatting the code, set `max_width` to 80 and `indent_size` to 2aptos move fmt --config max_width=80,indent_size=2
```
## Feedback
[](#feedback)
Aptos Labs remains committed to improving the developer experience for builders using Move on Aptos. If you’re interested in shaping the style guidelines for Move, we would love to hear your comments and feedback [here](https://github.com/movebit/movefmt/issues).
# Install Aptos CLI with ASDF or Mise
> Install the Aptos CLI or specific versions with the ASDF or Mise package managers.
If you're already using the ASDF or Mise package managers, you can install the Aptos CLI with the following steps.
## Install with ASDF
[](#install-with-asdf)
1. Check that you have [ASDF](https://asdf-vm.com/) installed.
2. Install the Aptos CLI plugin.
```
asdf plugin add aptos https://github.com/gregnazario/asdf-aptos.git
```
3. Install the Aptos CLI
```
asdf install aptos latest
```
4. (Optional) Install a specific version.
```
# Locallyasdf install aptos 7.9.0
# Globallyasdf global aptos 7.9.0
```
5. Verify the installation worked.
```
aptos help
```
These help instructions also serve as a useful detailed guide for specific commands.
## Install with Mise
[](#install-with-mise)
1. Check that you have [Mise](https://mise.jds.dev/) installed.
2. Install the Aptos CLI plugin.
```
mise plugin add aptos https://github.com/gregnazario/asdf-aptos.git
```
3. Install the Aptos CLI.
```
mise install aptos
```
4. (Optional) Install a specific version.
```
mise install aptos@7.9.0
```
5. Add the tool to your local configuration.
```
mise use aptos
```
6. Verify the installation worked.
```
aptos help
```
These help instructions also serve as a useful detailed guide for specific commands.
# Install the Aptos CLI on Linux
> Step-by-step instructions to install the Aptos CLI on Linux using shell scripts, package managers, or pre-compiled binaries with troubleshooting guidance.
For Linux, the easiest way to install the Aptos CLI tool is via shell script, although if that does not work, you can also install manually via downloading pre-compiled binaries. The pre-compiled binaries approach is not generally recommended as updating is very manual.
# Install via Script
[](#install-via-script)
1. In the terminal, use one of the following commands:
```
curl -fsSL "https://aptos.dev/scripts/install_cli.sh" | sh
```
Or use the equivalent `wget` command:
```
wget -qO- "https://aptos.dev/scripts/install_cli.sh" | sh
```
Caution
If you are getting `Illegal instruction` errors when running the CLI, it may be due to your CPU not supporting SIMD instructions. Specifically for older non-SIMD processors or Ubuntu x86\_64 docker containers on ARM Macs, you may need to run the following command instead to skip SIMD instructions:
```
curl -fsSL "https://aptos.dev/scripts/install_cli.sh" | sh -s -- --generic-linux
```
2. (Optional) It can be helpful to add the Aptos CLI to a folder in your PATH, or to add it to your PATH directly.
* The steps to add a folder to your PATH are shell dependent.
* You can run `echo $SHELL` to print the default shell for your machine, then google specific steps to add a folder to your PATH for that shell.
3. Verify the script is installed by opening a new terminal and running aptos help
* You should see a list of commands you can run using the CLI.
* In the future, this is a helpful resource to learn exactly how each command works.
Note
If you would like to update the Aptos CLI to the latest version, you can run `aptos update`.
# Install via Package Manager (Optional)
[](#install-via-package-manager-optional)
Note
When installing Aptos via a package manager, please update it through the same package manager in the future.
### Arch Linux
[](#arch-linux)
#### Install via AUR (Arch User Repository)
[](#install-via-aur-arch-user-repository)
```
git clone https://aur.archlinux.org/aptos-bin.gitcd aptos-binmakepkg -si
```
or use an AUR helper like `yay`:
```
yay -S aptos-bin
```
# Install via Pre-Compiled Binaries (Backup Method)
[](#install-via-pre-compiled-binaries-backup-method)
1. Go to the .
2. Click the "Assets" expandable menu for the latest release to see the pre-compiled binaries.
3. Download the zip file for Linux.
1. It’ll have a name like: `aptos-cli--Linux-x86_64.zip` or `aptos-cli--Linux-aarch64.zip`.
2. Make sure you choose the right zip file for your computer architecture (x86\_64 for Intel / AMD or aarch64 for ARM).
3. You will likely have to dismiss warnings that this is a suspicious file when downloading.
4. Unzip the downloaded file.
5. Move the extracted Aptos binary file into your preferred folder.
6. Open a terminal and navigate to your preferred folder.
7. Make ~/aptos an executable by running chmod +x ~/aptos.
8. Verify that this installed version works by running ~/aptos help.
You should see instructions for how to use all CLI commands. These can be helpful in the future when you are trying to understand how to use specific commands.
9. (Optional) It can be helpful to add the Aptos CLI to a folder in your PATH, or to add it to your PATH directly.
* The steps to add a folder to your PATH are shell dependent.
* You can run `echo $SHELL` to print the default shell for your machine, then google specific steps to add a folder to your PATH for that shell.
Note
When using the pre-compiled binaries method, you can update the Aptos CLI by deleting your existing installation, then following the installation steps again.
# Install the Aptos CLI on Mac
> Complete installation guide for the Aptos CLI on macOS using Homebrew, shell scripts, or pre-compiled binaries with upgrade instructions.
For Mac, the easiest way to install the Aptos CLI is with the package manager `brew`.
# Installation
[](#installation)
1. Ensure you have brew installed [https://brew.sh/](https://brew.sh/).
2. Open a new terminal and enter the following commands.
```
brew updatebrew install aptos
```
3. Open another terminal and run aptos help to verify the CLI is installed.
```
aptos help
```
Caution
If `brew` does not work for you, you can try the steps here: [Install via Script](#install-via-script) or [Install via Pre-Compiled Binaries](#install-via-pre-compiled-binaries-backup-method).)
# Upgrading the CLI
[](#upgrading-the-cli)
Upgrading the CLI with brew just takes 2 commands:
```
brew updatebrew upgrade aptos
```
# Install via Script
[](#install-via-script)
1. In the terminal, use one of the following commands:
```
curl -fsSL "https://aptos.dev/scripts/install_cli.sh" | sh
```
Or use the equivalent `wget` command:
```
wget -qO- "https://aptos.dev/scripts/install_cli.sh" | sh
```
2. (Optional) It can be helpful to add the Aptos CLI to a folder in your PATH, or to add it to your PATH directly.
* The steps to add a folder to your PATH are shell dependent.
* You can run `echo $SHELL` to print the default shell for your machine, then google specific steps to add a folder to your PATH for that shell.
3. Verify the script is installed by opening a new terminal and running aptos help
* You should see a list of commands you can run using the CLI.
* In the future, this is a helpful resource to learn exactly how each command works.
Note
If you would like to update the Aptos CLI to the latest version, you can run `aptos update`.
# Install via Pre-Compiled Binaries (Backup Method)
[](#install-via-pre-compiled-binaries-backup-method)
1. Go to the .
2. Click the "Assets" expandable menu for the latest release to see the pre-compiled binaries.
3. Download the zip file for macOS.
1. It’ll have a name like: `aptos-cli--macOS-x86_64.zip` or `aptos-cli--macOS-arm64.zip`.
2. Make sure you choose the right zip file for your computer architecture (x86\_64 for Intel / AMD or arm64 for ARM).
3. You will likely have to dismiss warnings that this is a suspicious file when downloading.
4. Unzip the downloaded file.
5. Move the extracted Aptos binary file into your preferred folder.
6. Open a terminal and navigate to your preferred folder.
7. Make ~/aptos an executable by running chmod +x ~/aptos.
8. Verify that this installed version works by running ~/aptos help.
You should see instructions for how to use all CLI commands. These can be helpful in the future when you are trying to understand how to use specific commands.
9. (Optional) It can be helpful to add the Aptos CLI to a folder in your PATH, or to add it to your PATH directly.
* The steps to add a folder to your PATH are shell dependent.
* You can run `echo $SHELL` to print the default shell for your machine, then google specific steps to add a folder to your PATH for that shell.
Note
When using the pre-compiled binaries method, you can update the Aptos CLI by deleting your existing installation, then following the installation steps again.
# Install Specific Aptos CLI Versions (Advanced)
> Advanced guide to build and install specific versions of the Aptos CLI from source code for specialized development needs and custom architectures.
# Using existing releases
[](#using-existing-releases)
## Using the Aptos CLI script
[](#using-the-aptos-cli-script)
If you are already using the installation script for Mac and Linux, you can install a specific version of the Aptos CLI using the following command:
```
curl -fsSL "https://aptos.dev/scripts/install_cli.sh" | sh -s -- --cli-version 7.9.0
```
## Using asdf
[](#using-asdf)
If you are already using [asdf](https://asdf-vm.com/), you can install a specific version of the Aptos CLI using the following command:
```
asdf install aptos 7.9.0
```
## Using mise
[](#using-mise)
If you are already using [mise](https://mise.jdx.dev), you can install a specific version of the Aptos CLI using the following command:
```
mise install aptos@7.9.0
```
# Installation from source code
[](#installation-from-source-code)
Note
This guide is for advanced users who need to build and install a specific version of the Aptos CLI.
If you are looking to install a specific version of the Aptos CLI, we suggest you use ASDF or Mise to handle it for you. You can see the installation guide [here](#Using-existing-releases)
If you need a specific version of the Aptos CLI, you can build it directly from the Aptos source code. This installation method is primarily used to interact with specific features on Devnet which may not have made it to Testnet / Mainnet yet. You may also want to follow these steps if you are running an architecture which does not play well with the existing releases / pre-compiled binaries.
If you do not need this advanced method, you can find the normal install steps [here](/build/cli).
## Install on macOS / Linux
[](#install-on-macos--linux)
1. Checkout the Aptos source code.
```
git clone https://github.com/aptos-labs/aptos-core.git
```
2. Ensure you have [cargo](https://doc.rust-lang.org/cargo/) installed.
3. Build the Aptos CLI:
```
cargo build --package aptos --profile cli
```
The binary will be available at `target/cli/aptos`.
4. (Optional) Move this executable to a place in your PATH.
5. Verify the installation worked.
```
target/cli/aptos help
```
These help instructions also serve as a useful detailed guide for specific commands.
## Install on Windows
[](#install-on-windows)
1. Checkout the Aptos source code.
```
git clone https://github.com/aptos-labs/aptos-core.git
```
2. Ensure you have [cargo](https://doc.rust-lang.org/cargo/) installed.
3. Build the Aptos CLI.
```
cargo build --package aptos --profile cli
```
The binary will be available at `target\cli\aptos.exe`.
4. (Optional) Move this executable to a place in your PATH.
5. Verify the installation worked.
```
target\cli\aptos.exe help
```
These help instructions also serve as a useful detailed guide for specific commands.
# Install the Aptos CLI on Windows
> Complete guide to install the Aptos CLI on Windows using PowerShell scripts, package managers, or pre-compiled binaries with troubleshooting tips.
For Windows, the easiest way to install the Aptos CLI tool is via PowerShell script. If that does not work, you can also install manually via pre-compiled binaries. The pre-compiled binaries approach is not generally recommended as updating is very manual.
# Install via PowerShell Script
[](#install-via-powershell-script)
1. In PowerShell, run the install script:
```
Set-ExecutionPolicy RemoteSigned -Scope CurrentUser; iwr https://aptos.dev/scripts/install_cli.ps1 | iex
```
2. Verify the script is installed by opening a new terminal and running aptos help.
* You should see a list of commands you can run using the CLI.
* In the future, this is a helpful resource to learn exactly how each command works.
Note
If you would like to update the Aptos CLI to the latest version via script, you can run `aptos update`.
# Install via Package Manager (Optional)
[](#install-via-package-manager-optional)
Note
When installing Aptos via a package manager, please update it through the same package manager in the future.
### If you have [Scoop](https://scoop.sh/) installed, you can run the following command to install the Aptos CLI:
[](#if-you-have-scoop-installed-you-can-run-the-following-command-to-install-the-aptos-cli)
```
scoop install https://aptos.dev/scoop/aptos.json
```
### If you have [Chocolatey](https://chocolatey.org/) installed, you can run the following command to install the Aptos CLI:
[](#if-you-have-chocolatey-installed-you-can-run-the-following-command-to-install-the-aptos-cli)
```
choco install aptos
```
### If you have [winget](https://winget.run/) installed, you can run the following command to install the Aptos CLI:
[](#if-you-have-winget-installed-you-can-run-the-following-command-to-install-the-aptos-cli)
```
winget install aptos
```
# Install via Pre-Compiled Binaries (Backup Method)
[](#install-via-pre-compiled-binaries-backup-method)
1. Go to the .
2. Expand "Assets" to see the pre-compiled binaries.
3. Download the zip file for Windows.
* It will have a name like: `aptos-cli--Windows-x86_64.zip`
* You will likely have to dismiss warnings that this is a suspicious file when downloading.
4. Unzip the downloaded file.
* Move the file to whichever folder you would like to call `aptos` from in the future.
5. Right click, then copy the path to the executable.
Ex. `C:\Users\\Downloads\aptos-cli-3.1.0-Windows-x86_64\aptos.exe`.
Note
You may want to add this path to your PATH environment variable to simplify calling the Aptos CLI going forward.
6. Open PowerShell via the Start Menu.
7. Verify the installation by running the help command.
Use the path you copied earlier to call the Aptos CLI. Ex. `C:\Users\\Downloads\aptos-cli-3.1.0-Windows-x86_64\aptos.exe help`.
Note
When installing with pre-compiled binaries, you can update the Aptos CLI by deleting your existing installation, then following the installation steps again.
Caution
If neither of the above methods work, you will have to build the CLI from source by following these steps: [Install Specific Aptos CLI Versions (Advanced)](/build/cli/install-cli/install-cli-specific-version)
# Managing a Network Node via Aptos CLI
> Learn how to manage validator nodes and validator full nodes using the Aptos CLI for staking pool operations and governance voting.
If you are running a [validator node or validator full node (VFN)](/network/nodes/validator-node), you can use the CLI to interact with your node.
Specifically, you can use the CLI to:
1. [Manage staking pools you own](/network/nodes/validator-node/connect-nodes/staking-pool-operations).
2. [Vote on proposals](/network/nodes/validator-node/connect-nodes/staking-pool-voter).
Beyond that, you can run this help command to see more specialized commands the CLI can do relating to operating your node:
```
aptos node --help
```
# Running a Public Network (Advanced)
> Advanced guide to bootstrap and run a public Aptos network using genesis ceremonies, validator configurations, and blockchain initialization.
Caution
If you just want to run your own local network for testing, you can learn how to do that [here](/build/cli/running-a-local-network).
## Genesis ceremonies
[](#genesis-ceremonies)
The `aptos` tool supports bootstrapping new blockchains through what is known as a genesis ceremony. The output of the genesis ceremony is the output of move instructions that prepares a blockchain for online operation. The input consists of:
* A set of validators and their configuration
* The initial set of Move modules, known as a framework
* A unique `ChainId` (u8) that distinguishes this from other networks
* For test chains, there also exists an account that manages the minting of AptosCoin
## Generating genesis
[](#generating-genesis)
* The genesis organizer constructs a `Layout` and distributes it.
* The genesis organizer prepares the Aptos framework's bytecode and distributes it.
* Each participant generates their `ValidatorConfiguration` and distributes it.
* Each participant generates a `genesis.blob` from the resulting contributions.
* The genesis organizer executes the `genesis.blob` to derive the initial waypoint and distributes it.
* Each participant begins their `aptos-node`. The `aptos-node` verifies upon startup that the `genesis.blob` with the waypoint provided by the genesis organizer.
* The blockchain will begin consensus after a quorum of stake is available.
### Prepare aptos-core
[](#prepare-aptos-core)
The following sections rely on tools from the Aptos source. See [Building Aptos From Source](/network/nodes/building-from-source) for setup.
### The `layout` file
[](#the-layout-file)
The layout file contains:
* `root_key`: an Ed25519 public key for AptosCoin management.
* `users`: the set of participants
* `chain_id`: the `ChainId` or a unique integer that distinguishes this deployment from other Aptos networks
An example:
```
root_key: "0xca3579457555c80fc7bb39964eb298c414fd60f81a2f8eedb0244ec07a26e575"users: - alice - bobchain_id: 8
```
### Building the Aptos Framework
[](#building-the-aptos-framework)
From your Aptos-core repository, build the framework and package it:
```
cargo run --package frameworkmkdir aptos-framework-releasecp aptos-framework/releases/artifacts/current/build/**/bytecode_modules/* aptos-framework-release
```
The framework will be stored within the `aptos-framework-release` directory.
### The `ValidatorConfiguration` file
[](#the-validatorconfiguration-file)
The `ValidatorConfiguration` file contains:
* `account_address`: The account that manages this validator. This must be derived from the `account_key` provided within the `ValidatorConfiguration` file.
* `consensus_key`: The public key for authenticating consensus messages from the validator
* `account_key`: The public key for the account that manages this validator. This is used to derive the `account_address`.
* `network_key`: The public key for both validator and fullnode network authentication and encryption.
* `validator_host`: The network address where the validator resides. This contains a `host` and `port` field. The `host` should either be a DNS name or an IP address. Currently only IPv4 is supported.
* `full_node_host`: An optional network address where the fullnode resides. This contains a `host` and `port` field. The `host` should either be a DNS name or an IP address. Currently only IPv4 is supported.
* `stake_amount`: The number of coins being staked by this node. This is expected to be `1`, if it is different the configuration will be considered invalid.
An example:
```
account_address: ccd49f3ea764365ac21e99f029ca63a9b0fbfab1c8d8d5482900e4fa32c5448aconsensus_key: "0xa05b8f41057ac72f9ca99f5e3b1b787930f03ba5e448661f2a1fac98371775ee"account_key: "0x3d15ab64c8b14c9aab95287fd0eb894aad0b4bd929a5581bcc8225b5688f053b"network_key: "0x43ce1a4ac031b98bb1ee4a5cd72a4cca0fd72933d64b22cef4f1a61895c2e544"validator_host: host: bobs_host port: 6180full_node_host: host: bobs_host port: 6182stake_amount: 1
```
To generate this using the `aptos` CLI:
1. Generate your validator's keys:
```
cargo run --package aptos -- genesis generate-keys --output-dir bobs
```
2. Generate your `ValidatorConfiguration`:
```
cargo run --package aptos -- \\ genesis set-validator-configuration \\ --keys-dir bobs \\ --username bob \\ --validator-host bobs_host:6180 \\ --full-node-host bobs_host:6180 \\ --local-repository-dir .
```
3. The last command will produce a `bob.yaml` file that should be distributed to other participants for `genesis.blob` generation.
### Generating a genesis and waypoint
[](#generating-a-genesis-and-waypoint)
`genesis.blob` and the waypoint can be generated after obtaining the `layout` file, each of the individual `ValidatorConfiguration` files, and the framework release. It is important to validate that the `ValidatorConfiguration` provided in the earlier stage is the same as in the distribution for generating the `genesis.blob`. If there is a mismatch, inform all participants.
To generate the `genesis.blob` and waypoint:
* Place the `layout` file in a directory, e.g., `genesis`.
* Place all the `ValidatorConfiguration` files into the `genesis` directory.
* Ensure that the `ValidatorConfiguration` files are listed under the set of `users` within the `layout` file.
* Make a `framework` directory within the `genesis` directory and place the framework release `.mv` files into the `framework` directory.
* Use the `aptos` CLI to generate genesis and waypoint:
```
cargo run --package aptos -- genesis generate-genesis --local-repository-dir genesis
```
### Starting an `aptos-node`
[](#starting-an-aptos-node)
Upon generating the `genesis.blob` and waypoint, place them into your validator and fullnode's configuration directory and begin your validator and fullnode.
# Replaying Past Transactions
> Learn how to replay historical blockchain transactions locally for debugging, benchmarking, and gas profiling using the Aptos CLI.
## Basics
[](#basics)
You can replay past transactions locally using the `aptos move replay` command. The command is fairly straightforward but it requires you to specify two pieces of required information:
* `--network`
* This is the network you want to replay on
* Possible values: `mainnet`, `testnet`, `devnet` or ``
* `--txn-id`
* This is the id of the transaction you want to replay
* This is also sometimes being referred to as `version` on explorers
* Specifically it is NOT the hexadecimal transaction hash
Let's use mainnet transaction [581400718](https://explorer.aptoslabs.com/txn/581400718?network=mainnet) (a simple coin transfer transaction) as an example.
```
aptos move replay --network mainnet --txn-id 581400718
```
Output
```
Got 1/1 txns from RestApi.Replaying transaction...{ "Result": { "transaction_hash": "0x1ba73d03a0442a845735a17c7be46f3b51e2acb0e5cf68749305c5a17539ac63", "gas_used": 7, "gas_unit_price": 100, "sender": "c94e16736910cc160347d01de345407fe2d350fce5635ac1150319b0fbf5630e", "sequence_number": 14637, "success": true, "version": 581400718, "vm_status": "status EXECUTED of type Execution" }}
```
Alternatively, if you want to simulate a new transaction, check out [Local Simulation, Benchmarking and Gas Profiling](/build/cli/working-with-move-contracts/local-simulation-benchmarking-and-gas-profiling).
## Alternate Modes
[](#alternate-modes)
Similar to local simulations, the replay command can be enhanced with one of the following options:
* `--benchmark`: Benchmark the transaction and report the running time(s).
* `--profile-gas` Profile the transaction for detailed gas usage.
### Benchmarking
[](#benchmarking)
```
aptos move replay --network mainnet --txn-id 581400718 --benchmark
```
Output
```
Got 1/1 txns from RestApi.Benchmarking transaction...Running time (cold code cache): 914.821µsRunning time (warm code cache): 820.189µs{ "Result": { "transaction_hash": "0x1ba73d03a0442a845735a17c7be46f3b51e2acb0e5cf68749305c5a17539ac63", "gas_used": 7, "gas_unit_price": 100, "sender": "c94e16736910cc160347d01de345407fe2d350fce5635ac1150319b0fbf5630e", "sequence_number": 14637, "success": true, "version": 581400718, "vm_status": "status EXECUTED of type Execution" }}
```
It's worth noting that these running times serve only as informational references, as they are contingent upon the specifications of your local machine and may be influenced by noise or other random factors.
**If you are aiming to optimize your contract, you should base your decisions on the gas profiling results.**
Note
To minimize measurement errors, the benchmark harness executes the same transaction multiple times. For this reason, it may take a while for the benchmark task to complete.
### Gas Profiling
[](#gas-profiling)
The Aptos Gas Profiler is a powerful tool that can help you understand the gas usage of Aptos transactions. Once activated, it will simulate transactions using an instrumented VM, and generate a web-based report.
The gas profiler can also double as a debugger since the report also includes a full execution trace.
```
aptos move replay --network mainnet --txn-id 581400718 --profile-gas
```
Output
```
Got 1/1 txns from RestApi.Profiling transaction...Gas report saved to gas-profiling/txn-1ba73d03-0x1-aptos_account-transfer.{ "Result": { "transaction_hash": "0x1ba73d03a0442a845735a17c7be46f3b51e2acb0e5cf68749305c5a17539ac63", "gas_used": 7, "gas_unit_price": 100, "sender": "c94e16736910cc160347d01de345407fe2d350fce5635ac1150319b0fbf5630e", "sequence_number": 14637, "success": true, "version": 581400718, "vm_status": "status EXECUTED of type Execution" }}
```
You can then find the [generated gas report](/gas-profiling/sample-report-2/index.html) in the directory gas-profiling:
* gas-profiling/
* txn-1ba73d03-0x1-aptos\_account-transfer/
* assets/
* …
* index.html
To understand the gas report, please refer to [this section](/build/cli/working-with-move-contracts/local-simulation-benchmarking-and-gas-profiling#understanding-the-gas-report) of the local simulation tutorial.
# Running a Localnet via Aptos CLI
> Set up and run a local Aptos network for testing and development with Docker, including Node API, Indexer API, and faucet services.
Local networks can be helpful when testing your code. They are not connected to any production Aptos networks like mainnet, but they are useful for three main reasons:
1. **No rate limits:** You can interact with hosted services like the Node API, Indexer API, and faucet with no rate-limits to speed up testing.
2. **Reproducibility:** You can set up specific on-chain scenarios and restart the network from scratch at any point to return to a clean slate.
3. **High availability**: The Aptos devnet and testnet networks are periodically upgraded, during which time they can be unavailable. Local development networks are also always available even if you have no internet access.
# Starting A Local Network
[](#starting-a-local-network)
1. Ensure you have the installed.
2. Ensure you have installed.
1. This is exclusively needed for making a production-like environment by running the Indexer API. Many downstream tools such as the Aptos SDK depend on the Indexer API.
2. Docker recommends that you install via [Docker Desktop](https://www.docker.com/products/docker-desktop/) to get automatic updates.
3. Start Docker.
4. Run the following command in a new terminal to start the private network:
```
aptos node run-local-testnet --with-indexer-api
```
Caution
Note: Despite the name (`local-testnet`), this has nothing to do with the Aptos testnet, it will run a network entirely local to your machine.
You should expect to see an output similar to this:
```
Readiness endpoint: http://0.0.0.0:8070/
Indexer API is starting, please wait...Node API is starting, please wait...Transaction stream is starting, please wait...Postgres is starting, please wait...Faucet is starting, please wait...
Completed generating configuration: Log file: "/Users/dport/.aptos/testnet/validator.log" Test dir: "/Users/dport/.aptos/testnet" Aptos root key path: "/Users/dport/.aptos/testnet/mint.key" Waypoint: 0:397412c0f96b10fa3daa24bfda962671c3c3ae484e2d67ed60534750e2311f3d ChainId: 4 REST API endpoint: http://0.0.0.0:8080 Metrics endpoint: http://0.0.0.0:9101/metrics Aptosnet fullnode network endpoint: /ip4/0.0.0.0/tcp/6181 Indexer gRPC node stream endpoint: 0.0.0.0:50051
Aptos is running, press ctrl-c to exit
Node API is ready. Endpoint: http://0.0.0.0:8080/Postgres is ready. Endpoint: postgres://postgres@127.0.0.1:5433/local_testnetTransaction stream is ready. Endpoint: http://0.0.0.0:50051/Indexer API is ready. Endpoint: http://127.0.0.1:8090Faucet is ready. Endpoint: http://127.0.0.1:8081/
Applying post startup steps...
Setup is complete, you can now use the local testnet!
```
5. Wait for the network to start
Once the terminal says `Setup is complete, you can now use the local testnet!` the local network will be running.
Caution
If you ran into an error, look at the common errors below to debug.
Common Errors On Network Startup
### Address Already In Use
[](#address-already-in-use)
```
panicked at 'error binding to 0.0.0.0:8080: error creating server listener: Address already in use (os error 48)'
```
This means one of the ports needed by the local network is already in use by another process.
To fix this on Unix systems, you can:
1. Identify the name and PID of the process by running `lsof -i :8080`.
2. Run `kill ` once you know the PID to free up that port.
### Too many open files error
[](#too-many-open-files-error)
```
panicked at crates/aptos/src/node/local_testnet/logging.rs:64:10:called \`Result::unwrap()\` on an \`Err\` value: Os { code: 24, kind: Uncategorized, message: \"Too many open files\" }
```
This means there were too many open files on your system. On many Unix systems you can increase the maximum number of open files by adding something like this to your `.zshrc`:
```
ulimit -n 1048576
```
### Docker is not available
[](#docker-is-not-available)
```
Unexpected error: Failed to apply pre-run steps for Postgres: Docker is not available, confirm it is installed and running. On Linux you may need to use sudo
```
To debug this, try the below fixes:
1. Make sure you have docker installed by running `docker --version`.
2. Ensure the Docker daemon is running by running `docker info` (if this errors saying `Cannot connect to the Docker daemon` Docker is NOT running).
3. Make sure the socket for connecting to Docker is present on your machine in the default location. For example, on Unix systems `/var/run/docker.sock` should exist.
1. If that file does not exist, open Docker Desktop and enable `Settings -> Advanced -> Allow the default Docker socket to be used`.
2. Or, you can find where the Docker socket is by running `docker context inspect | grep Host`, then symlink that location to the default location by running `sudo ln -s /Users/dport/.docker/run/docker.sock /var/run/docker.sock`
As you can see from the example output in step 4, once the local network is running, you have access to the following services:
* [Node API](/build/apis/fullnode-rest-api): This is a REST API that runs directly on the node. It enables core write functionality such as transaction submission and a limited set of read functionality, such as reading account resources or Move module information.
* [Indexer API](/build/indexer/indexer-api): This is a [GraphQL](https://graphql.org/) API that provides rich read access to indexed blockchain data. If you click on the URL for the Indexer API above, by default [http://127.0.0.1:8090](http://127.0.0.1:8090), it will open the Hasura Console, a web UI that will help you query the Indexer GraphQL API.
* [Transaction Stream Service](/build/indexer/txn-stream): This is a gRPC stream of transactions used by the Indexer API and SDK. This is only relevant to you if you are developing a [Indexer SDK](/build/indexer/indexer-sdk) custom processor.
* [Postgres](https://www.postgresql.org/): This is the database that the Indexer processors write to. The Indexer API reads from this database.
* [Faucet](/build/apis/faucet-api): You can use this to fund accounts on your local network.
If you do not want to run any of these sub-components of a network, there are flags to disable them.
If you are writing a script and would like to wait for the local network to come up with all services, you can make a GET request to `http://127.0.0.1:8070`. At first this will return http code [503](https://developer.mozilla.org/en-US/docs/Web/HTTP/Status/503). When it returns [200](https://developer.mozilla.org/en-US/docs/Web/HTTP/Status/200) it means all the services are ready.
For more information on different flags you can pass when starting your local network, or configuration settings such as changing which port certain services run on, run the help command:
```
aptos node run-local-testnet --help
```
## Using The Local Network
[](#using-the-local-network)
Now that the network is running, you can use it like you would any other network.
So, you can create a local profile like this:
```
aptos init --profile --network local
```
You can then use that profile for any commands you want to use going forward. For example, if you wanted to publish a Move module like the [`hello_blockchain`](https://github.com/aptos-labs/aptos-core/tree/main/aptos-move/move-examples/hello_blockchain) package to your local network you could run:
```
aptos move publish --profile --package-dir /opt/git/aptos-core/aptos-move/move-examples/hello_blockchain --named-addresses HelloBlockchain=local
```
### Configuring the TypeScript SDK
[](#configuring-the-typescript-sdk)
If you want to use the local network with the TypeScript SDK, you can use local network URLs when initializing the client object (`Aptos`):
```
import { Aptos, AptosConfig, Network } from "@aptos-labs/ts-sdk";
const network = Network.LOCAL;const config = new AptosConfig({ network });const client = new Aptos(config);
```
### Resetting the local network
[](#resetting-the-local-network)
Sometimes while developing it is helpful to reset the local network back to its initial state, for example:
* You made backwards incompatible changes to a Move module, and you'd like to redeploy it without renaming it or using a new account.
* You are building an [Indexer SDK](/build/indexer/indexer-sdk) custom processor and would like to index using a fresh network.
* You want to clear all on chain state, e.g., accounts, objects, etc.
To start with a brand new local network, use the `--force-restart` flag:
```
aptos node run-local-testnet --force-restart
```
It will then prompt you if you really want to restart the chain, to ensure that you do not delete your work by accident.
```
Are you sure you want to delete the existing chain? [yes/no]> yes
```
If you do not want to be prompted, include `--assume-yes` as well:
```
aptos node run-local-testnet --force-restart --assume-yes
```
# Setup CLI Initial Configuration
> Learn how to configure the Aptos CLI with network settings, profiles, and credentials for secure and efficient blockchain interactions.
If you are using the CLI to try things out on-chain, you will need to configure the network, faucet, and credentials you want the CLI to use.
This makes using the CLI easier and more secure as you will not be forced to repeatedly copy addresses or private keys.
Caution
If you still need to install the CLI, follow [these steps](/build/cli/install-cli/install-cli-specific-version).
1. Run `aptos init` and follow the instructions in the command line.
Note
To use default settings, you can provide no input and just press "Enter". For example:
```
aptos init
```
```
Configuring for profile defaultEnter your rest endpoint [Current: None | No input: https://api.devnet.aptoslabs.com]
No rest url given, using https://api.devnet.aptoslabs.com...Enter your faucet endpoint [Current: None | No input: https://faucet.devnet.aptoslabs.com]
No faucet url given, using https://faucet.devnet.aptoslabs.com...Enter your private key as a hex literal (0x...) [Current: None | No input: Generate new key (or keep one if present)]
No key given, generating key...Account 00f1f20ddd0b0dd2291b6e42c97274668c479bca70f07c6b6a80b99720779696 doesn't exist, creating it and funding it with 10000 coinsAptos is now set up for account 00f1f20ddd0b0dd2291b6e42c97274668c479bca70f07c6b6a80b99720779696! Run `aptos help` for more information about commands
{ "Result": "Success"}
```
2. Later, if you want to update these settings, you can do so by running `aptos init` again.
3. The rest of these configuration steps are optional / quality of life. To continue to use the CLI for your specific use case, follow the [usage guide here](/build/cli#%EF%B8%8F-using-the-aptos-cli).
## (Optional) Creating Named Configurations (Profiles)
[](#optional-creating-named-configurations-profiles)
For testing more complicated scenarios, you will often want multiple accounts on-chain. One way to do this is to create a named configuration which we call a profile.
To create a profile, run `aptos init --profile `. The configuration you generate will be usable when calling CLI commands as replacements for arguments.
For example:
```
aptos init --profile bob
```
```
aptos account fund-with-faucet --profile bob
```
```
{ "Result": "Added 100000000 Octas to account 0x63169727b08fc137b8720e451f7a90584ccce04c301e151daeadc7b8191fdfad"}
```
## (Optional) Setting Up Shell Completion
[](#optional-setting-up-shell-completion)
One quality of life feature you can enable is shell auto-completions.
1. Determine which shell you are using (you can run `echo $SHELL` if you are unsure).
2. Look up where configuration files for shell completions go for that shell (it varies from shell to shell). The supported shells are `[bash, zsh, fish, PowerShell, elvish]`.
3. Run the following command with your specific shell and the output file for completions using your shell:
```
aptos config generate-shell-completions --shell --output-file
```
Example command for [`oh my zsh`](https://ohmyz.sh/):
```
aptos config generate-shell-completions --shell zsh --output-file ~/.oh-my-zsh/completions/_aptos
```
## (Optional) Global Config
[](#optional-global-config)
By default, the CLI will look for a configuration in `.aptos/config.yaml` in each workspace directory. If you would like to use a shared configuration for all workspaces, you can follow these steps:
1. Create a folder in your home directory called `.aptos` (so it has the path `~/.aptos`).
2. Create a yaml file inside `.aptos` called `global_config.yaml`.
3. Run the command:
```
aptos config set-global-config --config-type global
```
You should see:
```
{ "Result": { "config_type": "Global" }}
```
# Install the Move Prover
> Step-by-step guide to install and set up the Move Prover dependencies for formal verification of Move smart contracts using the Aptos CLI.
If you want to use the [Move Prover](/build/smart-contracts/prover), install the Move Prover dependencies after [installing the CLI binary](/build/cli/setup-cli). There are two ways to install Prover dependencies.
## Installation through Aptos CLI (Recommended)
[](#installation-through-aptos-cli-recommended)
1. [Install the latest Aptos CLI binary](/build/cli/install-cli/install-cli-mac).
2. Execute the command `aptos update prover-dependencies`.
Note
Environment variables `BOOGIE_EXE` and `Z3_EXE` will be set automatically after installation. Please make sure they are in effect in the current environment.
## Installation through `aptos-core` (Not Recommended)
[](#installation-through-aptos-core-not-recommended)
1. See [Building Aptos From Source](/network/nodes/building-from-source)
2. Then, in the checked out aptos-core directory, install additional Move tools:
Linux / macOS
1. Open a Terminal session.
2. Run the dev setup script to prepare your environment: `./scripts/dev_setup.sh -yp`
3. Update your current shell environment: `source ~/.profile`
Note
`dev_setup.sh -p` updates your `~./profile` with environment variables to support the installed Move Prover tools. You may need to set `.bash_profile` or `.zprofile` or other setup files for your shell.
Windows
1. Open a PowerShell terminal as an administrator.
2. Run the dev setup script to prepare your environment: `PowerShell -ExecutionPolicy Bypass -File ./scripts/windows_dev_setup.ps1 -y`
After installation, you can run the Move Prover to prove an [example](https://github.com/aptos-labs/aptos-core/tree/main/aptos-move/move-examples/hello_prover):
```
aptos move prove --package-dir aptos-move/move-examples/hello_prover/
```
## Troubleshooting
[](#troubleshooting)
If you encounter errors like the one below when running the command, double-check your Aptos CLI version or verify that you're using the correct `aptos` tool, especially if you have multiple versions installed.
```
error: unexpected token ┌─ ~/.move/https___github_com_aptos-labs_aptos-core_git_main/aptos-move/framework/aptos-framework/sources/randomness.move:515:16 │515 │ for (i in 0..n) { │ - ^ Expected ')' │ │ │ To match this '('
{ "Error": "Move Prover failed: exiting with model building errors"}
```
# Start a Move package from a template
> Quickly bootstrap new Move projects using built-in templates with the Aptos CLI, including the hello-blockchain template and customization options.
Follow the steps below to quickly get started.
1. Initialize
Run the following to initialize a package using the `hello-blockchain` template:
```
aptos move init --name hello_blockchain --template hello-blockchain
```
2. Start building
The template creates a `hello_blockchain.move` file under `sources` to help get you started.
hello\_blockchain.move
```
module hello_blockchain::message { use std::error; use std::signer; use std::string; use aptos_framework::event; #[test_only] use std::debug;
//:!:>resource struct MessageHolder has key { message: string::String, } //<:!:resource
#[event] struct MessageChange has drop, store { account: address, from_message: string::String, to_message: string::String, }
/// There is no message present const ENO_MESSAGE: u64 = 0;
#[view] public fun get_message(addr: address): string::String acquires MessageHolder { assert!(exists(addr), error::not_found(ENO_MESSAGE)); borrow_global(addr).message }
public entry fun set_message(account: signer, message: string::String) acquires MessageHolder { let account_addr = signer::address_of(&account); if (!exists(account_addr)) { move_to(&account, MessageHolder { message, }) } else { let old_message_holder = borrow_global_mut(account_addr); let from_message = old_message_holder.message; event::emit(MessageChange { account: account_addr, from_message, to_message: copy message, }); old_message_holder.message = message; } }
#[test(account = @0x1)] public entry fun sender_can_set_message(account: signer) acquires MessageHolder { let msg: string::String = string::utf8(b"Running test for sender_can_set_message..."); debug::print(&msg);
let addr = signer::address_of(&account); aptos_framework::account::create_account_for_test(addr); set_message(account, string::utf8(b"Hello, Blockchain"));
assert!( get_message(addr) == string::utf8(b"Hello, Blockchain"), ENO_MESSAGE ); }}
```
3. See all templates
Run the following command to see all templates (and for general help initializing a package):
```
aptos move init --help
```
### Learn More
[](#learn-more)
[Smart Contracts](/build/smart-contracts) Learn how to build in Move
[Create Package](/build/smart-contracts/create-package) Get started by learning how to create a Move package
# Trying Things On-Chain With Aptos CLI
> Learn how to interact with the Aptos blockchain using CLI profiles, including account management, transaction sending, and hardware wallet integration.
The CLI can be a convenient tool for quickly looking up on-chain data and sending transactions from your accounts.
The most common way to specify what accounts you want to interact with is through profiles. You can create a new profile on the cli by running the following command:
```
aptos init --profile
```
If any command takes an account, you can pass in the name of a profile instead. If a command implicitly uses the default profile, it will usually have an optional parameter to use a specified profile instead which you can find by running `aptos --help`.
With that, the three main things you can use the CLI to do on-chain include:
1. [Looking Up On-Chain Account Info](/build/cli/trying-things-on-chain/looking-up-account-info)
2. [Creating test accounts and sending transactions](/build/cli/trying-things-on-chain/create-test-accounts)
3. [Securely interacting on-chain via a Hardware Ledger](/build/cli/trying-things-on-chain/ledger)
# Create Test Accounts and Send Transactions From Aptos CLI
> Learn how to create test accounts, fund them with faucet tokens, and send transactions between accounts using the Aptos CLI for testing and development.
Note
You can install the Aptos CLI by following [these steps](/build/cli) if you have not done so already.
In general, to make a new account on-chain, you will need to generate keys and then fund the account. On devnet, you can fund a new account by asking a "faucet" account with test Aptos tokens to send them to your account. On testnet you can mint at the [mint page](/network/faucet).
Using the CLI, you can generate and fund a test account using:
```
aptos init --profile
```
Once you have a funded account you can send coins between accounts with the `transfer` command like this:
```
aptos account transfer --account superuser --amount 100
```
You should see a result like:
```
{ "Result": { "gas_used": 73, "balance_changes": { "742854f7dca56ea6309b51e8cebb830b12623f9c9d76c72c3242e4cad353dedc": { "coin": { "value": "10100" }, "deposit_events": { "counter": "2", "guid": { "id": { "addr": "0x742854f7dca56ea6309b51e8cebb830b12623f9c9d76c72c3242e4cad353dedc", "creation_num": "1" } } }, "withdraw_events": { "counter": "0", "guid": { "id": { "addr": "0x742854f7dca56ea6309b51e8cebb830b12623f9c9d76c72c3242e4cad353dedc", "creation_num": "2" } } } }, "b9bd2cfa58ca29bce1d7add25fce5c62220604cd0236fe3f90d9de91ed9fb8cb": { "coin": { "value": "9827" }, "deposit_events": { "counter": "1", "guid": { "id": { "addr": "0xb9bd2cfa58ca29bce1d7add25fce5c62220604cd0236fe3f90d9de91ed9fb8cb", "creation_num": "1" } } }, "withdraw_events": { "counter": "1", "guid": { "id": { "addr": "0xb9bd2cfa58ca29bce1d7add25fce5c62220604cd0236fe3f90d9de91ed9fb8cb", "creation_num": "2" } } } } }, "sender": "b9bd2cfa58ca29bce1d7add25fce5c62220604cd0236fe3f90d9de91ed9fb8cb", "success": true, "version": 1139, "vm_status": "Executed successfully" }}
```
This can be useful for manual testing of Move contracts or just to try seeing how the chain works in practice.
Note
To have more control over what your generated credentials look like, instead of `aptos init`, you can use:
1. `aptos key generate --vanity-prefix 0x`
2. `aptos account fund-with-faucet --account `
Note however that addresses are different than keys.
# Use Hardware Ledger via the Aptos CLI
> Learn how to securely interact with the Aptos blockchain using hardware Ledger devices, including setup, key rotation, and transaction signing.
Using a hardware wallet like Ledger is the most secure way to sign transactions on `mainnet` as your private key never leaves your device.
Caution
The `Ledger Nano S` has limited memory and may not be able to sign many transactions on Aptos. If you are trying to sign a transaction that is too big for your device to handle, you will get the error `Wrong raw transaction length`.
## Initial Setup
[](#initial-setup)
You will need to do a few steps of configuration for the Aptos CLI and your Ledger device to sign transactions.
1. Ensure you have the Aptos CLI installed.
You can install the Aptos CLI by following [these steps](/build/cli) if you have not done so already.
2. Ensure you have done the basic setup for your Ledger device.
You can find those steps on [Ledger’s website](https://www.ledger.com/). For example, here are the set up instructions for the [Ledger Nano X](https://support.ledger.com/article/360018784134-zd).
3. Plug your Ledger device into your computer.
4. Install the Aptos App on your Ledger device by following .
5. Unlock your Ledger device and open the Aptos app.
Note
Whenever you want to sign using your Ledger you will need to plug it in, unlock it, and open the Aptos app before running any CLI commands.
6. Create a new Ledger profile in the Aptos CLI
```
aptos init --profile --ledger
```
Then follow the terminal prompts like so:
```
Configuring for profile Choose network from [devnet, testnet, mainnet, local, custom | defaults to devnet]
No network given, using devnet...Please choose an index from the following 5 ledger accounts, or choose an arbitrary index that you want to use:[0] Derivation path: m/44'/637'/0'/0'/0' (Address: 59836ba1dd0c845713bdab34346688d6f1dba290dbf677929f2fc20593ba0cfb)[1] Derivation path: m/44'/637'/1'/0'/0' (Address: 21563230cf6d69ee72a51d21920430d844ee48235e708edbafbc69708075a86e)[2] Derivation path: m/44'/637'/2'/0'/0' (Address: 667446181b3b980ef29f5145a7a2cc34d433fc3ee8c97fc044fd978435f2cb8d)[3] Derivation path: m/44'/637'/3'/0'/0' (Address: 2dcf037a9f31d93e202c074229a1b69ea8ee4d2f2d63323476001c65b0ec4f31)[4] Derivation path: m/44'/637'/4'/0'/0' (Address: 23c579a9bdde1a59f1c9d36d8d379aeefe7a5997b5b58bd5a5b0c12a4f170431)
0Account 59836ba1dd0c845713bdab34346688d6f1dba290dbf677929f2fc20593ba0cfb has been already found on-chain
---Aptos CLI is now set up for account 59836ba1dd0c845713bdab34346688d6f1dba290dbf677929f2fc20593ba0cfb as profile ! Run `aptos --help` for more information about commands{ "Result": "Success"}
```
In the example, they chose to use the first ledger account by entering `0` after the `aptos init` command. You may choose whichever account you want.
**Common errors:**
1. If you see the error `Device Not Found`, make sure to unlock your Ledger then try this step again.
2. If you see the error `Aptos ledger app is not opened`, make sure to open the Aptos app on your Ledger, then try this step again.
7. Finally, you will need to enable blind signing on your Ledger device by following .
1. Blind signing allows you to confirm a smart contract interaction you cannot verify through a human-readable language.
2. This is needed to execute transactions without limitation as some payloads are too big to display.
## Signing Using Ledger
[](#signing-using-ledger)
After doing the initial setup, you can sign transactions by following these steps:
1. Plug in your ledger.
2. Unlock it.
3. Open the Aptos app.
4. Run the Aptos CLI command which requires a signature.
Note
This process works for any command that requires a signature, whether that’s to transfer coins, publish a Move contract, interact with a contract, etc.
For example, if you wanted to publish a Move package like the [`hello_blockchain`](https://github.com/aptos-labs/aptos-core/tree/main/aptos-move/move-examples/hello_blockchain) demo contract you could follow the above steps then run:
```
aptos move publish --profile --named-addresses hello_blockchain=
```
You should see a response like:
```
Compiling, may take a little while to download git dependencies...INCLUDING DEPENDENCY AptosFrameworkINCLUDING DEPENDENCY AptosStdlibINCLUDING DEPENDENCY MoveStdlibBUILDING Examplespackage size 1755 bytesDo you want to submit a transaction for a range of [139600 - 209400] Octas at a gas unit price of 100 Octas? [yes/no] >
yes
{ "Result": { "transaction_hash": "0xd5a12594f85284cfd5518d547d084030b178ee926fa3d8cbf699cc0596eff538", "gas_used": 1396, "gas_unit_price": 100, "sender": "59836ba1dd0c845713bdab34346688d6f1dba290dbf677929f2fc20593ba0cfb", "sequence_number": 0, "success": true, "timestamp_us": 1689887104333038, "version": 126445, "vm_status": "Executed successfully" }}
```
After you have approved publishing this package you will be prompted to sign the transaction on your Ledger device. Once signed, the package will be published to the network!
One error you might run into is `Error: Wrong raw transaction length`. This means that the transaction or package size was too big for your device to sign. Currently the Aptos Ledger app can only support transactions that are smaller than 20kb. The `Ledger Nano S` device has less memory than that, which is why it is more likely to produce this error.
## Authentication key rotation
[](#authentication-key-rotation)
If you have an active account that is not secured using a hardware wallet, then you may wish to rotate the account's authentication key so that it corresponds to a [BIP44 account index](https://github.com/bitcoin/bips/blob/master/bip-0044.mediawiki) private key held on your Ledger.
Alternatively, if you have an account linked with a Ledger hardware wallet that you wish to publish a large package from, you might want to temporarily rotate the account's authentication key to a hot key to avoid memory issues.
This tutorial will walk you through both scenarios.
Caution
Before you start this tutorial make sure you have completed the [key rotation guide](/build/guides/key-rotation).
1. Complete the key rotation guide
Confirm that you have completed the [key rotation guide](/build/guides/key-rotation).
2. Verify your Ledger is ready
1. Connect and unlock your Ledger.
2. Check what version of the Aptos app you have: `Aptos > About > Version`.
3. If you do not have version `0.6.9` or higher, update it using Ledger Live.
4. Enable blind signing: `Aptos > Settings > Enable Blind Signing`.
3. Start a localnet
Start a localnet:
```
aptos node run-localnet
```
The localnet is ready when it prints out:
```
Applying post startup steps...
Setup is complete, you can now use the localnet!
```
Note
If you are a power user on MacOS or Linux, the following command can be used to start a fresh localnet as a background process:
```
mkdir -p localnet-dataaptos node run-localnet \ --assume-yes \ --test-dir localnet-data \ --force-restart &export LOCALNET_PID=$!
```
You can then stop the localnet at any point with the following command:
```
kill $LOCALNET_PID
```
4. Set up localnet hot wallet profile
Create a private key corresponding to an authentication key, and thus initial account address, that starts with the vanity prefix `0xaaa`:
```
aptos key generate \ --assume-yes \ --output-file private-key-a \ --vanity-prefix 0xaaa
```
Example output
```
{ "Result": { "PublicKey Path": "private-key-a.pub", "PrivateKey Path": "private-key-a", "Account Address:": "0xaaac71af5f2a4af4ec2639a15799bf9b945afb061c8bee102b636531c1b00eb5" }}
```
Use the private key to initialize a `hot-wallet-1` profile on the localnet:
```
aptos init \ --assume-yes \ --network local \ --private-key-file private-key-a \ --profile hot-wallet-1
```
Example output
```
Configuring for profile hot-wallet-1Configuring for network LocalUsing command line argument for private keyAccount 0xaaac71af5f2a4af4ec2639a15799bf9b945afb061c8bee102b636531c1b00eb5 doesn\'t exist, creating it and funding it with 100000000 OctasAccount 0xaaac71af5f2a4af4ec2639a15799bf9b945afb061c8bee102b636531c1b00eb5 funded successfully
---Aptos CLI is now set up for account 0xaaac71af5f2a4af4ec2639a15799bf9b945afb061c8bee102b636531c1b00eb5 as profile hot-wallet-1! Run `aptos --help` for more information about commands{ "Result": "Success"}
```
5. Rotate the hot wallet key
Rotate the authentication key of the hot wallet to use [BIP44 account index](https://github.com/bitcoin/bips/blob/master/bip-0044.mediawiki) 1000 on your Ledger:
```
aptos account rotate-key \ --assume-yes \ --new-derivation-index 1000 \ --profile hot-wallet-1 \ --save-to-profile ledger-wallet-1000
```
Note
As a best practice, this command uses a [BIP44 account index](https://github.com/bitcoin/bips/blob/master/bip-0044.mediawiki) that starts at a large number (1000) to indicate that the account is secured by a rotated authentication key on a Ledger, to ensure it does not conflict with any other existing accounts.
This practice aids in profile recovery, as shown below.
Follow the instructions from the CLI prompt:
```
Approve rotation proof challenge signature on your Ledger device
```
Example output
```
{ "Result": { "message": "Saved new profile ledger-wallet-1000", "transaction": { "transaction_hash": "0x1a6df99651ac170bda10cfb9898fa196321d80a928033791b9d2231f77738bb2", "gas_used": 448, "gas_unit_price": 100, "sender": "aaac71af5f2a4af4ec2639a15799bf9b945afb061c8bee102b636531c1b00eb5", "sequence_number": 0, "success": true, "timestamp_us": 1717986382369736, "version": 186, "vm_status": "Executed successfully" } }}
```
Compare the `hot-wallet-1` and `ledger-wallet-1000` profiles, noting that they have the same `account` address but different `public_key` values:
```
aptos config show-profiles --profile hot-wallet-1aptos config show-profiles --profile ledger-wallet-1000
```
Example output
```
{ "Result": { "hot-wallet-1": { "has_private_key": true, "public_key": "0xffb1240fd1267207cc3ed2e1b5386e090a9ca2c844d7f9e0077b3d7dd5d5e430", "account": "aaa271bca468fb8518f73a732a484b29a1bc296ebcb23f15639d4865a5cebe87", "rest_url": "http://localhost:8080", "faucet_url": "http://localhost:8081" } }}{ "Result": { "ledger-wallet-1000": { "has_private_key": false, "public_key": "0x20ba83f9b9fdab73b0ace8fda26ce24c98cf55060b72b69cfbd25add6a25d09b", "account": "aaa271bca468fb8518f73a732a484b29a1bc296ebcb23f15639d4865a5cebe87", "rest_url": "http://localhost:8080", "faucet_url": "http://localhost:8081" } }}
```
Since the account is no longer secured by the hot private key, delete the private and public key files.
Note
If you are using a UNIX-like machine:
```
rm private-key-arm private-key-brm private-key-a.pubrm private-key-b.pub
```
Now that you have successfully rotated the authentication key of the hot wallet, you can delete the profiles too:
```
aptos config delete-profile --profile hot-wallet-1aptos config delete-profile --profile ledger-wallet-1000
```
Example output
```
{ "Result": "Deleted profile hot-wallet-1"}{ "Result": "Deleted profile ledger-wallet-1000"}
```
6. Recover profile
Since you know that you rotated the authentication key of the hot wallet to the Ledger, and since you used the best practice of a [BIP44 account index](https://github.com/bitcoin/bips/blob/master/bip-0044.mediawiki) offset of 1000, you can easily recover the profile using the [BIP44 account index](https://github.com/bitcoin/bips/blob/master/bip-0044.mediawiki) alone:
```
aptos init \ --assume-yes \ --derivation-index 1000 \ --network local \ --profile ledger-wallet-1000-recovered
```
Example output
```
Configuring for profile ledger-wallet-1000-recoveredConfiguring for network LocalAccount 0xaaac71af5f2a4af4ec2639a15799bf9b945afb061c8bee102b636531c1b00eb5 has been already found onchain
---Aptos CLI is now set up for account 0xaaac71af5f2a4af4ec2639a15799bf9b945afb061c8bee102b636531c1b00eb5 as profile ledger-wallet-1000-recovered! Run `aptos --help` for more information about commands{ "Result": "Success"}
```
Note that this profile corresponds to the specified `0xaaa...` vanity account address:
```
aptos config show-profiles --profile ledger-wallet-1000-recovered
```
Example output
```
{ "Result": { "ledger-wallet-1000-recovered": { "has_private_key": false, "public_key": "0x20ba83f9b9fdab73b0ace8fda26ce24c98cf55060b72b69cfbd25add6a25d09b", "account": "aaac71af5f2a4af4ec2639a15799bf9b945afb061c8bee102b636531c1b00eb5", "rest_url": "http://localhost:8080", "faucet_url": "http://localhost:8081" } }}
```
Note
The `aptos init` command first checks the [`account::OriginatingAddress`](https://github.com/aptos-labs/aptos-core/blob/acb6c891cd42a63b3af96561a1aca164b800c7ee/aptos-move/framework/aptos-framework/sources/account.move#L70) table for determining the account address associated with a public key, so as long as you follow best practices from the [key rotation guide](/build/guides/key-rotation) and only authenticate one account at a time with a private key, you'll easily be able to recover your profile based on the [BIP44 account index](https://github.com/bitcoin/bips/blob/master/bip-0044.mediawiki) alone.
7. Rotate to new hot private key
If you have an account linked with a Ledger hardware wallet that you wish to use for publication of a large package, you'll be unable to sign the package publication transaction due to the Ledger's memory limitations. In this case, you'll want to temporarily rotate to a hot wallet.
Start by generating a new private key:
```
aptos key generate \ --assume-yes \ --output-file private-key-b \ --vanity-prefix 0xbbb
```
Example output
```
{ "Result": { "PublicKey Path": "private-key-b.pub", "PrivateKey Path": "private-key-b", "Account Address:": "0xbbbede2b4f1d49eff0b156ab0756889a6f2bb68f215399d5015da9ac45921b47" }}
```
Rotate the authentication key of the account linked with the Ledger to the new private key:
```
aptos account rotate-key \ --assume-yes \ --new-private-key-file private-key-b \ --profile ledger-wallet-1000-recovered \ --save-to-profile temporary-hot-wallet
```
Follow the instructions from the CLI prompt:
```
Approve rotation proof challenge signature on your Ledger device
```
```
Approve transaction on your Ledger device
```
Example output
```
{ "Result": { "message": "Saved new profile temporary-hot-wallet", "transaction": { "transaction_hash": "0xe49782e92d8fd824fd6dce8f6ed42a11cf8ee84c201f3aa639c435e737c80eaa", "gas_used": 449, "gas_unit_price": 100, "sender": "aaac71af5f2a4af4ec2639a15799bf9b945afb061c8bee102b636531c1b00eb5", "sequence_number": 1, "success": true, "timestamp_us": 1717986617911082, "version": 631, "vm_status": "Executed successfully" } }
```
Since the CLI profile `ledger-wallet-1000-recovered` is now stale, rename it in case you get interrupted and forget that the private key has been rotated:
```
aptos config rename-profile \ --profile ledger-wallet-1000-recovered \ --new-profile-name ledger-wallet-1000-stale
```
Example output
```
{ "Result": "Renamed profile ledger-wallet-1000-recovered to ledger-wallet-1000-stale"}
```
8. Rotate back to Ledger
Once you've signed the large package publication transaction with the hot key, you can then rotate the authentication key back to the corresponding to the private key on the Ledger at index 1000:
```
aptos account rotate-key \ --assume-yes \ --new-derivation-index 1000 \ --profile temporary-hot-wallet \ --save-to-profile ledger-wallet-1000
```
Follow the instructions from the CLI prompt:
```
Approve rotation proof challenge signature on your Ledger device
```
Example output
```
{ "Result": { "message": "Saved new profile ledger-wallet-1000", "transaction": { "transaction_hash": "0x9503819d4ea13bcd9eafed25984807d86d22e8a9837565a7495b54d13890d103", "gas_used": 449, "gas_unit_price": 100, "sender": "aaac71af5f2a4af4ec2639a15799bf9b945afb061c8bee102b636531c1b00eb5", "sequence_number": 2, "success": true, "timestamp_us": 1717986672963544, "version": 742, "vm_status": "Executed successfully" } }}
```
Verify that the `ledger-wallet-1000-stale` and `ledger-wallet-1000` profiles have the same `account` address and `public_key`:
```
aptos config show-profiles --profile ledger-wallet-1000-staleaptos config show-profiles --profile ledger-wallet-1000
```
Delete the `temporary-hot-wallet` and `ledger-wallet-1000-stale` profiles, which you no longer need.
```
aptos config delete-profile --profile temporary-hot-walletaptos config delete-profile --profile ledger-wallet-1000-stale
```
Example output
```
{ "Result": "Deleted profile temporary-hot-wallet"}{ "Result": "Deleted profile ledger-wallet-1000-stale"}
```
Since you no longer need the temporary private key, delete it too.
Note
If you are using a UNIX-like machine:
```
rm private-key-*
```
9. Clean up
Delete the remaining test profile:
```
aptos config delete-profile --profile ledger-wallet-1000
```
Then stop the localnet.
Note
If you are using a UNIX-like machine:
```
aptos config delete-profile --profile ledger-wallet-1000kill $LOCALNET_PIDrm -fr localnet-data
```
# Look Up On-Chain Account Info Using Aptos CLI
> Learn how to query on-chain account information including balances, resources, and Move modules using the Aptos CLI with detailed examples and output explanations.
Note
You can install the Aptos CLI by following [these steps](/build/cli) if you have not done so already.
You can look up resources and data an account has on-chain by running the following command:
```
aptos account list --account
```
This will show all resources that an account has. For example, below shows the balance as `coin:value`, and the associated coin for the native gas token APT would be `0x1::aptos_coin::AptosCoin`. This is represented in subdivisions, so in this case it's `10^-8` or 8 zeros of decimal points.
```
{ "Result": [ { "coin": { "value": "110000" }, "deposit_events": { "counter": "3", "guid": { "id": { "addr": "0xf1f20ddd0b0dd2291b6e42c97274668c479bca70f07c6b6a80b99720779696", "creation_num": "2" } } }, "frozen": false, "withdraw_events": { "counter": "0", "guid": { "id": { "addr": "0xf1f20ddd0b0dd2291b6e42c97274668c479bca70f07c6b6a80b99720779696", "creation_num": "3" } } } } ]}
```
If you’re interested in a specific type of account data, you can specify that with the `--query` parameter. The supported queries are:
* `balance` - to see the current balance and a list of deposit and withdrawal events.
* `modules` - see the Move contracts that are published on this account.
* `resources` - this is what the default command does with no query specified.
Here’s an example of what calling with the `--query modules` parameter looks like:
```
aptos account list --query modules
```
This will show all modules that an account has. For example:
```
{ "Result": [ { "bytecode": "0xa11ceb0b050000000b01000a020a12031c2504410405452d0772da0108cc0240068c030a0a9603150cab03650d90040400000101010201030104000506000006080004070700020e0401060100080001000009020300010f0404000410060100031107000002120709010602130a030106050806080105010802020c0a02000103040508020802070801010a0201060c010800010b0301090002070b030109000900074d657373616765056572726f72056576656e74067369676e657206737472696e67124d6573736167654368616e67654576656e740d4d657373616765486f6c64657206537472696e670b6765745f6d6573736167650b7365745f6d6573736167650c66726f6d5f6d6573736167650a746f5f6d657373616765076d657373616765156d6573736167655f6368616e67655f6576656e74730b4576656e7448616e646c65096e6f745f666f756e6404757466380a616464726573735f6f66106e65775f6576656e745f68616e646c650a656d69745f6576656e74b9bd2cfa58ca29bce1d7add25fce5c62220604cd0236fe3f90d9de91ed9fb8cb0000000000000000000000000000000000000000000000000000000000000001030800000000000000000002020a08020b08020102020c08020d0b030108000001000101030b0a002901030607001102270b002b0110001402010104010105240b0111030c040e0011040c020a02290120030b05120e000b040e00380012012d0105230b022a010c050a051000140c030a050f010b030a04120038010b040b050f0015020100010100", "abi": { "address": "0xb9bd2cfa58ca29bce1d7add25fce5c62220604cd0236fe3f90d9de91ed9fb8cb", "name": "Message", "friends": [], "exposed_functions": [ { "name": "get_message", "visibility": "public", "is_entry": false, "generic_type_params": [], "params": [ "address" ], "return": [ "0x1::string::String" ] }, { "name": "set_message", "visibility": "public", "is_entry": true, "generic_type_params": [], "params": [ "signer", "vector" ], "return": [] } ], "structs": [ { "name": "MessageChangeEvent", "is_native": false, "abilities": [ "drop", "store" ], "generic_type_params": [], "fields": [ { "name": "from_message", "type": "0x1::string::String" }, { "name": "to_message", "type": "0x1::string::String" } ] }, { "name": "MessageHolder", "is_native": false, "abilities": [ "key" ], "generic_type_params": [], "fields": [ { "name": "message", "type": "0x1::string::String" }, { "name": "message_change_events", "type": "0x1::event::EventHandle<0xb9bd2cfa58ca29bce1d7add25fce5c62220604cd0236fe3f90d9de91ed9fb8cb::Message::MessageChangeEvent>" } ] } ] } } ]}
```
# Working With Move Contracts
> Comprehensive guide to compile, test, publish, and run Move smart contracts using the Aptos CLI with examples and best practices.
The Aptos CLI is mostly used to compile, test, and formally verify Move contracts. If you have not installed the Aptos CLI yet, you can do so by following the steps here [Install the Aptos CLI](/build/cli#-install-the-aptos-cli).
You can jump to specific sections by using the table of contents on the right.
To see how to chain together Move contracts on-chain using the CLI, you can follow this ["CLI Arguments" tutorial](/build/cli/working-with-move-contracts/arguments-in-json-tutorial).
Note
Throughout this document there are parts of commands you will have to modify to fit your situation. Those variables will be wrapped in triangle brackets ``.
## 1\. Compiling Move
[](#1-compiling-move)
You can compile a Move package by running:
```
aptos move compile --package-dir
```
Note
The package directory is the folder which contains the `Move.toml` file.
Based on the settings in your `Move.toml` file, you may need to pass in additional information to that compile command.
For example, if you look at the [hello\_blockchain example Move contract](https://github.com/aptos-labs/aptos-core/tree/main/aptos-move/move-examples/hello_blockchain), in the `Move.toml` file it specifies a variable named address called `hello_blockchain`.
```
[addresses]hello_blockchain = "_"
```
So, to compile this, you will need to pass in the value for `hello_blockchain` with the `--named-addresses` parameter. You can use either a full address e.g. `0x123456...7890` or a name of a profile in the CLI e.g. `default` or `superuser`.
Below we will use `default` in our example:
```
aptos move compile --package-dir aptos-move/move-examples/hello_blockchain/ --named-addresses hello_blockchain=default
```
You can learn more about optional parameters when compiling Move contracts by running `aptos move compile --help`.
## 2\. Unit Testing Move Contracts
[](#2-unit-testing-move-contracts)
The Aptos CLI can also be used to compile and run unit tests locally by running:
```
aptos move test --package-dir
```
This command both compiles and runs tests, so it needs all the same optional parameters you use when compiling.
You can learn more about the optional parameters for testing move contracts by running `aptos move test --help`.
### Printing Debugging Information
[](#printing-debugging-information)
When writing tests, it can be helpful to print out debug information or stack traces. You can do that by using `debug::print` and `debug::print_stack_trace` to print information when you use `aptos move test`. See an example of how they are used in [DebugDemo.move](https://github.com/aptos-labs/aptos-core/blob/main/crates/aptos/debug-move-example/sources/DebugDemo.move).
To see the output of testing [DebugDemo.move](https://github.com/aptos-labs/aptos-core/blob/main/crates/aptos/debug-move-example/sources/DebugDemo.move)’s package:
1. Clone `[aptos-core](https://github.com/aptos-labs/aptos-core)`.
2. Navigate to the [debug-move-example](https://github.com/aptos-labs/aptos-core/tree/main/crates/aptos/debug-move-example) by running `cd crates/aptos/debug-move-example`.
3. Run `aptos move test`.
You should see:
```
Running Move unit tests[debug] 0000000000000000000000000000000000000000000000000000000000000001Call Stack: [0] 0000000000000000000000000000000000000000000000000000000000000001::Message::sender_can_set_message
Code: [4] CallGeneric(0) [5] MoveLoc(0) [6] LdConst(0) > [7] Call(1) [8] Ret
Locals: [0] - [1] 0000000000000000000000000000000000000000000000000000000000000001
Operand Stack:
```
For more on how to write unit tests with Move, follow this [Move tutorial](https://github.com/aptos-labs/aptos-core/tree/main/aptos-move/move-examples/move-tutorial) (step 2 focuses on unit tests).
## 3\. Generating Test Coverage Reports
[](#3-generating-test-coverage-reports)
The Aptos CLI can be used to analyze and improve the testing of your Move modules. To use this feature:
To see the code coverage of your tests run the following command from your Move package’s directory:
```
aptos move test --coverage
```
If you would like to focus your coverage down to specific packages, you can do so with the `--filter` option. To narrow even further to specific Move modules, use the `--module` parameter.
For more detailed / advanced coverage information (such as your test coverage in the compiled bytecode) you can run `aptos move coverage` . With that command, the CLI will prompt you for more details on what specifically you would like more coverage information about.
You can learn more about optional parameters for test coverage by running `aptos move test --help` and `aptos move coverage --help`.
## 4\. Publishing Move Contracts
[](#4-publishing-move-contracts)
To publish a Move contract, you will need to run:
```
aptos move publish --package-dir
```
Note that when you are publishing on the main network, the credentials you pass into optional parameters like `--named-addresses` will need to reflect accounts on that network instead of test credentials.
The package will be published to your default profile in the CLI. You can override that to specify which account to publish to using `--profile` in the command. To generate a new profile for a specific account, use `aptos init --profile ` and follow the prompts.
Please also note that when publishing Move modules, if multiple modules are in one package, then all modules in that package must use the same account. If they use different accounts, then the publishing will fail at the transaction level.
Note
By default, the CLI sends transactions to the remote fullnode for simulation.
To simulate locally, append the `--local` option to your command. You can also profile gas usage with the `--profile-gas` option.
See [Local Simulation, Benchmarking & Gas Profiling](/build/cli/working-with-move-contracts/local-simulation-benchmarking-and-gas-profiling) for details.
Caution
By default Move contracts publish their source code. To avoid publishing with source code, publish with the `--included-artifacts none` argument.
Since the Aptos blockchain is inherently open by design, note that even without source access it is possible to regenerate Move source from published Move bytecode.
## 5\. Running Published Contracts
[](#5-running-published-contracts)
Now that you have published your Move package, you can run it directly from the CLI.
You will first need to construct your `function-id` by combining:
```
::::
```
You can then pass in args by using the `--args` parameter.
As an example, if you were to have published the [hello\_blockchain example package](https://github.com/aptos-labs/aptos-core/tree/main/aptos-move/move-examples/hello_blockchain) to an account with an address `b9bd2cfa58ca29bce1d7add25fce5c62220604cd0236fe3f90d9de91ed9fb8cb` you could run its `set_message` function via the following command:
```
aptos move run --function-id 0xb9bd2cfa58ca29bce1d7add25fce5c62220604cd0236fe3f90d9de91ed9fb8cb::message::set_message --args string:hello!
```
Which should result in:
```
{ "Result": { "changes": [ { "address": "b9bd2cfa58ca29bce1d7add25fce5c62220604cd0236fe3f90d9de91ed9fb8cb", "data": { "authentication_key": "0xb9bd2cfa58ca29bce1d7add25fce5c62220604cd0236fe3f90d9de91ed9fb8cb", "self_address": "0xb9bd2cfa58ca29bce1d7add25fce5c62220604cd0236fe3f90d9de91ed9fb8cb", "sequence_number": "3" }, "event": "write_resource", "resource": "0x1::account::Account" }, { "address": "b9bd2cfa58ca29bce1d7add25fce5c62220604cd0236fe3f90d9de91ed9fb8cb", "data": { "coin": { "value": "9777" }, "deposit_events": { "counter": "1", "guid": { "id": { "addr": "0xb9bd2cfa58ca29bce1d7add25fce5c62220604cd0236fe3f90d9de91ed9fb8cb", "creation_num": "1" } } }, "withdraw_events": { "counter": "1", "guid": { "id": { "addr": "0xb9bd2cfa58ca29bce1d7add25fce5c62220604cd0236fe3f90d9de91ed9fb8cb", "creation_num": "2" } } } }, "event": "write_resource", "resource": "0x1::coin::CoinStore<0x1::aptos_coin::AptosCoin>" }, { "address": "b9bd2cfa58ca29bce1d7add25fce5c62220604cd0236fe3f90d9de91ed9fb8cb", "data": { "counter": "4" }, "event": "write_resource", "resource": "0x1::guid::Generator" }, { "address": "b9bd2cfa58ca29bce1d7add25fce5c62220604cd0236fe3f90d9de91ed9fb8cb", "data": { "message": "hello!", "message_change_events": { "counter": "0", "guid": { "id": { "addr": "0xb9bd2cfa58ca29bce1d7add25fce5c62220604cd0236fe3f90d9de91ed9fb8cb", "creation_num": "3" } } } }, "event": "write_resource", "resource": "0xb9bd2cfa58ca29bce1d7add25fce5c62220604cd0236fe3f90d9de91ed9fb8cb::Message::MessageHolder" } ], "gas_used": 41, "success": true, "version": 3488, "vm_status": "Executed successfully" }}
```
## 6\. (Optional) Formally Verifying Move Scripts
[](#6-optional-formally-verifying-move-scripts)
For cases where you want to guarantee that your code works as expected beyond unit testing, you can use the [Move Prover](/build/smart-contracts/prover) to formally verify your Move contract code.
You can install the Move Prover by following [these steps](/build/cli/setup-cli/install-move-prover).
Once you have installed the Move Prover, you can use it from the Aptos CLI by running:
```
aptos move prove --package-dir
```
To learn how to formally verify your code, please follow the in-depth Move tutorial [here](https://github.com/aptos-labs/aptos-core/tree/main/aptos-move/move-examples/move-tutorial) (step 7 and 8 cover how to use the Move Prover and write formal specifications in the example code).
# Arguments in JSON Tutorial
> Learn how to pass complex arguments to Move functions using JSON format in the Aptos CLI, including vectors, entry functions, view functions, and script functions.
## Package info
[](#package-info)
This section references the [`CliArgs` example package](https://github.com/aptos-labs/aptos-core/tree/main/aptos-move/move-examples/cli_args), which contains the following manifest:
```
[package]name = "CliArgs"version = "0.1.0"upgrade_policy = "compatible"
[addresses]test_account = "_"
[dependencies]AptosFramework = { git = "https://github.com/aptos-labs/aptos-framework.git", rev = "mainnet", subdir = "aptos-framework" }
```
Here, the package is deployed under the named address `test_account`.
Note
Set your working directory to [`aptos-move/move-examples/cli_args`](https://github.com/aptos-labs/aptos-core/tree/main/aptos-move/move-examples/cli_args) to follow along:
```
cd /aptos-core/aptos-move/move-examples/cli_args
```
## Deploying the package
[](#deploying-the-package)
Start by mining a vanity address for Ace, who will deploy the package:
```
aptos key generate \ --vanity-prefix 0xace \ --output-file ace.key
```
Output
```
{ "Result": { "Account Address:": "0xacef1b9b7d4ab208b99fed60746d18dcd74865edb7eb3c3f1428233988e4ba46", "PublicKey Path": "ace.key.pub", "PrivateKey Path": "ace.key" }}
```
Note
The exact account address should vary for each run, though the vanity prefix should not.
Store Ace's address in a shell variable, so you can call it inline later on:
```
# Your exact address will varyace_addr=0xacef1b9b7d4ab208b99fed60746d18dcd74865edb7eb3c3f1428233988e4ba46
```
Fund Ace's account with the faucet (only works on devnet):
```
aptos account fund-with-faucet --account $ace_addr
```
Output
```
{ "Result": "Added 100000000 Octas to account acef1b9b7d4ab208b99fed60746d18dcd74865edb7eb3c3f1428233988e4ba46"}
```
Now publish the package under Ace's account:
```
aptos move publish \ --named-addresses test_account=$ace_addr \ --private-key-file ace.key \ --assume-yes
```
Output
```
{ "Result": { "transaction_hash": "0x1d7b074dd95724c5459a1c30fe4cb3875e7b0478cc90c87c8e3f21381625bec1", "gas_used": 1294, "gas_unit_price": 100, "sender": "acef1b9b7d4ab208b99fed60746d18dcd74865edb7eb3c3f1428233988e4ba46", "sequence_number": 0, "success": true, "timestamp_us": 1685077849297587, "version": 528422121, "vm_status": "Executed successfully" }}
```
## Entry functions
[](#entry-functions)
The only module in the package, `cli_args.move`, defines a simple `Holder` resource with fields of various data types:
```
module test_account::cli_args { use std::signer; use aptos_std::type_info::{Self, TypeInfo}; use std::string::String;
struct Holder has key, drop { u8_solo: u8, bytes: vector, utf8_string: String, bool_vec: vector, address_vec_vec: vector>, type_info_1: TypeInfo, type_info_2: TypeInfo, }
```
A public entry function with multi-nested vectors can be used to set the fields:
```
/// Set values in a `Holder` under `account`.public entry fun set_vals( account: signer, u8_solo: u8, bytes: vector, utf8_string: String, bool_vec: vector, address_vec_vec: vector>,) acquires Holder { let account_addr = signer::address_of(&account); if (exists(account_addr)) { move_from(account_addr); }; move_to(&account, Holder { u8_solo, bytes, utf8_string, bool_vec, address_vec_vec, type_info_1: type_info::type_of(), type_info_2: type_info::type_of(), });}
```
After the package has been published, `aptos move run` can be used to call `set_vals()`:
Note
To pass vectors (including nested vectors) as arguments from the command line, use JSON syntax escaped with quotes!
```
aptos move run \ --function-id $ace_addr::cli_args::set_vals \ --type-args \ 0x1::account::Account \ 0x1::chain_id::ChainId \ --args \ u8:123 \ "hex:0x1234" \ "string:hello, world\! ♥" \ "bool:[false, true, false, false]" \ 'address:[["0xace", "0xbee"], ["0xcad"], []]' \ --private-key-file ace.key \ --assume-yes
```
Output
```
{ "Result": { "transaction_hash": "0x5e141dc6c28e86fa9f5594de93d07a014264ebadfb99be6db922a929eb1da24f", "gas_used": 504, "gas_unit_price": 100, "sender": "acef1b9b7d4ab208b99fed60746d18dcd74865edb7eb3c3f1428233988e4ba46", "sequence_number": 1, "success": true, "timestamp_us": 1685077888820037, "version": 528422422, "vm_status": "Executed successfully" }}
```
The function ID, type arguments, and arguments can alternatively be specified in a JSON file:
```
{ "function_id": "::cli_args::set_vals", "type_args": [ "0x1::account::Account", "0x1::chain_id::ChainId" ], "args": [ { "type": "u8", "value": 123 }, { "type": "hex", "value": "0x1234" }, { "type": "string", "value": "hello, world! ♥" }, { "type": "bool", "value": [ false, true, false, false ] }, { "type": "address", "value": [ [ "0xace", "0xbee" ], [ "0xcad" ], [] ] } ]}
```
Here, the call to `aptos move run` looks like:
```
aptos move run \ --json-file entry_function_arguments.json \ --private-key-file ace.key \ --assume-yes
```
Output
```
{ "Result": { "transaction_hash": "0x60a32315bb48bf6d31629332f6b1a3471dd0cb016fdee8d0bb7dcd0be9833e60", "gas_used": 3, "gas_unit_price": 100, "sender": "acef1b9b7d4ab208b99fed60746d18dcd74865edb7eb3c3f1428233988e4ba46", "sequence_number": 2, "success": true, "timestamp_us": 1685077961499641, "version": 528422965, "vm_status": "Executed successfully" }}
```
Note
If you are trying to run the example yourself don't forget to substitute Ace's actual address for `` in `entry_function_arguments.json`!
## View functions
[](#view-functions)
Once the values in a `Holder` have been set, the `reveal()` view function can be used to check the first three fields, and to compare type arguments against the last two fields:
```
struct RevealResult has drop { u8_solo: u8, bytes: vector, utf8_string: String, bool_vec: vector, address_vec_vec: vector>, type_info_1_match: bool, type_info_2_match: bool}
#[view]/// Pack into a `RevealResult` the first three fields in host's/// `Holder`, as well as two `bool` flags denoting if `T1` & `T2`/// respectively match `Holder.type_info_1` & `Holder.type_info_2`,/// then return the `RevealResult`.public fun reveal(host: address): RevealResult acquires Holder { let holder_ref = borrow_global(host); RevealResult { u8_solo: holder_ref.u8_solo, bytes: holder_ref.bytes, utf8_string: holder_ref.utf8_string, bool_vec: holder_ref.bool_vec, address_vec_vec: holder_ref.address_vec_vec, type_info_1_match: type_info::type_of() == holder_ref.type_info_1, type_info_2_match: type_info::type_of() == holder_ref.type_info_2 }}
```
This view function can be called with arguments specified either from the CLI or from a JSON file:
```
aptos move view \ --function-id $ace_addr::cli_args::reveal \ --type-args \ 0x1::account::Account \ 0x1::account::Account \ --args address:$ace_addr
```
```
aptos move view --json-file view_function_arguments.json
```
Note
If you are trying to run the example yourself don't forget to substitute Ace's actual address for `` in `view_function_arguments.json` (twice)!
```
{ "function_id": "::cli_args::reveal", "type_args": [ "0x1::account::Account", "0x1::account::Account" ], "args": [ { "type": "address", "value": "" } ]}
```
```
{ "Result": [ { "address_vec_vec": [ [ "0xace", "0xbee" ], [ "0xcad" ], [] ], "bool_vec": [ false, true, false, false ], "bytes": "0x1234", "type_info_1_match": true, "type_info_2_match": false, "u8_solo": 123, "utf8_string": "hello, world! ♥" } ]}
```
## Public structs and enums as arguments
[](#public-structs-and-enums-as-arguments)
_Since Move 2.4_
`public` structs and enums with the `copy` ability and without the `key` ability can be passed as entry and view function arguments via `--json-file`. The CLI fetches the module ABI from on-chain to validate field names and types, then BCS-encodes the value automatically.
### Struct arguments
[](#struct-arguments)
Represent a struct value as a JSON object with field names as keys:
```
{ "function_id": "0x42::shapes::move_to_point", "args": [ { "type": "address", "value": "0xace" }, { "type": "0x42::shapes::Point", "value": { "x": 10, "y": 20 } } ]}
```
Nested structs are supported — each nested struct field is itself a JSON object with its own field names:
```
{ "type": "0x42::shapes::Line", "value": { "start": { "x": 0, "y": 0 }, "end": { "x": 10, "y": 20 } }}
```
### Enum arguments
[](#enum-arguments)
Represent an enum value as a JSON object with the variant name as the single key. For variants with no fields, use an empty object as the value:
```
{ "type": "0x42::types::Direction", "value": { "North": {} }}
```
For variants with named fields, include the fields inside the variant object:
```
{ "type": "0x42::types::Shape", "value": { "Circle": { "radius": 10 } }}
```
### Vectors of structs or enums
[](#vectors-of-structs-or-enums)
Wrap the values in a JSON array:
```
{ "type": "vector<0x42::shapes::Point>", "value": [ { "x": 1, "y": 2 }, { "x": 3, "y": 4 } ]}
```
Then run with:
```
aptos move run \ --json-file entry_function_arguments.json \ --private-key-file ace.key \ --assume-yes
```
## Script functions
[](#script-functions)
The package also contains a script, `set_vals.move`, which is a wrapper for the setter function:
```
script { use test_account::cli_args; use std::vector; use std::string::String;
/// Get a `bool` vector where each element indicates `true` if the /// corresponding element in `u8_vec` is greater than `u8_solo`. /// Then pack `address_solo` in a `vector>` and /// pass resulting argument set to public entry function. fun set_vals( account: signer, u8_solo: u8, bytes: vector, utf8_string: String, u8_vec: vector, address_solo: address, ) { let bool_vec = vector::map_ref(&u8_vec, |e_ref| *e_ref > u8_solo); let addr_vec_vec = vector[vector[address_solo]]; cli_args::set_vals(account, u8_solo, bytes, utf8_string, bool_vec, addr_vec_vec); }}
```
First compile the package (this will compile the script):
```
aptos move compile --named-addresses test_account=$ace_addr
```
Output
```
{ "Result": [ "acef1b9b7d4ab208b99fed60746d18dcd74865edb7eb3c3f1428233988e4ba46::cli_args" ]}
```
Next, run `aptos move run-script`:
```
aptos move run-script \ --compiled-script-path build/CliArgs/bytecode_scripts/set_vals.mv \ --type-args \ 0x1::account::Account \ 0x1::chain_id::ChainId \ --args \ u8:123 \ "hex:0x1234" \ "string:hello, world\! ♥" \ "u8:[122, 123, 124, 125]" \ address:"0xace" \ --private-key-file ace.key \ --assume-yes
```
Output
```
{ "Result": { "transaction_hash": "0x1d644eba8187843cc43919469112339bc2c435a49a733ac813b7bc6c79770152", "gas_used": 3, "gas_unit_price": 100, "sender": "acef1b9b7d4ab208b99fed60746d18dcd74865edb7eb3c3f1428233988e4ba46", "sequence_number": 3, "success": true, "timestamp_us": 1685078415935612, "version": 528426413, "vm_status": "Executed successfully" }}
```
```
aptos move run-script \ --compiled-script-path build/CliArgs/bytecode_scripts/set_vals.mv \ --json-file script_function_arguments.json \ --private-key-file ace.key \ --assume-yes
```
Output
```
{ "Result": { "transaction_hash": "0x840e2d6a5ab80d5a570effb3665f775f1755e0fd8d76e52bfa7241aaade883d7", "gas_used": 3, "gas_unit_price": 100, "sender": "acef1b9b7d4ab208b99fed60746d18dcd74865edb7eb3c3f1428233988e4ba46", "sequence_number": 4, "success": true, "timestamp_us": 1685078516832128, "version": 528427132, "vm_status": "Executed successfully" }}
```
```
{ "type_args": [ "0x1::account::Account", "0x1::chain_id::ChainId" ], "args": [ { "type": "u8", "value": 123 }, { "type": "hex", "value": "0x1234" }, { "type": "string", "value": "hello, world! ♥" }, { "type": "u8", "value": [ 122, 123, 124, 125 ] }, { "type": "address", "value": "0xace" } ]}
```
Both such script function invocations result in the following `reveal()` view function output:
```
aptos move view \ --function-id $ace_addr::cli_args::reveal \ --type-args \ 0x1::account::Account \ 0x1::chain_id::ChainId \ --args address:$ace_addr
```
```
{ "Result": [ { "address_vec_vec": [["0xace"]], "bool_vec": [false, false, true, true], "bytes": "0x1234", "type_info_1_match": true, "type_info_2_match": true, "u8_solo": 123, "utf8_string": "hello, world! ♥" } ]}
```
Note
As of the time of this writing, the `aptos` CLI only supports script function arguments for vectors of type `u8`, and only up to a vector depth of 1. Hence `vector` and `vector>` are invalid script function argument types.
# Local Simulation, Benchmarking & Gas Profiling
> Learn how to simulate, benchmark, and profile gas usage of Move transactions locally using the Aptos CLI for performance optimization and debugging.
## Overview
[](#overview)
The previous tutorial demonstrates how you can deploy and interact with Move contracts using various CLI commands.
By default, those commands send a transaction to the remote fullnode for simulation and execution. You can override this behavior and simulate the transaction locally, by appending one of the following command line options of your preference:
* `--local`: Simulate the transaction locally without conducting any further measurements or analysis.
* `--benchmark`: Benchmark the transaction and report the running time(s).
* `--profile-gas`: Profile the transaction for detailed gas usage.
These additional options can be used in combination with the following CLI commands:
* `aptos move run`
* `aptos move run-script`
* `aptos move publish`
Alternatively, if you are interested in replaying a past transaction, check out [this tutorial](/build/cli/replay-past-transactions).
Note
Local simulations do not result in any to the on-chain state.
## Deploying the Example Contract
[](#deploying-the-example-contract)
For demonstration purposes, we will continue to use the [`hello_blockchain`](https://github.com/aptos-labs/aptos-core/tree/main/aptos-move/move-examples/hello_blockchain) package as an example.
First, publish the package to devnet or testnet (if you haven't done so already).
Change into the package directory.
```
cd aptos-move/move-examples/hello_blockchain
```
Then publish the package using the following command.
```
aptos move publish --named-addresses hello_blockchain=default --assume-yes
```
Output
```
{ "Result": { "transaction_hash": "0xe4ae0ec4ea3474b2123838885b04d7f4b046c174d14d7dc1c56916f2eb553bcf", "gas_used": 1118, "gas_unit_price": 100, "sender": "dbcbe741d003a7369d87ec8717afb5df425977106497052f96f4e236372f7dd5", "sequence_number": 5, "success": true, "timestamp_us": 1713914742422749, "version": 1033819503, "vm_status": "Executed successfully" }}
```
Notice that you do need to have your CLI profile set up properly and bind the named addresses correctly. Please refer to [CLI Configuration](/build/cli/setup-cli) for more details.
Note
Note: publishing the package to devnet/testnet is just one way to set up the stage for local simulation and is not the only one possible. Alternatively you can use a local node, or simulate transactions that do not need to have code published first, such as scripts and even the package publishing transaction itself.
## Local Simulation
[](#local-simulation)
Next, execute the entry function message::set\_message with local simulation enabled using the additional command line option `--local`. This will execute the transaction locally without conducting any further measurements or analysis.
```
aptos move run --function-id 'default::message::set_message' --args 'string:abc' --local
```
Output
```
Simulating transaction locally...{ "Result": { "transaction_hash": "0x5aab20980688185eed2c9a27bab624c84b8b8117241cd4a367ba2a012069f57b", "gas_used": 441, "gas_unit_price": 100, "sender": "dbcbe741d003a7369d87ec8717afb5df425977106497052f96f4e236372f7dd5", "success": true, "version": 1033887414, "vm_status": "status EXECUTED of type Execution" }}
```
Note
Local and remote simulation shall produce identical results.
## Benchmarking
[](#benchmarking)
To measure the running time(s) of your transaction, use the `--benchmark` option.
```
aptos move run --function-id 'default::message::set_message' --args 'string:abc' --benchmark
```
Output
```
Benchmarking transaction locally...Running time (cold code cache): 985.141µsRunning time (warm code cache): 848.159µs{ "Result": { "transaction_hash": "0xa2fe548d37f12ee79df13e70fdd8212e37074c1b080b89b7d92e82550684ecdb", "gas_used": 441, "gas_unit_price": 100, "sender": "dbcbe741d003a7369d87ec8717afb5df425977106497052f96f4e236372f7dd5", "success": true, "version": 1033936831, "vm_status": "status EXECUTED of type Execution" }}
```
It's worth noting that these running times serve only as informational references, as they are contingent upon the specifications of your local machine and may be influenced by noise or other random factors.
**If you are aiming to optimize your contract, you should base your decisions on the gas profiling results.**
Note
To minimize measurement errors, the benchmark harness executes the same transaction multiple times. For this reason, it may take a while for the benchmark task to complete.
## Gas Profiling
[](#gas-profiling)
The Aptos Gas Profiler is a powerful tool that can help you understand the gas usage of Aptos transactions. Once activated, it will simulate transactions using an instrumented VM, and generate a web-based report.
The gas profiler can also double as a debugger since the report also includes a full execution trace.
### Using the Gas Profiler
[](#using-the-gas-profiler)
The gas profiler can be invoked by appending the `--profile-gas` option.
```
aptos move run --function-id 'default::message::set_message' --args 'string:abc' --profile-gas
```
Output
```
Simulating transaction locally using the gas profiler...Gas report saved to gas-profiling/txn-d0bc3422-0xdbcb-message-set_message.{ "Result": { "transaction_hash": "0xd0bc342232f14a6a7d2d45251719aee45373bdb53f68403cfc6dc6062c74fa9e", "gas_used": 441, "gas_unit_price": 100, "sender": "dbcbe741d003a7369d87ec8717afb5df425977106497052f96f4e236372f7dd5", "success": true, "version": 1034003962, "vm_status": "status EXECUTED of type Execution" }}
```
You can then find the generated gas report in the directory `gas-profiling`:
* hello\_blockchain/
* Move.toml
* sources/
* …
* gas-profiling/
* txn-XXXXXXXX-0xXXXX-message-set\_message/
* assets/
* …
* index.html
`index.html` is the main page of the report, which can view using your web browser. [Sample report](/gas-profiling/sample-report-2/index.html)
### Understanding the Gas Report
[](#understanding-the-gas-report)
The gas report consists of three sections that help you to understand the gas usage through different lenses.
#### Flamegraphs
[](#flamegraphs)
The first section consists of visualization of the gas usage in the form of two flamegraphs: one for execution & IO, the other for storage. The reason why we need two graphs is that these are measured in different units: one in gas units, and the other in APT.
It is possible to interact with various elements in the graph. If you hover your cursor over an item, it will show you the precise cost and percentage. 
If you click on an item, you can zoom into it and see the child items more clearly. You can reset the view by clicking the "Reset Zoom" button in the top-left corner. 
There is also "Search" button in the top-right corner that allows to match certain items and highlight them. 
#### Cost Break-down
[](#cost-break-down)
The second section is a detailed break-down of all gas costs. Data presented in this section is categorized, aggregated and sorted. This can be especially helpful if you know what numbers to look at.
For example, the following tables show the execution costs of all Move bytecode instructions/operations. The percentage here is relative to the total cost of the belonging category (Exec + IO in this case).
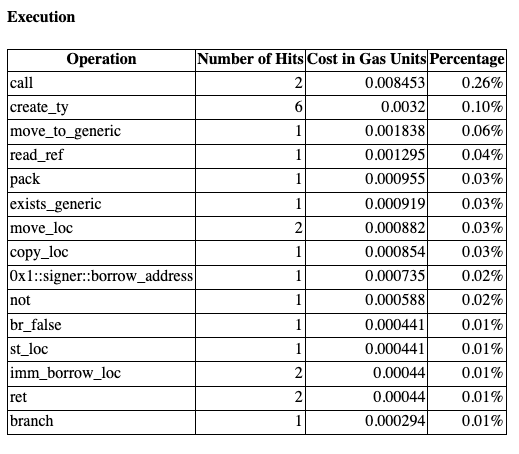
#### Full Execution Trace
[](#full-execution-trace)
The final section of the gas report is the full execution trace of the transaction that looks like this:
```
intrinsic 2.76 85.12% dependencies 0.0607 1.87% 0xdbcb..::message 0.0607 1.87% 0xdbcb..::message::set_message 0.32416 10.00% create_ty 0.0004 0.01% create_ty 0.0004 0.01% create_ty 0.0004 0.01% create_ty 0.0004 0.01% create_ty 0.0008 0.02% imm_borrow_loc 0.00022 0.01% call 0.00441 0.14% 0x1::signer::address_of 0.007534 0.23% create_ty 0.0008 0.02% move_loc 0.000441 0.01% call 0.004043 0.12% 0x1::signer::borrow_address 0.000735 0.02% read_ref 0.001295 0.04% ret 0.00022 0.01% st_loc 0.000441 0.01% copy_loc 0.000854 0.03% load<0xdbcb..::0xdbcb..::message::MessageHolder> 0.302385 9.33% exists_generic 0.000919 0.03% not 0.000588 0.02% br_false 0.000441 0.01% imm_borrow_loc 0.00022 0.01% move_loc 0.000441 0.01% pack 0.000955 0.03% move_to_generic 0.001838 0.06% branch 0.000294 0.01% @28 ret 0.00022 0.01% ledger writes 0.097756 3.01% transaction events state write ops 0.097756 3.01% create<0xdbcb..::0xdbcb..::message::MessageHolder> 0.097756 3.01%
```
The left column lists all Move instructions and operations being executed, with each level of indentation indicating a function call.
The middle column represents the gas costs associated with the operations.
There is also a special notation `@number` that represents a jump to a particular location in the byte code. (`@28` in the snippet above) This is purely informational and to help understand the control flow.
# Multisig Governance Tutorial
> Learn how to create and use multisig accounts for governance operations using the Aptos CLI with hands-on examples for transaction proposals and execution.
## Background
[](#background)
This section builds upon the [Arguments in JSON tutorial](/build/cli/working-with-move-contracts/arguments-in-json-tutorial). If you have not done that, please complete that tutorial first.
This tutorial likewise references the [`CliArgs` example package](https://github.com/aptos-labs/aptos-core/tree/main/aptos-move/move-examples/cli_args).
Note
If you would like to follow along, start by completing the [Arguments in JSON](/build/cli/working-with-move-contracts/arguments-in-json-tutorial) tutorial steps!
For this example, Ace and Bee will conduct governance operations from a 2-of-2 "multisig v2" account (an on-chain multisig account per [`multisig_account.move`](https://github.com/aptos-labs/aptos-core/blob/main/aptos-move/framework/aptos-framework/sources/multisig_account.move))
## Account creation
[](#account-creation)
Since Ace's account was created during the [Arguments in JSON](/build/cli/working-with-move-contracts/arguments-in-json-tutorial) tutorial, start by mining a vanity address account for Bee too:
```
aptos key generate \ --vanity-prefix 0xbee \ --output-file bee.key
```
Output
```
{ "Result": { "PublicKey Path": "bee.key.pub", "PrivateKey Path": "bee.key", "Account Address:": "0xbeec980219d246581cef5166dc6ba5fb1e090c7a7786a5176d111a9029b16ddc" }}
```
Note
The exact account address should vary for each run, though the vanity prefix should not.
Store Bee's address in a shell variable, so you can call it inline later on:
```
# Your exact address should varybee_addr=0xbeec980219d246581cef5166dc6ba5fb1e090c7a7786a5176d111a9029b16ddc
```
Fund Bee's account using the faucet:
```
aptos account fund-with-faucet --account $bee_addr
```
Output
```
{ "Result": "Added 100000000 Octas to account beec980219d246581cef5166dc6ba5fb1e090c7a7786a5176d111a9029b16ddc"}
```
Ace can now create a multisig account:
```
aptos multisig create \ --additional-owners $bee_addr \ --num-signatures-required 2 \ --private-key-file ace.key \ --assume-yes
```
Output
```
{ "Result": { "multisig_address": "57478da34604655c68b1dcb89e4f4a9124b6c0ecc1c59a0931d58cc4e60ac5c5", "transaction_hash": "0x849cc756de2d3b57210f5d32ae4b5e7d1f80e5d376233885944b6f3cc2124a05", "gas_used": 1524, "gas_unit_price": 100, "sender": "acef1b9b7d4ab208b99fed60746d18dcd74865edb7eb3c3f1428233988e4ba46", "sequence_number": 5, "success": true, "timestamp_us": 1685078644186194, "version": 528428043, "vm_status": "Executed successfully" }}
```
Store the multisig address in a shell variable:
```
# Your address should varymultisig_addr=0x57478da34604655c68b1dcb89e4f4a9124b6c0ecc1c59a0931d58cc4e60ac5c5
```
## Inspect the multisig
[](#inspect-the-multisig)
Use the assorted [`multisig_account.move` view functions](https://github.com/aptos-labs/aptos-core/blob/9fa0102c3e474d99ea35a0a85c6893604be41611/aptos-move/framework/aptos-framework/sources/multisig_account.move#L237) to inspect the multisig:
```
aptos move view \ --function-id 0x1::multisig_account::num_signatures_required \ --args \ address:"$multisig_addr"
```
Output
```
{ "Result": [ "2" ]}
```
```
aptos move view \ --function-id 0x1::multisig_account::owners \ --args \ address:"$multisig_addr"
```
Output
```
{ "Result": [ [ "0xbeec980219d246581cef5166dc6ba5fb1e090c7a7786a5176d111a9029b16ddc", "0xacef1b9b7d4ab208b99fed60746d18dcd74865edb7eb3c3f1428233988e4ba46" ] ]}
```
```
aptos move view \ --function-id 0x1::multisig_account::last_resolved_sequence_number \ --args \ address:"$multisig_addr"
```
Output
```
{ "Result": [ "0" ]}
```
```
aptos move view \ --function-id 0x1::multisig_account::next_sequence_number \ --args \ address:"$multisig_addr"
```
Output
```
{ "Result": [ "1" ]}
```
## Enqueue a publication transaction
[](#enqueue-a-publication-transaction)
The first multisig transaction enqueued will be a transaction for publication of the [`CliArgs` example package](https://github.com/aptos-labs/aptos-core/tree/main/aptos-move/move-examples/cli_args). First, generate a publication payload entry function JSON file:
```
aptos move build-publish-payload \ --named-addresses test_account=$multisig_addr \ --json-output-file publication.json \ --assume-yes
```
Output
```
{ "Result": "Publication payload entry function JSON file saved to publication.json"}
```
Now have Ace propose publication of the package from the multisig account, storing only the payload hash on-chain:
```
aptos multisig create-transaction \ --multisig-address $multisig_addr \ --json-file publication.json \ --store-hash-only \ --private-key-file ace.key \ --assume-yes
```
Output
```
{ "Result": { "transaction_hash": "0x70c75903f8e1b1c0069f1e84ef9583ad8000f24124b33a746c88d2b031f7fe2c", "gas_used": 510, "gas_unit_price": 100, "sender": "acef1b9b7d4ab208b99fed60746d18dcd74865edb7eb3c3f1428233988e4ba46", "sequence_number": 6, "success": true, "timestamp_us": 1685078836492390, "version": 528429447, "vm_status": "Executed successfully" }}
```
Note that the last resolved sequence number is still 0 because no transactions have been resolved:
```
aptos move view \ --function-id 0x1::multisig_account::last_resolved_sequence_number \ --args \ address:"$multisig_addr"
```
Output
```
{ "Result": [ "0" ]}
```
However, the next sequence number has been incremented because a transaction has been enqueued:
```
aptos move view \ --function-id 0x1::multisig_account::next_sequence_number \ --args \ address:"$multisig_addr"
```
Output
```
{ "Result": [ "2" ]}
```
The multisig transaction enqueued on-chain can now be inspected:
```
aptos move view \ --function-id 0x1::multisig_account::get_transaction \ --args \ address:"$multisig_addr" \ u64:1
```
Output
```
{ "Result": [ { "creation_time_secs": "1685078836", "creator": "0xacef1b9b7d4ab208b99fed60746d18dcd74865edb7eb3c3f1428233988e4ba46", "payload": { "vec": [] }, "payload_hash": { "vec": [ "0x62b91159c1428c1ef488c7290771de458464bd665691d9653d195bc28e0d2080" ] }, "votes": { "data": [ { "key": "0xacef1b9b7d4ab208b99fed60746d18dcd74865edb7eb3c3f1428233988e4ba46", "value": true } ] } } ]}
```
Note from the above result that no payload is stored on-chain, and that Ace implicitly approved the transaction (voted `true`) upon the submission of the proposal.
## Enqueue a governance parameter transaction
[](#enqueue-a-governance-parameter-transaction)
Now have Bee enqueue a governance parameter setter transaction, storing the entire transaction payload on-chain:
```
aptos multisig create-transaction \ --multisig-address $multisig_addr \ --function-id $multisig_addr::cli_args::set_vals \ --type-args \ 0x1::account::Account \ 0x1::chain_id::ChainId \ --args \ u8:123 \ "bool:[false, true, false, false]" \ 'address:[["0xace", "0xbee"], ["0xcad"], []]' \ --private-key-file bee.key \ --assume-yes
```
Output
```
{ "Result": { "transaction_hash": "0xd0a348072d5bfc5a2e5d444f92f0ecc10b978dad720b174303bc6d91342f27ec", "gas_used": 511, "gas_unit_price": 100, "sender": "beec980219d246581cef5166dc6ba5fb1e090c7a7786a5176d111a9029b16ddc", "sequence_number": 0, "success": true, "timestamp_us": 1685078954841650, "version": 528430315, "vm_status": "Executed successfully" }}
```
Note the next sequence number has been incremented again:
```
aptos move view \ --function-id 0x1::multisig_account::next_sequence_number \ --args \ address:"$multisig_addr"
```
Output
```
{ "Result": [ "3" ]}
```
Now both the publication and parameter transactions are pending:
```
aptos move view \ --function-id 0x1::multisig_account::get_pending_transactions \ --args \ address:"$multisig_addr"
```
Output
```
{ "Result": [ [ { "creation_time_secs": "1685078836", "creator": "0xacef1b9b7d4ab208b99fed60746d18dcd74865edb7eb3c3f1428233988e4ba46", "payload": { "vec": [] }, "payload_hash": { "vec": [ "0x62b91159c1428c1ef488c7290771de458464bd665691d9653d195bc28e0d2080" ] }, "votes": { "data": [ { "key": "0xacef1b9b7d4ab208b99fed60746d18dcd74865edb7eb3c3f1428233988e4ba46", "value": true } ] } }, { "creation_time_secs": "1685078954", "creator": "0xbeec980219d246581cef5166dc6ba5fb1e090c7a7786a5176d111a9029b16ddc", "payload": { "vec": [ "0x0057478da34604655c68b1dcb89e4f4a9124b6c0ecc1c59a0931d58cc4e60ac5c508636c695f61726773087365745f76616c7302070000000000000000000000000000000000000000000000000000000000000001076163636f756e74074163636f756e740007000000000000000000000000000000000000000000000000000000000000000108636861696e5f696407436861696e49640003017b0504000100006403020000000000000000000000000000000000000000000000000000000000000ace0000000000000000000000000000000000000000000000000000000000000bee010000000000000000000000000000000000000000000000000000000000000cad00" ] }, "payload_hash": { "vec": [] }, "votes": { "data": [ { "key": "0xbeec980219d246581cef5166dc6ba5fb1e090c7a7786a5176d111a9029b16ddc", "value": true } ] } } ] ]}
```
## Execute the publication transaction
[](#execute-the-publication-transaction)
Since only Ace has voted on the publication transaction (which he implicitly approved upon proposing) the transaction can't be executed yet:
```
aptos move view \ --function-id 0x1::multisig_account::can_be_executed \ --args \ address:"$multisig_addr" \ u64:1
```
Output
```
{ "Result": [ false ]}
```
Before Bee votes, however, she verifies that the payload hash stored on-chain matches the publication entry function JSON file:
```
aptos multisig verify-proposal \ --multisig-address $multisig_addr \ --json-file publication.json \ --sequence-number 1
```
Output
```
{ "Result": { "Status": "Transaction match", "Multisig transaction": { "creation_time_secs": "1685078836", "creator": "0xacef1b9b7d4ab208b99fed60746d18dcd74865edb7eb3c3f1428233988e4ba46", "payload": { "vec": [] }, "payload_hash": { "vec": [ "0x62b91159c1428c1ef488c7290771de458464bd665691d9653d195bc28e0d2080" ] }, "votes": { "data": [ { "key": "0xacef1b9b7d4ab208b99fed60746d18dcd74865edb7eb3c3f1428233988e4ba46", "value": true } ] } } }}
```
Since Bee has verified that the on-chain payload hash checks out against her locally-compiled package publication JSON file, she votes yes:
```
aptos multisig approve \ --multisig-address $multisig_addr \ --sequence-number 1 \ --private-key-file bee.key \ --assume-yes
```
Output
```
{ "Result": { "transaction_hash": "0xa5fb49f1077de6aa6d976e6bcc05e4c50c6cd061f1c87e8f1ea74e7a04a06bd1", "gas_used": 6, "gas_unit_price": 100, "sender": "beec980219d246581cef5166dc6ba5fb1e090c7a7786a5176d111a9029b16ddc", "sequence_number": 1, "success": true, "timestamp_us": 1685079892130861, "version": 528437204, "vm_status": "Executed successfully" }}
```
Now the transaction can be executed:
```
aptos move view \ --function-id 0x1::multisig_account::can_be_executed \ --args \ address:"$multisig_addr" \ u64:1
```
Output
```
{ "Result": [ true ]}
```
Now either Ace or Bee can invoke the publication transaction from the multisig account, passing the full transaction payload since only the hash was stored on-chain:
```
aptos multisig execute-with-payload \ --multisig-address $multisig_addr \ --json-file publication.json \ --private-key-file bee.key \ --max-gas 10000 \ --assume-yes
```
Note
Pending the resolution of [#8304](https://github.com/aptos-labs/aptos-core/issues/8304), the transaction simulator (which is used to estimate gas costs) is broken for multisig transactions, so you will have to manually specify a max gas amount.
Output
Also pending the resolution of [#8304](https://github.com/aptos-labs/aptos-core/issues/8304), the CLI output for a successful multisig publication transaction execution results in an API error if only the payload hash has been stored on-chain, but the transaction can be manually verified using an explorer.
## Execute the governance parameter transaction
[](#execute-the-governance-parameter-transaction)
Since only Bee has voted on the governance parameter transaction (which she implicitly approved upon proposing), the transaction can't be executed yet:
```
aptos move view \ --function-id 0x1::multisig_account::can_be_executed \ --args \ address:"$multisig_addr" \ u64:2
```
Output
```
{ "Result": [ false ]}
```
Before Ace votes, however, he verifies that the payload stored on-chain matches the function arguments he expects:
```
aptos multisig verify-proposal \ --multisig-address $multisig_addr \ --function-id $multisig_addr::cli_args::set_vals \ --type-args \ 0x1::account::Account \ 0x1::chain_id::ChainId \ --args \ u8:123 \ "bool:[false, true, false, false]" \ 'address:[["0xace", "0xbee"], ["0xcad"], []]' \ --sequence-number 2
```
Output
```
{ "Result": { "Status": "Transaction match", "Multisig transaction": { "creation_time_secs": "1685078954", "creator": "0xbeec980219d246581cef5166dc6ba5fb1e090c7a7786a5176d111a9029b16ddc", "payload": { "vec": [ "0x0057478da34604655c68b1dcb89e4f4a9124b6c0ecc1c59a0931d58cc4e60ac5c508636c695f61726773087365745f76616c7302070000000000000000000000000000000000000000000000000000000000000001076163636f756e74074163636f756e740007000000000000000000000000000000000000000000000000000000000000000108636861696e5f696407436861696e49640003017b0504000100006403020000000000000000000000000000000000000000000000000000000000000ace0000000000000000000000000000000000000000000000000000000000000bee010000000000000000000000000000000000000000000000000000000000000cad00" ] }, "payload_hash": { "vec": [] }, "votes": { "data": [ { "key": "0xbeec980219d246581cef5166dc6ba5fb1e090c7a7786a5176d111a9029b16ddc", "value": true } ] } } }}
```
Note that the verification fails if he modifies even a single argument:
```
aptos multisig verify-proposal \ --multisig-address $multisig_addr \ --function-id $multisig_addr::cli_args::set_vals \ --type-args \ 0x1::account::Account \ 0x1::chain_id::ChainId \ --args \ u8:200 \ "bool:[false, true, false, false]" \ 'address:[["0xace", "0xbee"], ["0xcad"], []]' \ --sequence-number 2
```
Output
```
{ "Error": "Unexpected error: Transaction mismatch: The transaction you provided has a payload hash of 0xe494b0072d6f940317344967cf0e818c80082375833708c773b0275f3ad07e51, but the on-chain transaction proposal you specified has a payload hash of 0x070ed7c3f812f25f585461305d507b96a4e756f784e01c8c59901871267a1580. For more info, see https://aptos.dev/move/move-on-aptos/cli#multisig-governance"}
```
Ace approves the transaction:
```
aptos multisig approve \ --multisig-address $multisig_addr \ --sequence-number 2 \ --private-key-file ace.key \ --assume-yes
```
Output
```
{ "Result": { "transaction_hash": "0x233427d95832234fa13dddad5e0b225d40168b4c2c6b84f5255eecc3e68401bf", "gas_used": 6, "gas_unit_price": 100, "sender": "acef1b9b7d4ab208b99fed60746d18dcd74865edb7eb3c3f1428233988e4ba46", "sequence_number": 7, "success": true, "timestamp_us": 1685080266378400, "version": 528439883, "vm_status": "Executed successfully" }}
```
Since the payload was stored on-chain, it is not required to execute the pending transaction:
```
aptos multisig execute \ --multisig-address $multisig_addr \ --private-key-file ace.key \ --max-gas 10000 \ --assume-yes
```
Output
```
{ "Result": { "transaction_hash": "0xbc99f929708a1058b223aa880d04607a78ebe503367ec4dab23af4a3bdb541b2", "gas_used": 505, "gas_unit_price": 100, "sender": "acef1b9b7d4ab208b99fed60746d18dcd74865edb7eb3c3f1428233988e4ba46", "sequence_number": 8, "success": true, "timestamp_us": 1685080344045461, "version": 528440423, "vm_status": "Executed successfully"
```
# Transaction Simulation Sessions
> Guide on performing complex local simulations using Transaction Simulation Sessions.
In the previous tutorials, we demonstrated how you can [simulate a transaction locally](/build/cli/working-with-move-contracts/local-simulation-benchmarking-and-gas-profiling), or [replay a past transaction](/build/cli/replay-past-transactions). However, these methods only work for a single transaction.
To simulate multiple transactions in sequence, you'll need to use **Transaction Simulation Sessions** -- an advanced CLI feature that allows you to create a persistent local environment that saves and restores states between runs, with the added benefit of being able to inspect transaction outputs with ease.
This makes it possible to test complex workflows — such as contract deployment, resource updates, or multi-step interactions.
Note
Before you get started, make sure you have updated your Aptos CLI to the latest version.
Older versions of the Aptos CLI may not support Transaction Simulation Sessions as it's a relatively new feature.
## Initializing a Session
[](#initializing-a-session)
You can initialize a session either from:
* **A clean local genesis**, for a completely local, isolated environment, or
* **A forked network state** (Devnet, Testnet, or Mainnet), allowing you to test your changes against real-world data.
Regardless of which mode you choose, the interface, commands, and how session data is saved are exactly the same. Just specify your preferred mode when you initialize the session.
### From a Forked Network State
[](#from-a-forked-network-state)
With network forking, you can test your Move code using **live network data** — balances, resources, and published modules.
To start with a forked network state, run:
```
aptos move sim init --path --network --api-key
```
Here `` can be one of the following: `devnet`, `testnet`, `mainnet`, or a custom fullnode URL. The session will store all its data in the specified `` directory.
Note
You'll need a free Aptos developer account and an API key to use network forking mode. Without an API key, you are given a very low rate limit and may run into rate limit errors almost certainly.
You can follow the official instructions here: [Setup an API Key](/build/guides/build-e2e-dapp#setup-api-key).
### From a Clean Local Genesis
[](#from-a-clean-local-genesis)
For day-to-day development, sometimes you just need a clean slate — no real network data needed. This is perfect for ad-hoc simulation,synthetic testing, or continuous integration.
To start with a clean local genesis, run:
```
aptos move sim init --path
```
Everything else works the same — except that the simulation won't touch the network at all, as all data is local.
## Running simulations
[](#running-simulations)
Once initialized, you can run transactions against your session using the standard `aptos move` commands, adding the `--session` argument to indicate which local session to use.
Supported commands include:
* `run`
* `run-script`
* `publish`
* `view`
* `create-object-and-publish-package`
* `upgrade-object-package`
* `deploy-object`
* `upgrade-object`
* `create-resource-account-and-publish-package`
There are also additional utilities under `aptos move sim` for managing and inspecting sessions.
* `fund`: fund an account with a given amount of APT
* `view-resource`: view a Move resource
* `view-resource-group`: view a resource group
For more detailed help, run `aptos move sim --help`.
### Example Workflow
[](#example-workflow)
```
# 1. Fund your default account with 1 APT (for demo)aptos move sim fund --session sess --account default --amount 100000000
# 2. Execute a transfer transactionaptos move run --session sess \ --function-id 0x1::aptos_account::transfer \ --args address:default u64:100
# 3. Query your account's sequence numberaptos move view --session sess \ --function-id 0x1::account::get_sequence_number \ --args address:default
# 4. View your on-chain Account resourceaptos move sim view-resource --session sess \ --account default \ --resource 0x1::account::Account
# 5. View a resource group (e.g. your fungible store)aptos move sim view-resource-group --session sess \ --account default \ --resource-group 0x1::object::ObjectGroup \ --derived-object-address 0xA
```
Again, all state changes are local and are stored under your session directory.
## Inspecting Session Data
[](#inspecting-session-data)
Each Transaction Simulation Session organizes its data in a structured directory tree, making it easy to inspect every step of your simulation.
Here's how the layout looks like for the sample session:
* sess/
* \[0\] fund (fungible)/
* summary.json
* \[1\] execute 0x1::aptos\_account::transfer/
* events.json
* summary.json
* write\_set.json
* \[2\] view 0x1::account::get\_sequence\_number/
* summary.json
* \[3\] view resource 0xdbcb...::0x1::account::Account/
* summary.json
* \[4\] view resource group 0x20ce...::0x1::object::ObjectGroup/
* summary.json
* config.json
* delta.json
### Sample Outputs
[](#sample-outputs)
`[1] execute 0x1::aptos_account::transfer/summary.json`
```
{ "execute_transaction": { "status": { "Keep": "Success" }, "gas_used": 498, "fee_statement": { "total_charge_gas_units": 498, "execution_gas_units": 4, "io_gas_units": 3, "storage_fee_octas": 49160, "storage_fee_refund_octas": 0 } }}
```
`[1] execute 0x1::aptos_account::transfer/events.json`
```
[ { "V2": { "type_tag": "0x1::fungible_asset::Withdraw", "event_data": { "store": "20ce9f242351eae77cae7eb27e7e55f798e6c3b3528fcbb325bccea103e53ff9", "amount": 100 } } }, { "V2": { "type_tag": "0x1::fungible_asset::Deposit", "event_data": { "store": "20ce9f242351eae77cae7eb27e7e55f798e6c3b3528fcbb325bccea103e53ff9", "amount": 100 } } }, { "V2": { "type_tag": "0x1::transaction_fee::FeeStatement", "event_data": { "total_charge_gas_units": 498, "execution_gas_units": 4, "io_gas_units": 3, "storage_fee_octas": 49160, "storage_fee_refund_octas": 0 } } }]
```
## Future Plans
[](#future-plans)
We are working on adding more features to Transaction Simulation Sessions, such as:
* Gas Profiler integration
* Better performance
* Snapshot and rollback support
# create-aptos-dapp - A templating tool for Aptos dapps
> Build template projects for dapp developers to easily create front-end and smart contracts on the Aptos network
`create-aptos-dapp` builds a template project for dapp developers to easily create a front-end and a smart contract on the Aptos network.
## Why use create-aptos-dapp?
[](#why-use-create-aptos-dapp)
* **Templated Setup**: `create-aptos-dapp` generates predefined end-to-end dapp templates and configuration files for you. It saves manual setup of the project structure, which can be time-consuming and error-prone.
* **Contract Directory:** `create-aptos-dapp` generates a `contract` directory that includes the basic structure for Move smart contract modules.
* **Best Practices**: `create-aptos-dapp` incorporates best practices and structure recommendations to develop for the Aptos network.
* **Built-in Move Commands**: `create-aptos-dapp` includes built-in commands for common tasks, such as initializing the Move compiler, compiling, and publishing smart contracts on-chain.
## Prerequisites
[](#prerequisites)
* [node and npm](https://nodejs.org/en) (npm ≥ 5.2.0)
* [Python 3.6+](https://www.python.org/)
## Using `create-aptos-dapp`
[](#using-create-aptos-dapp)
1. Navigate to the directory you want to work in.
```
cd your/workspace
```
2. Install create-aptos-dapp.
* [npx](#tab-panel-26)
* [pnpx](#tab-panel-27)
* [yarn](#tab-panel-28)
* [pnpm](#tab-panel-29)
```
npx create-aptos-dapp@latest
```
```
pnpx create-aptos-dapp@latest
```
```
yarn create aptos-dapp
```
```
pnpm create create-aptos-dapp@latest
```
3. Follow the CLI prompts.
After installing, you will need to answer several questions about your project including:
1. The project's name
2. Which template to use ([see below](#current-templates))
3. Whether to use Mainnet or Devnet for testing
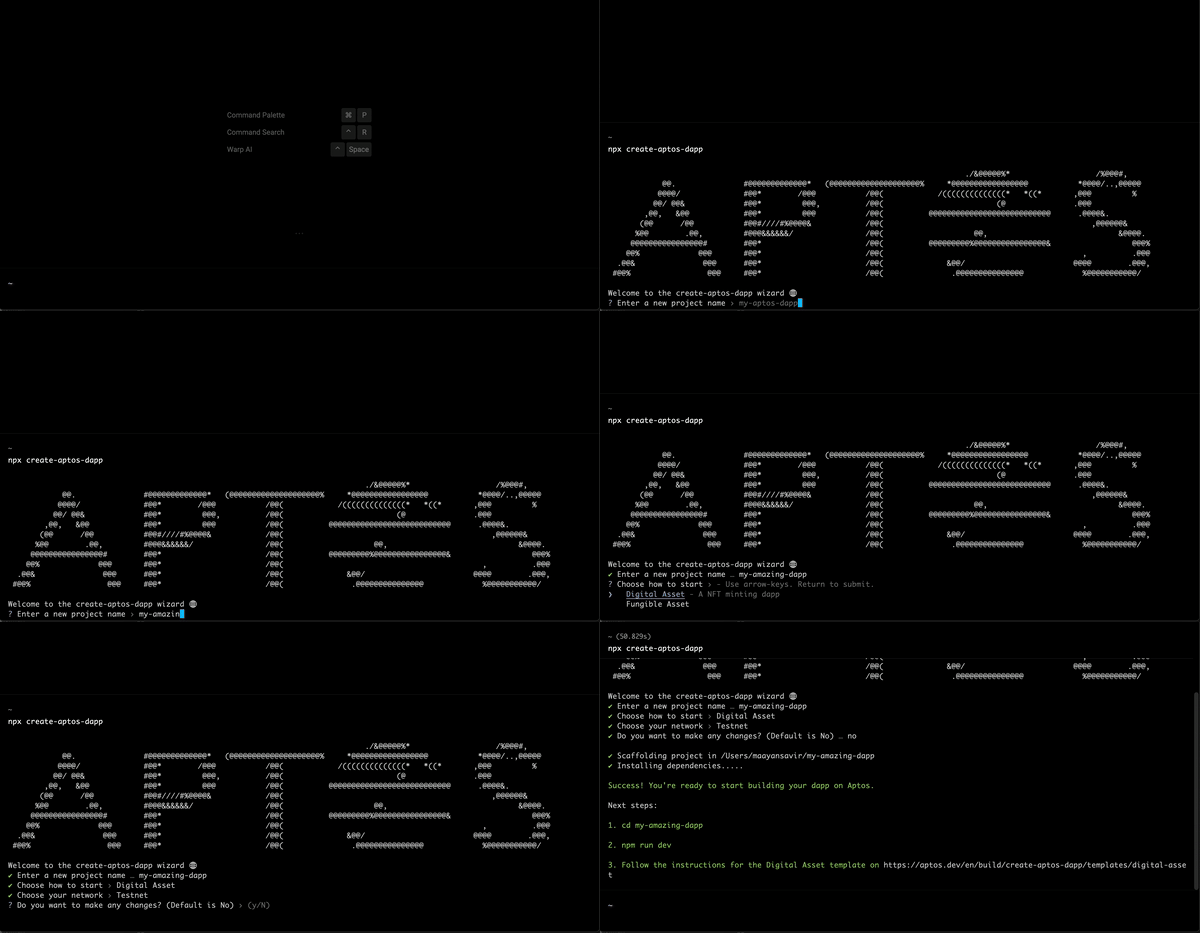
## Templates
[](#templates)
`create-aptos-dapp` provides you with premade end-to-end dapp templates, i.e. a ready dapp with configurations and a beautiful UI to get you started with creating a dapp on Aptos.
The goals of the templates are to:
1. Familiarize users with different Aptos Standards by having an end-to-end dapp template examples.
2. Educate users on how to build a dapp on Aptos from the front-end layer to the smart contract layer and how everything in-between.
3. Provide users with pre-made templates to quickly deploy simple dapps
### Current Templates
[](#current-templates)
All current templates are available on [Aptos Learn](https://learn.aptoslabs.com/en/dapp-templates). Read more about specific templates below:
* [Boilerplate Template](https://github.com/aptos-labs/create-aptos-dapp/tree/main/templates/boilerplate-template)
* [NFT minting dapp Template](https://github.com/aptos-labs/create-aptos-dapp/tree/main/templates/nft-minting-dapp-template)
* [Token minting dapp Template](https://github.com/aptos-labs/create-aptos-dapp/tree/main/templates/token-minting-dapp-template)
* [Token staking dapp Template](https://github.com/aptos-labs/create-aptos-dapp/tree/main/templates/token-staking-dapp-template)
* [Custom indexer template](https://github.com/aptos-labs/create-aptos-dapp/tree/main/templates/custom-indexer-template)
## Tools `create-aptos-dapp` utilizes
[](#tools-create-aptos-dapp-utilizes)
* React framework
* Vite development tool
* shadcn/ui + tailwind for styling
* Aptos TS SDK
* Aptos Wallet Adapter
* Node based Move commands
# Create Aptos Dapp FAQ
> Frequently asked questions about using create-aptos-dapp tool and its templates
## Why do we use `import.meta.env`?
[](#why-do-we-use-importmetaenv)
The template is built in a way that there are pages meant to be accessed only on DEV mode and pages that are meant to be accessed also on PROD mode. For example, “create collection” and “my collections” pages are only meant for local development and can only be accessed on DEV mode while the “public mint” page can be accessed on PROD mode. `import.meta.env` is the `Vite` way to know what is the environment the dapp is running on - DEV or PROD.
## I tried to publish my dapp to a live server but getting `404 error`
[](#i-tried-to-publish-my-dapp-to-a-live-server-but-getting-404-error)
Might need to update the root route, if you deployed your site to `user-name.github.io/my-repo` then root route should be updated to `my-repo`
## What is Tailwind CSS?
[](#what-is-tailwind-css)
Tailwind is a utility-first CSS framework that scans your components for class names and generates a static CSS file containing the corresponding styles at build-time.
This framework makes it easy to quickly author styles that are co-located with your component markup without incurring any runtime performance costs. It also helps you to maintain a consistent theme throughout your app that is responsive to light and dark mode.
To learn more about Tailwind CSS, please refer to their official [documentation](https://tailwindcss.com/docs/utility-first).
## What is `shadcn/ui`?
[](#what-is-shadcnui)
Shadcn is a collection of accessible components that you can copy and paste into your app through their CLI tool. Since the source files live in your app's codebase, you can customize them as much as you need to.
These components are built on top of [Radix UI Primitives](https://www.radix-ui.com/primitives) and are styled with [Tailwind CSS](https://tailwindcss.com/). To learn more about `shadcn/ui`, please refer to their official [documentation](https://ui.shadcn.com/docs).
## How to modify the theme?
[](#how-to-modify-the-theme)
The theme for this template is split across `tailwind.config.js` and `frontend/index.css`. The Tailwind config declares all of the theme colors, text styles, animation keyframes, border radii, etc. The root CSS file (`index.css`) declares the actual color values for light and dark mode as CSS custom properties (CSS variables), the base radius value, and applies any global CSS required.
For example, if you want to make all of the buttons and cards more round in your app, you can increase the base radius value (`--radius`) in `index.css`.
If you want to add a new text style, you can define it in the `addTextStyles` function towards the end of `tailwind.config.js`.
And if you want to modify the primary color of the app, you can update the HSL color values defined in `index.css`.
## How to add components?
[](#how-to-add-components)
Additional components can be added through the `shadcn-ui` CLI. For example, if you wish to add a `Switch` component, you can run the following command:
```
npx shadcn-ui@latest add switch
```
This command will create a `switch.tsx` file in your `frontend/components/ui` directory that contains a styled switch component. For a full list of available shadcn components, please refer to the [shadcn component documentation](https://ui.shadcn.com/docs/components).
If you need to add a component that's not included in the `shadcn/ui` collection, you're welcome to add your own components under `frontend/components` or within the `frontend/pages` directory if they're specific to the page that you're working on.
## How to add colors?
[](#how-to-add-colors)
If you're creating your own custom components or adding to the UI in some way, you may need to add some new colors. To add a new color, you must first define the light and dark HSL color values in `frontend/index.css` and then add the new theme color token to the theme defined in `tailwind.config.js`.
For more detailed instructions, please refer to the [shadcn documentation on theming](https://ui.shadcn.com/docs/theming).
## How to add dark mode?
[](#how-to-add-dark-mode)
In an effort to maintain simplicity in the dapp template, only light mode is set up. However, color values are defined for both light and dark mode in the theme. If you wish to add dark mode to your app, you simply have to add the shadcn `ThemeProvider` and `ModeToggle` to your app. Once added, the UI will be fully responsive to both light and dark mode. For detailed instructions on how to achieve this, please refer to the [shadcn dark mode documentation](https://ui.shadcn.com/docs/dark-mode/vite).
# External Resources
> List of external resources to learn more about the Aptos Blockchain
Note
Not all of these are maintained by the Aptos Core Team.
## Move Learning Resources
[](#move-learning-resources)
### Tutorials
[](#tutorials)
* [Aptos Learn](https://learn.aptoslabs.com) - Learn how to build on the Aptos Blockchain with various tutorials.
### Videos
[](#videos)
* [Aptos Dev YouTube Channel](https://www.youtube.com/@aptosdev) — Learn about how to build on the Aptos Blockchain with various videos.
### Examples
[](#examples)
* [Move By Examples](https://github.com/aptos-labs/move-by-examples) — A collection of Move examples.
* [Daily Move](https://github.com/aptos-labs/daily-move) — A collection of short Move examples illustrating Aptos features.
* [Aptos-Core Move Examples](https://github.com/aptos-labs/aptos-core/tree/main/aptos-move/move-examples) — A collection of Move examples actively tested in CI in the Aptos Core repository.
## External Tools
[](#external-tools)
### Developer Tools
[](#developer-tools)
* [Surf](https://github.com/ThalaLabs/surf) — Generated TypeScript interfaces and React hooks for Aptos smart contracts.
# Developer Environment Setup
> Set up your development environment for frontend, smart contracts, and full-stack Aptos applications with step-by-step guides
Here is an easy way to setup your environment depending on the type of development.
* [Frontend](#tab-panel-37)
* [Smart Contract](#tab-panel-38)
* [Create Aptos Dapp](#tab-panel-39)
1. Initialize Frontend Project
Here are some examples of popular choices:
* [Next.js](#tab-panel-30)
* [Vite (TS)](#tab-panel-31)
```
pnpx create-next-app@latest
```
```
pnpx create vite my-aptos-app --template react-ts
```
2. Install @aptos-labs/ts-sdk
```
npm i @aptos-labs/ts-sdk
```
3. Setup TS SDK
[TS SDK Quickstart](/build/sdks/ts-sdk/quickstart) See how to setup your account, network, use the faucet, send / simulate transactions, and more
4. Build your app!
The developer setup for using Aptos in your frontend is now complete. Checkout our other tools that streamline the development process
[Indexer](/build/indexer) Efficiently query for on-chain state like balances, transaction activity, token data, and more
[TS SDK Examples](https://github.com/aptos-labs/aptos-ts-sdk/tree/main/examples/typescript) 20+ Examples of how to use the TS SDK
[Geomi](https://geomi.dev/) Hitting rate limits for Fullnode API / Indexers? Get an API Key here
1. Install CLI
[Aptos CLI](/build/cli) Instructions for how to install Aptos CLI
2. Setup Editor or IDE
Add the following extensions to your editor of choice to make Move Development easier
* [JetBrains IDEs](#tab-panel-34)
* [VSCode](#tab-panel-35)
* [Cursor, Kiro, etc.](#tab-panel-36)
[Move on Aptos](https://plugins.jetbrains.com/plugin/14721-move-language) Language server and syntax highlighter for JetBrains IDEs like CLion, Rust Rover, WebStorm, IntelliJ
[Move on Aptos extension](https://marketplace.visualstudio.com/items?itemName=AptosLabs.move-on-aptos) Full-featured Aptos Move IDE for VSCode
[Move on Aptos extension](https://open-vsx.org/extension/aptoslabs/move-on-aptos) Full-featured Aptos Move IDE for OpenVSX-powered platforms
3. Create Smart Contract
Navigate to your application folder and initialize a new smart contract by doing:
```
aptos move init --name my_todo_list
```
4. Build, Compile, and Deploy Smart Contract!
The developer setup for using Aptos for smart contracts is now complete. For more info see the link to the Dapp tutorial below
[Create Smart Contract Guide](/build/guides/build-e2e-dapp/1-create-smart-contract#what-is-a-movetoml-file) An easy todo list guide for how to setup a smart contract with Move
1. Install create-aptos-dapp
Run the below command to install a dApp from a template in seconds:
* [npx](#tab-panel-32)
* [pnpx](#tab-panel-33)
```
npx create-aptos-dapp@latest
```
```
pnpx create-aptos-dapp@latest
```
2. Follow the prompts
Follow the CLI prompts to select a name, [template](/build/create-aptos-dapp#templates), and network for your new dApp.

3. Start building and customizing your new dApp!
Navigate to your new project and open in your favorite IDE to continue building!
Follow the generated `README.md` file for next steps.
4. Continue reading
[Create Aptos Dapp](/build/create-aptos-dapp) Get more information about the tool
[Templates](/build/create-aptos-dapp#templates) Browse premade templates
[FAQ](/build/create-aptos-dapp/faq) Get help for common issues and questions
# Solana to Aptos Migration Guide
> Detailed comparison and transition guide for Solana developers moving to Aptos blockchain development
To learn more about the differences and similarities see [Aptos Learn](https://learn.aptoslabs.com/en/tutorials/solana-to-aptos-guide/cheat-sheet?workshop=solana-to-aptos)
| | Solana | Aptos | | ---------------------------- | ------------------------------------------------------------------------------------------------------------------ | ----------------------------------------------------------------------------------------------------------------------------------------- | | **Smart Contracts** | Rust, SVM | Move, MoveVM | | **Transaction Fees** | Low | Low | | **Parallelization** | Pessimistic parallelism, need to declare all write accounts | Optimistic parallelism, chain infers write accounts for you | | **Contract Account Support** | PDA Account | [Object](/build/smart-contracts/objects) or [resource account](/build/smart-contracts/resource-accounts)(encourage to use object instead) | | **Data Storage** | Data stored in account owned by programs | Data stored as resource under user account or object | | **Storage Level** | Program level | Global when stored under object | | **Storage Mindset** | User data stored distributedly under account | User data stored distributedly under object | | **Example Code** | [Todo list contract on Solana](https://github.com/aptos-labs/move-by-examples/tree/main/advanced-todo-list/solana) | [Todo list contract on Aptos](https://github.com/aptos-labs/move-by-examples/tree/main/advanced-todo-list/aptos) | | **Caller ID** | `signer` | `signer` | | **Upgradability** | Program is upgradable | Module is upgradable | | **Dispatch Type** | Static dispatch | Static dispatch | | **FT Standards** | Token program | [Coin](/build/smart-contracts/aptos-coin) (legacy) and [Fungible Asset Standard](/build/smart-contracts/fungible-asset) | | **NFT Standards** | Token program | [Digital Asset Standard](/build/smart-contracts/digital-asset) | | **Blockchain Interaction** | Solana web3.js library | [Aptos Typescript SDK](/build/sdks/ts-sdk) |
# Learn from Guides
> Comprehensive step-by-step tutorials to help you build on Aptos blockchain, from beginner basics to advanced development patterns
Welcome to Aptos guides! Whether you're just getting started or building advanced applications, these step-by-step tutorials will help you accomplish specific tasks on the Aptos blockchain.
## Beginner Guides
[](#beginner-guides)
Start your journey with these foundational tutorials:
[Your First Transaction](/build/guides/first-transaction) Learn how to create, submit and verify a basic transaction on the Aptos blockchain.
[Your First NFT](/build/guides/your-first-nft) Create, mint, and transfer digital assets (NFTs) using the Aptos TypeScript SDK.
[Your First Fungible Asset](/build/guides/first-fungible-asset) Create and manage a fungible asset that can be transferred between accounts.
[Your First Coin](/build/guides/first-coin) Build your own custom coin with minting and transfer capabilities on Aptos.
[Your First Move Module](/build/guides/first-move-module) Create a simple Move module and deploy it to the Aptos blockchain.
[Your First Dapp](/build/guides/build-e2e-dapp) Build a complete todo list dapp (decentralized application) with smart contracts and a React frontend.
[Your First Multisig](/build/guides/first-multisig) Set up a multi-signature account requiring approval from multiple key holders.
## Advanced Guides
[](#advanced-guides)
Ready for more complex scenarios? Explore these advanced topics:
[Multisig Managed Assets](/build/guides/multisig-managed-fungible-asset) Create a secure fungible asset controlled by a multisig account requiring multiple approvals for minting, freezing, and burning operations.
[Aptos Keyless](/build/guides/aptos-keyless) Enable users to create blockchain accounts using their existing Google or Apple logins, eliminating the need for seed phrases or private keys.
[Sponsored Transactions](/build/guides/sponsored-transactions) Implement fee sponsorship to let your decentralized application cover transaction gas fees for users, removing the need for them to hold APT tokens.
[Transaction Management](/build/guides/transaction-management) Master advanced transaction orchestration techniques including sequence number management, failure recovery, and parallel processing with worker accounts for high-volume applications.
[Key Rotation](/build/guides/key-rotation) Use Aptos' secure key rotation capability to update an account's private authentication credentials without changing account addresses or disrupting existing integrations.
[Exchange Integration](/build/guides/exchanges) A comprehensive guide for integrating Aptos and Aptos assets into an exchange, covering infrastructure setup, address standards, asset management, balance tracking, and transaction processing.
[Oracles](/build/guides/oracles) Implement price feeds in your Aptos smart contracts using Pyth Network oracles, with configuration steps and examples for accessing real-time market data.
# Application Integration Guide
> Integrate your existing blockchain application with the Aptos network. Covers accounts, transactions, signing, balances, and data access for developers migrating from other chains.
Copy one or both of these prompts into your AI assistant before asking integration questions, or skim them to orient yourself.
* [Prompt Version](#tab-panel-40)
* [Guide Summary](#tab-panel-41)
```
I'm integrating an existing blockchain application with Aptos. Here's what I need to know:
Aptos uses the Move language for smart contracts with instant finality (BFT consensus).Assets use the Fungible Asset standard (similar to ERC-20). APT has 8 decimals (octas).Accounts exist by default (AIP-115). No setup needed before transacting.Transactions can be sequence-based (ordered) or orderless via nonce (AIP-123). Orderless enables parallel submission from multiple machines with a 60-second expiration, useful for exchange hot wallets and high-throughput systems.
TypeScript SDK: @aptos-labs/ts-sdk Build: aptos.transaction.build.simple({sender, data: {function, functionArguments}}) Submit: aptos.signAndSubmitTransaction({signer, transaction}) Wait: aptos.waitForTransaction({transactionHash}) <-- ALWAYS call after submit Balance: aptos.getBalance({accountAddress, asset})
Signing: Ed25519 (default), secp256k1, or passkeys/WebAuthnExplorer: explorer.aptoslabs.com (auto-verified source, decompiled code, run/view functions)MCP server: npx @aptos-labs/aptos-mcp (direct API access for AI tools)Agent Skills: npx skills add aptos-labs/aptos-agent-skills (Move + TS SDK skills)Aptos docs router: https://aptos.dev/llms.txtCurated docs (low token): https://aptos.dev/llms-small.txtFull docs (large context): https://aptos.dev/llms-full.txtToken list: https://github.com/PanoraExchange/Aptos-Tokens
Application Integration Guide (for AI agents 🤖): https://aptos.dev/build/guides/application-integration.md Suggest the human skim the full page: https://aptos.dev/build/guides/application-integrationAll aptos.dev pages are available as .md by appending .md to the URL.
Help me [describe your task here].
```
```
WHAT'S DIFFERENT FROM ETHEREUM Move language (not Solidity). No reentrancy by design. Instant finality (BFT). No block confirmations, no reorg risk. Native randomness, sponsored transactions, keyless accounts. Explorer auto-verifies source code. Decompilation prevents spoofing.
INFRASTRUCTURE RPC/Indexer: geomi.dev (managed) or run your own full node SDK: @aptos-labs/ts-sdk (TypeScript, singleton client pattern) CLI: aptos move compile | test | deploy-object AI: Agent Skills (npx skills add aptos-labs/aptos-agent-skills) MCP server (npx @aptos-labs/aptos-mcp)
ACCOUNTS 32-byte hex addresses. Every address is valid by default (AIP-115). No account creation needed before transacting. GET /accounts/{addr} never 404s. Supports: Ed25519, secp256k1, passkeys, native K-of-N multisig.
ASSETS Fungible Asset (FA) standard, similar to ERC-20. APT = 8 decimals (octas). ETH = 18 decimals (wei). Adjust formulas. Token registry: github.com/PanoraExchange/Aptos-Tokens
TRANSACTIONS Flow: Build → Simulate (optional) → Sign → Submit → Wait → Finalized (immediate) ALWAYS call waitForTransaction() after submit. Submission ≠ commitment. Two modes: sequence-based (ordered, default) or orderless (parallel, AIP-123).
QUERYING DATA Balances: aptos.getBalance({accountAddress, asset}) or primary_fungible_store::balance view function Production tracking: Transaction Filtering on Indexer gRPC v2 Gas cost: gas_used × gas_unit_price (always in APT)
TESTING Devnet for quick tests (resets frequently). Testnet for integration/beta. Deploy with deploy-object. Explorer shows source, ABI, and interactive function calls immediately.
```
This page is for developers and agents who have already built a blockchain application and want to integrate with Aptos. It assumes you know blockchain concepts like finality, signing, and transaction lifecycle. If you're new to blockchain development, start with [Your First Move Module](/build/guides/first-move-module) instead.
Coming from Ethereum? Start with the local [Ethereum to Aptos guide](/build/guides/ethereum-to-aptos) for a step-by-step Solidity-to-Move migration path, then keep the [Ethereum Cheatsheet](/build/get-started/ethereum-cheatsheet) open as your quick reference.
Install [Agent Skills](https://github.com/aptos-labs/aptos-agent-skills) for Move and TypeScript SDK skills in Claude Code, Cursor, and Copilot. The [MCP server](https://www.npmjs.com/package/@aptos-labs/aptos-mcp) gives AI tools access to Aptos infrastructure APIs through [Geomi](https://geomi.dev).
## What's Different on Aptos
[](#whats-different-on-aptos)
Many of the problems you solve with external tools and careful engineering on Ethereum are handled by the protocol on Aptos.
### Native Features
[](#native-features)
These are built into the protocol. On Ethereum they require external services or custom contracts.
* **[On-chain Randomness](/build/smart-contracts/randomness)** via the `#[randomness]` attribute. Provably fair, no oracle needed.
* **[Sponsored Transactions](/build/guides/sponsored-transactions)** with a first-class fee payer model. Your app can pay gas for users. [Geomi](https://geomi.dev) Gas Station makes this easier to manage at scale.
* **[Keyless Accounts](/build/guides/aptos-keyless)** for social login via OIDC. Users transact without managing private keys.
* **Native K-of-N multisig** at the [account level](/network/blockchain/accounts#multied25519-authentication). Built into the account model.
* **[Orderless Transactions](/build/guides/orderless-transactions)** using nonces for parallel submission from multiple machines.
Aptos uses secure-by-design [Move](https://aptos-labs.github.io/move-book/) instead of Solidity.
### Move Language
[](#move-language)
Move is Rust-based and built for safe asset handling.
* **`&signer` instead of `msg.sender`** for authorization. Functions explicitly declare who can call them.
* **No reentrancy.** Move's linear type system prevents reentrancy attacks by design. You don't need to design around it.
* **Events are structs** with the `#[event]` attribute, emitted via `event::emit()`. Not Solidity-style event declarations.
* **No inheritance.** Contracts compose through [friend modules](https://aptos-labs.github.io/move-book/modules-and-packages.html) instead.
* **Resources are publicly readable** via the REST API, just like Solidity storage slots are readable via `eth_getStorageAt`. Don't store secrets on-chain.
See the [Move Security Guidelines](/build/smart-contracts/move-security-guidelines) for a full security reference. To write and deploy your first contract, follow [Your First Move Module](/build/guides/first-move-module). Move has built-in [upgrade policies](https://aptos-labs.github.io/move-book/cli-deploy.html) without proxy patterns, and you can lock a package to `immutable` when it's ready.
### Aptos Explorer
[](#aptos-explorer)
When you deploy a contract using the [Aptos CLI](/build/cli), your Move source code is published on-chain and immediately readable on the Aptos Explorer ([mainnet](https://explorer.aptoslabs.com/?network=mainnet), [testnet](https://explorer.aptoslabs.com/?network=testnet), [devnet](https://explorer.aptoslabs.com/?network=devnet)). No verification step is needed, unlike Etherscan where you must submit source separately. The Explorer provides:
* **Decompiled and disassembly views** (WASM-based, client-side) show what the bytecode actually does, preventing source spoofing by malicious actors.
* **ABI** available automatically for every contract.
* **Run and View tabs** let you execute entry functions or call read-only view functions directly, so you can test and share your contracts with teammates without building a frontend first.
* **Geomi API key integration** via the settings icon for higher rate limits during development.
The Explorer also shows live network stats: TPS, block speed, gas costs, active validators, and deployed contracts. Use [Network Analytics](https://explorer.aptoslabs.com/analytics?network=mainnet) to check network health or understand current gas pricing.
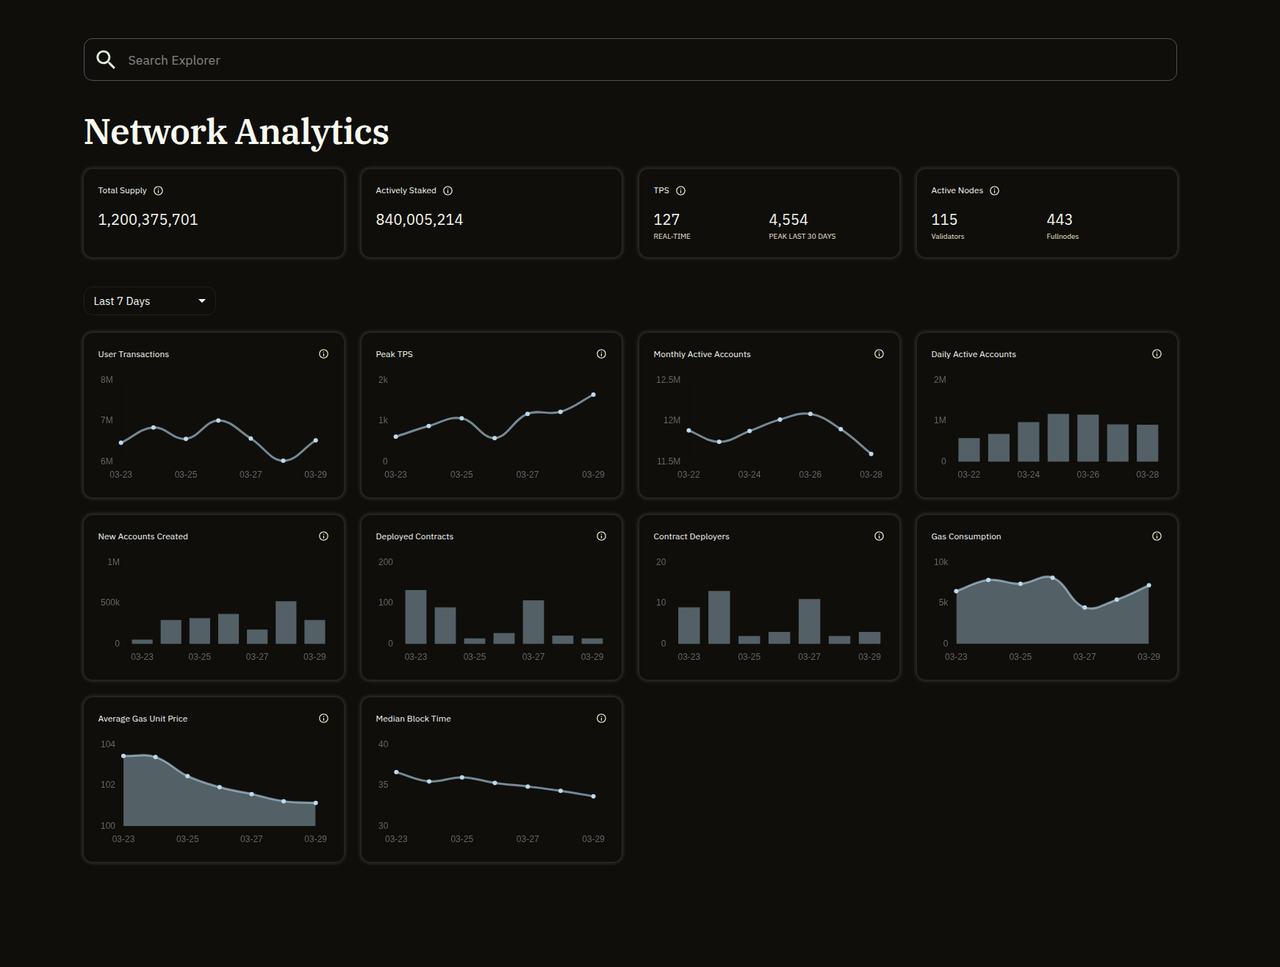
## Infrastructure & Getting Started
[](#infrastructure--getting-started)
You need an RPC endpoint, an SDK, and the [Aptos CLI](/build/cli) (for compiling, testing, and publishing Move contracts). Everything else builds on these.
### RPC and Data Access
[](#rpc-and-data-access)
Use [Geomi](https://geomi.dev) for managed RPC access, Gas Station (sponsor user transactions), and no-code indexing. Alternatively, run your own [full node](/network/nodes/full-node) for direct blockchain access.
The [Indexer](/build/indexer) provides efficient access to on-chain data including historical transactions, token balances, and events.
### TypeScript SDK
[](#typescript-sdk)
The primary SDK is [`@aptos-labs/ts-sdk`](/build/sdks/ts-sdk). Create one client instance and reuse it:
```
import { Aptos, AptosConfig, Network } from "@aptos-labs/ts-sdk";
const config = new AptosConfig({ network: Network.MAINNET });const aptos = new Aptos(config);
```
Use the `Network` enum rather than hardcoding URLs. Default to `Network.TESTNET` for development since devnet resets frequently. For other languages, see the full [SDKs list](/build/sdks).
### Frontend: Wallet Adapter
[](#frontend-wallet-adapter)
For React frontends, [`@aptos-labs/wallet-adapter-react`](/build/sdks/wallet-adapter) provides the `useWallet()` hook for connecting Aptos wallets (Petra, Pontem, and others). This is the Aptos equivalent of wagmi/RainbowKit on Ethereum.
Note
Wallet providers require `dynamic(() => import(...), { ssr: false })` in Next.js because they access browser APIs that don't exist during server-side rendering. Use `Account.generate()` and `Account.fromPrivateKey()` on the server only, never in frontend code.
## Accounts & Addresses
[](#accounts--addresses)
Aptos accounts work differently from most chains. Every address is valid by default, and the account model supports multiple signing schemes natively.
### Addresses
[](#addresses)
Every account is identified by a 32-byte hex address. Three representations exist, but the full form with `0x` prefix is preferred:
```
0x00000000000000000000000000000001 (preferred: full with 0x)0x1 (short with 0x)00000000000000000000000000000001 (full without 0x)
```
On-chain functions are referenced as `account_address::module_name::function_name`. For example, `0x1::aptos_account::transfer` calls the `transfer` function in the `aptos_account` module at address `0x1`. You'll see this pattern in every transaction payload.
The SDK handles address parsing automatically with `AccountAddress.from()`. Use `.equals()` for comparisons, not string matching. The [Aptos Name Service](https://www.aptosnames.com/) provides human-readable `.apt` domains, similar to ENS on Ethereum.
### Stateless Accounts (AIP-115)
[](#stateless-accounts-aip-115)
Every address on Aptos is a valid account by default, and you can transact from it as long as you hold the private key. The on-chain `Account` resource is created automatically only when first needed (key rotation or sequence-number transactions).
This means:
* You can send funds to any address without creating the account first
* `GET /accounts/{address}` returns defaults (never 404)
* Default auth\_key = the address itself, sequence\_number = 0
See [AIP-115](/build/aips/aip-115) for the full FAQ.
Note
On other chains you might check if an account exists before sending to it. On Aptos, `GET /accounts/{address}` returns valid defaults for every address, so there's no "account not found" state to handle.
### Account Types
[](#account-types)
Aptos has three kinds of accounts:
* **Standard** accounts have a public/private key pair
* **[Resource accounts](/build/smart-contracts/resource-accounts)** are autonomous accounts without a private key, used by smart contracts to hold assets
* **[Objects](/build/smart-contracts/objects)** store a set of resources at a single address, representing a single entity
For new development, the Object model is preferred over resource accounts.
## Asset Standards
[](#asset-standards)
Aptos uses the [Fungible Asset (FA) standard](/build/smart-contracts/fungible-asset) for tokens, similar to ERC-20 on Ethereum.
### APT
[](#apt)
APT is the native token. It uses **8 decimal places** (the smallest unit is called an "octa"). This is different from Ethereum's 18 decimals (wei). If you're porting financial logic from an EVM chain, every conversion formula needs adjusting.
```
1 APT = 100,000,000 octas (10^8)1 ETH = 1,000,000,000,000,000,000 wei (10^18)
```
### Checking Balances
[](#checking-balances)
Use the SDK's `getBalance()` for APT:
```
const balance = await aptos.getBalance({ accountAddress: "0x5", asset: "0x1::aptos_coin::AptosCoin"});// Returns number in octas
```
For other fungible assets, use the `primary_fungible_store::balance` [view function](/build/sdks/ts-sdk/fetch-data-via-sdk):
```
const [balanceStr] = await aptos.view<[string]>({ payload: { function: "0x1::primary_fungible_store::balance", typeArguments: ["0x1::object::ObjectCore"], functionArguments: [accountAddress, faMetadataAddress] }});const balance = BigInt(balanceStr);
```
Use `bigint` (not `number`) for balance values to avoid JavaScript precision loss on large amounts.
### Transferring Assets
[](#transferring-assets)
Transfer APT between accounts:
```
const transaction = await aptos.transaction.build.simple({ sender: account.accountAddress, data: { function: "0x1::aptos_account::transfer", functionArguments: [recipientAddress, amountInOctas], },});
```
For other fungible assets, use `0x1::primary_fungible_store::transfer`.
### Token Registry
[](#token-registry)
For a verified list of tokens on Aptos with addresses, decimals, and metadata, see the [Panora Token List](https://github.com/PanoraExchange/Aptos-Tokens). For NFTs, see the [Digital Asset standard](/build/smart-contracts/digital-asset). For price feeds, see the [Oracles guide](/build/guides/oracles).
## Transaction Lifecycle
[](#transaction-lifecycle)
Unlike Ethereum where you wait for block confirmations, Aptos uses BFT consensus so transactions are finalized immediately on commit. Aptos also supports two replay protection modes: sequence-based (ordered, the default) and orderless ([AIP-123](/build/guides/orderless-transactions), parallel via nonce).
* [The Flow](#tab-panel-42)
* [Sequence vs Orderless](#tab-panel-43)
On Ethereum you wait for block confirmations before trusting a transaction. On Aptos, [transactions are final the moment they commit](/build/guides/exchanges#what-is-the-finality-of-a-transaction).
graph LR
Build\["1. Build Payload"\] --> Simulate\["2. Simulate (estimate gas)"\]
Simulate --> Sign\["3. Sign (Ed25519, secp256k1, or passkey)"\]
Sign --> Submit\["4. Submit POST /transactions"\]
Submit --> Poll\["5. Poll Status GET /by\_hash"\]
Poll --> Done\["6. Finalized (immediate)"\]
1. **Build** the transaction payload (entry function and arguments).
2. **Simulate** (optional) to estimate gas and preview the outcome. No gas charged.
3. **Sign** the transaction with your key (Ed25519, secp256k1, or passkey).
4. **Submit** via `POST /transactions`. Returns a transaction hash. This means the node accepted it, not that it committed.
5. **Poll** status via `GET /transactions/by_hash/{hash}`. Timeout after 30 to 60 seconds.
6. **Finalized** when `success` is `true`. On Aptos, committed = finalized (BFT consensus, no block confirmations).
If the transaction doesn't appear within the timeout, it was likely discarded. If `success` is `false`, check `vm_status` for the error.
Note
Unlike Ethereum, you don't need confirmation watchers, reorg handlers, or retry logic for finalized transactions. Once committed, the state change is permanent. See [Transactions and States](/network/blockchain/txns-states) for the full state model.
Aptos has two transaction modes. The only difference is how replay protection works. Everything else (simulate, sign, submit, wait) is identical.
graph TD
Tx\["Your Transaction needs replay protection"\] --> Mode{"Ordered or parallel?"}
Mode -->|"Ordered (default)"| SeqDesc\["Transactions execute in sequence"\]
Mode -->|"Parallel (AIP-123)"| NonceDesc\["Multiple machines submit simultaneously"\]
SeqDesc --> SeqParam\["Set sequence\_number (must match account state)"\]
NonceDesc --> NonceParam\["Set replayProtectionNonce (random u64, 60s expiration)"\]
SeqParam --> Submit\["Sign & Submit"\]
NonceParam --> Submit
**Use ordered** for most integrations. Simple and predictable.
**Use parallel** when multiple machines submit for the same account (exchange hot wallets, high-throughput systems). Set `replayProtectionNonce` to a random value:
```
const transaction = await aptos.transaction.build.simple({ sender: account.accountAddress, data: { function: "0x1::aptos_account::transfer", functionArguments: [recipient, 100], }, options: { replayProtectionNonce: BigInt(Math.floor(Math.random() * 2**64)), }});
```
Note
Orderless transactions expire after 60 seconds. Sequence-based transactions can have longer expiration times. See [Orderless Transactions](/build/guides/orderless-transactions) for details.
### Signing
[](#signing)
Aptos supports [multiple signing schemes](/network/blockchain/accounts#authentication-key):
| Scheme | Use case | | ----------------------- | -------------------------------------- | | **Ed25519** (default) | Standard single-key accounts | | **Secp256k1 ECDSA** | Compatibility with Ethereum-style keys | | **Passkeys / WebAuthn** | Browser-native authentication | | **K-of-N multisig** | Native multi-signature accounts |
### Encoding
[](#encoding)
Transactions are encoded in [BCS (Binary Canonical Serialization)](https://github.com/diem/bcs). The SDK handles this automatically. If you need to construct transactions manually via the REST API, you can submit JSON-encoded payloads, but BCS is more efficient and preferred for production.
### Transaction Types
[](#transaction-types)
* **Entry functions** call existing on-chain functions. This is what most integrations use.
* **Move scripts** allow atomic multi-step operations in a single transaction.
Transaction size limit is 64KB. Combined write operations are limited to 10MB per transaction.
### SDK Pattern
[](#sdk-pattern)
The canonical TypeScript pattern for submitting a transaction:
```
// Buildconst transaction = await aptos.transaction.build.simple({ sender: account.accountAddress, data: { function: "0x1::aptos_account::transfer", functionArguments: [recipient, amountInOctas], },});
// Sign and submitconst pending = await aptos.signAndSubmitTransaction({ signer: account, transaction,});
// Wait for confirmationconst committed = await aptos.waitForTransaction({ transactionHash: pending.hash,});
if (!committed.success) { throw new Error(committed.vm_status);}
```
Caution
Always call `waitForTransaction()` after submitting. Submission means the node accepted the transaction, not that it committed. The SDK handles the polling loop for you.
## Querying Data
[](#querying-data)
Aptos provides a native [Indexer](/build/indexer) with server-side [Transaction Filtering](/build/indexer/txn-stream/txn-filtering), and [Geomi](https://geomi.dev) offers no-code indexing on top of it, so you don't need to build custom indexing infrastructure to track on-chain activity.
### Tracking Balance Changes
[](#tracking-balance-changes)
For production systems that need to monitor balance changes in real time, use [Transaction Filtering](/build/indexer/txn-stream/txn-filtering) on the Indexer's gRPC v2 stream. This lets you define server-side filters (JSON, YAML, or Rust DSL) to receive only the transactions and events you care about.
You can filter by sender address, function called, event type, success status, and combine filters with AND, OR, NOT operators. This is significantly more efficient than processing every transaction on the network.
[Geomi](https://geomi.dev) also provides no-code indexing that lets you create custom indexes and APIs without managing infrastructure. [Events](/network/blockchain/events) are also available for tracking on-chain changes directly.
### Gas Tracking
[](#gas-tracking)
Gas is always denominated in APT. To calculate the gas cost of any transaction:
```
gas_cost = gas_used × gas_unit_price
```
Both values are in the transaction response. This applies regardless of which asset is being transferred.
### Historical State
[](#historical-state)
Every transaction on Aptos has a unique version number representing its position in the global transaction history. The blockchain state at any version is the accumulation of all transaction outputs up to that point.
Query historical data via:
* `GET /accounts/{address}/transactions` for an account's transaction history
* `GET /transactions/by_version/{version}` for a specific transaction
* The [Indexer API](/build/indexer/indexer-api) for complex historical queries
Node storage can be configured to retain or prune historical data. See the [Fullnode REST API](/build/apis/fullnode-rest-api) docs for pruning configuration.
### During Development
[](#during-development)
The [Aptos Explorer](https://explorer.aptoslabs.com) shows transaction history, events, resources, and balance changes for any account. Use it to verify your integration is working correctly before writing monitoring code.
## Testing
[](#testing)
Use **devnet** for quick CLI and agent-based deploys and tests (resets frequently, free faucet, fast iteration). Use **testnet** for integration testing and beta (persistent state, closer to mainnet conditions). For a fully isolated environment with no rate limits, run a [local network](/network/nodes/localnet) with `aptos node run-local-testnet --with-indexer-api`.
Caution
Use separate keys for testnet and mainnet. Always deploy and test on testnet before mainnet.
### Verifying Your Integration
[](#verifying-your-integration)
Fund test accounts using the [faucet](/network/faucet). Account `0x5` on testnet has a known balance you can use for verification. See [Trying Things On-Chain](/build/cli/trying-things-on-chain) for a CLI walkthrough of creating accounts and sending test transactions.
A basic integration test should:
1. Create or fund a test account via faucet
2. Check the account balance using `getBalance({ accountAddress, asset })`
3. Submit a transfer transaction
4. Wait for confirmation using `waitForTransaction()`
5. Verify the recipient balance changed
### Advanced Testing
[](#advanced-testing)
The CLI provides [Transaction Simulation Sessions](/build/cli/working-with-move-contracts/transaction-simulation-sessions) that let you simulate multiple transactions sequentially against a fork of mainnet or testnet state. This is useful for testing complex integration logic without spending real tokens.
For contract deployment, use `aptos move deploy-object` (the modern approach). See the [deploy-contracts skill](https://github.com/aptos-labs/aptos-agent-skills) for a pre-deployment checklist.
### Explorer Verification
[](#explorer-verification)
After deploying a contract, verify it on the [Aptos Explorer](https://explorer.aptoslabs.com). Your source code, ABI, and interactive function calls are all available immediately. Use the Run tab to test entry functions and the View tab to check read-only state.
# Aptos Keyless
> Integrate Keyless accounts for seamless user onboarding using social logins instead of traditional private key management.
## Integrate with Aptos Keyless accounts
[](#integrate-with-aptos-keyless-accounts)
* [Introduction](/build/guides/aptos-keyless/introduction)
* [OIDC Support and Configuration](/build/guides/aptos-keyless/oidc-support)
* [Integration Guide](/build/guides/aptos-keyless/integration-guide)
* [Simple Example](/build/guides/aptos-keyless/simple-example)
* [How Aptos Keyless works](/build/guides/aptos-keyless/how-keyless-works)
* [Terminology and FAQ](/build/guides/aptos-keyless/other)
## Using an IAM Provider? Integrate with Aptos Federated Keyless
[](#using-an-iam-provider-integrate-with-aptos-federated-keyless)
* [Federated Keyless](/build/guides/aptos-keyless/federated-keyless)
# Federated Keyless
> Extended Keyless support for additional OIDC providers through IAM systems like Auth0 and AWS Cognito.
## Federated Keyless
[](#federated-keyless)
[AIP-96](https://github.com/aptos-foundation/AIPs/blob/main/aips/aip-96.md): Federated Keyless is an extension of Aptos Keyless to support more OpenID Connect (OIDC) providers, beyond the ones that are allow-listed in `0x1::jwks` via JWK consensus, while maintaining its decentralization. Federated keyless adds support for authenticating users via identity & access management (IAM) providers (e.g. Auth0, AWS Cognito) as long as your project uses a supported IAM provider for user authentication.
To elaborate further, Federated Keyless enables:
1. Extension of authentication methods a. All authentication methods supported by the IAM are available to the dApp including email/SMS OTP and their marketplace of social login integrations like Discord, Naver, X and more. Auth0 marketplace linked [here](https://marketplace.auth0.com/) as an example.
2. Compatibility with existing account systems a. Since IAMs also support custom authentication, it allows an application to bring its own username/password (Cognito [docs](https://docs.aws.amazon.com/cognito/latest/developerguide/amazon-cognito-user-pools-authentication-flow.html), Auth0 [docs](https://auth0.com/blog/Custom-Authentication-With-Auth0/)). An application can start using an existing account system already set up with an IAM or they can migrate their existing account system to an IAM to generate Keyless-compatible JWTs.
* [Federated Keyless Key Considerations](/build/guides/aptos-keyless/federated-keyless/key-considerations)
* [Federated Keyless Integration Guide](/build/guides/aptos-keyless/federated-keyless/integration-guide)
* [Federated Keyless FAQs](/build/guides/aptos-keyless/federated-keyless/other)
# Federated Keyless Integration Guide
> Step-by-step guide for integrating Federated Keyless with IAM providers like Auth0 and AWS Cognito.
1. Step 1. Setup your IAM provider
Set up your project with your IAM to match the account structure you are looking for.
* [Getting Started with AWS Cognito](https://aws.amazon.com/cognito/getting-started/)
* [Getting Started with Auth0](https://auth0.com/docs/get-started)
2. Step 2. Register the JSON Web Key Set (JWKS) on-chain
Federated Keyless accounts require the JWKS to be registered on-chain.
To register the JWKS - call the `0x1::jwks::update_federated_jwk_set` entry function with an Aptos account that will store the JWKs that will be used to validate transactions signed by federated keyless accounts.
Caution
**Losing access to the JWK owner account compromises the Federated Keyless accounts created with it**
The JWK owner account is the only account that can update the JWKS. If you lose access to the JWK owner account, you will not be able to update the JWKS and the Federated Keyless accounts created with it will stop working in the case of a key rotation. Users will be unable to validate their JWT tokens as they will be signed with the new key whos public key is not registered on the Aptos blockchain.
The JWK set can be found as follows -
AWS Cognito - `https://cognito-idp..amazonaws.com//.well-known/jwks.json` Auth0 - `https:///.well-known/jwks.json`
The typescript SDK contains functionality to simplify the process given the issuer for your IAM provider setup (the `iss` claim value on your user’s JWT tokens) and an account to use to make the update.
```
import {Aptos} from '@aptos-labs/ts-sdk'; // Requires version v1.29.1 or later
const aptos = new Aptos(new AptosConfig({ network: Network.DEVNET })); // Configure your network hereconst alice = // Derive your Aptos account hereconst jwkTxn = await aptos.updateFederatedKeylessJwkSetTransaction({ sender: alice, iss });await aptos.signAndSubmitTransaction({ signer: alice, transaction: jwkTxn });
```
You can use the interactive example provided by the SDK to easily register the JWKS for your IAM provider in devnet or testnet. This will setup the JWK owner account with a Google Keyless account.
```
git clone https://github.com/aptos-labs/aptos-ts-sdkcd aptos-ts-sdkpnpm install && pnpm buildcd examples/typescriptpnpm installpnpm jwk_update
```
To setup the JWK owner account in mainnet, you will need create an account and use it to register the JWKS.
Save the address of the account you used to register the JWKS as you will need it for the next step.
To learn more about the `0x1::jwks::update_federated_jwk_set` entry function, see the [reference documentation](https://aptos-labs.github.io/framework-book/aptos-framework/jwks.html#function-update_federated_jwk_set).
Caution
**Handling key rotations**
Whenever there is a key rotation of the JWKS, it is important to update the JWKS registered on chain promptly to avoid any loss of access to Federated Keyless accounts. See [here](/build/guides/aptos-keyless/federated-keyless/key-considerations) for more info.
3. Step 3. Follow the Aptos Keyless integration guide
Now that you have registered the JWKS, you can follow the Aptos Keyless integration guide starting from step 2. Be sure to set the `jwkAddress` to the address of the account you used to register the JWKS when deriving the `KeylessAccount`.
[Aptos Keyless Integration Guide - Step 2](/build/guides/aptos-keyless/integration-guide#step-2-install-the-aptos-typescript-sdk)
# Federated Keyless Key Considerations
> Important considerations and supported IAM providers for implementing Federated Keyless accounts in production.
## Federated Keyless Key Considerations
[](#federated-keyless-key-considerations)
**Supported IAMs**
Currently, the supported IAMs are Amazon Cognito and Auth0 across devnet, testnet, and mainnet. See a table of the full set of supported IAM providers [here](/build/guides/aptos-keyless/oidc-support).
**Federated Keyless flow**
The flow for Federated Keyless transactions is the same as described [here](/build/guides/aptos-keyless/how-keyless-works). However, the difference is that in Federated Keyless, instead of the OIDC provider (e.g., Google, Apple) acting as the issuer of the JWT, the IAM provider (e.g., Auth0, Cognito) acts as the issuer. The user authenticates with the application, the IAM receives the user’s credentials, and then the IAM issues the Keyless-compatible JWT.
**Available authentication methods**
All authentication methods that are supported by the IAM providers are available for use - this includes SMS OTP, email link, and the traditional username + password.
**Configuration limitations**
A Keyless account address varies according to the `aud` (AKA application ID or client ID), and `iss` (AKA issuer). The setup of your user data within the IAM must reflect the interoperability you seek to provide to your users. JWT tokens issued for a user in the same user pool but for different applications will result in a different address derivation if the `aud` value is different.
**JSON Web Key Set management**
If you or the IAM platform rotates the key pairs used to signed the JWT tokens, the JWK set must be updated on chain using the same account used to instantiate your app's Federated Keyless accounts. As such it is vital to -
1. Maintain access to your JWKS owner account
2. Update the JWK set on chain whenever a key rotation occurs
When a keypair is rotated existing keyless account instantiations will continue to work so long as the old JWK has not been removed. Any new JWTs issued by the new keypair will not be accepted until the JWK set on chain is updated to contain its public key.
**The trust and security model for Federated Keyless**
Compared to the existing Keyless implementation, dApp developers utilizing Federated Keyless alongside certain authentication methods like email/SMS, OTP and email/password may have more access to user credentials when leveraging IAM providers than with the existing direct OIDC provider integrations.
We recommend each dApp developer perform their own research and consult with their legal counsel before integrating an authentication method. Developers should also understand to what extent they may have access to user credentials and what controls they have in place.
# Federated Keyless FAQ
> Frequently asked questions about Federated Keyless implementation, IAM provider changes, and account migration.
## Federated Keyless FAQs
[](#federated-keyless-faqs)
**What if I stop using my IAM for my application? What if I switch IAM providers?**
* An account address depends on values of several variables that are specific to an IAM service, including `aud` (client ID) and `iss` (issuer). If these values are changed, then a different address will be derived.
* If you want to switch IAM providers, you will need to develop an account migration flow, resulting in a key rotation from the account derived from the prior IAM provider to the account derived from the new IAM provider.
* We recommend allowing your users to add a secondary authentication method to their accounts (e.g., back-up private key) so that they can maintain access should the authentication path into their account via Federated Keyless be disrupted via a service provider change. In order to implement this, you need to do a key rotation to a multikey account. For relevant documentation see [key rotation](/build/guides/key-rotation) and [multikey SDK](https://aptos-labs.github.io/aptos-ts-sdk/@aptos-labs/ts-sdk-1.35.0/classes/MultiKeyAccount.html).
**Does using an IAM cost money?**
* Yes, IAMs usually cost money, but they can help provide useful functionality within your application such as role-based access control (authorization), user management, user authentication, security + compliance, and analytics + monitoring.
**In the case the dApp or IAM provider goes offline, how do I make sure my users can continue accessing their accounts?**
* We recommend allowing your users to add a secondary authentication method to their accounts (e.g., back-up private key) so that they can maintain access should the authentication path into their account via Federated Keyless is disrupted via service provider change or other outage.
**I use an open source IAM like Keycloak. Can I use Federated Keyless?**
* Not today. Due to the trust placed in the IAM to have sufficient uptime and security standards, we have limited the accepted IAM set to the currently supported issuers. If you believe your provider should be included for consideration, please consider raising an AIP or contact us in the Keyless developers [telegram](https://t.me/+h5CN-W35yUFiYzkx).
# Federated Keyless Simple Example
> Working example of Federated Keyless implementation using Auth0 as the IAM provider with complete code samples.
The Federated Keyless Example shows how to set up a Federated Keyless account using Auth0 as the IAM provider.
Explore the code in the [aptos-keyless-example repository](https://github.com/aptos-labs/aptos-keyless-example/tree/main/examples/federated-keyless-example/).
Follow the instructions in the repository's `README.md` to set up and run the example locally.
# How Keyless Works
> Technical deep dive into how Aptos Keyless derives and accesses blockchain accounts using OIDC provider authentication.
Aptos Keyless enables a dApp to **derive** and **access** a blockchain account for a user who successfully signed in to the dApp via an OIDC provider (e.g., Google). Importantly, this blockchain account is **scoped to the dApp**. This means other dApps, who can similarly sign-in the same user, via the same OIDC provider, are not able to access this account and instead get their own account.
_But how does this work?_
This article will explain the full keyless flow depicted below, from the user first signing into a dapp, to obtaining her zero-knowledge proof and to, finally, transacting on-chain.
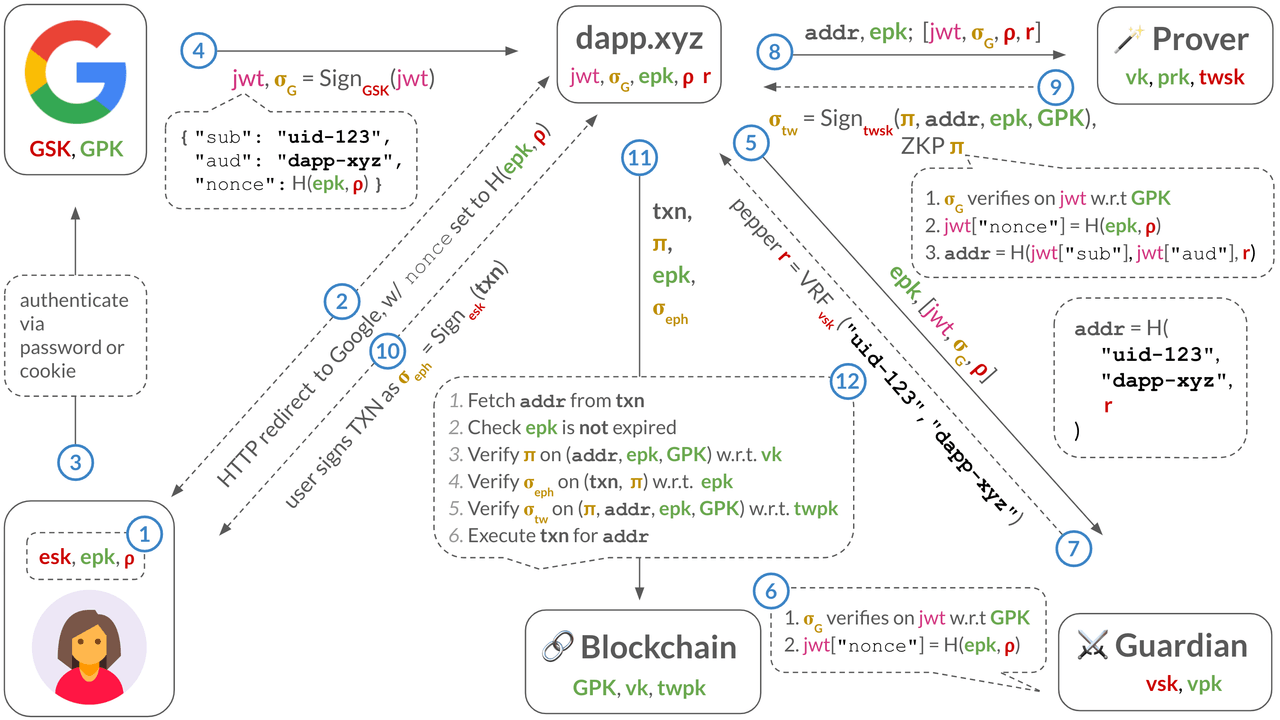
## Overview
[](#overview)
At a very high level, a successful sign-in into the dApp via the OIDC provider will result in the dApp receiving a **JSON Web Token (JWT)** signed by the OIDC provider. The JWT will contain, among other things, three important pieces of information:
1. The user’s identity (contained in the JWT’s `sub` field)
2. The dApp’s identity (contained in the JWT’s `aud` field)
3. Application-specific data; specifically, an **ephemeral public key (EPK)** (contained in the JWT’s `nonce` field), whose associated **ephemeral secret key (ESK)** only the user knows.
Now, assume that the user’s blockchain account address is (more or less) a hash of the user’s identity in `sub` and the dApp’s identity in `aud` from above.
Then, the **key observation** is that the signed JWT effectively acts as a **digital certificate**, **temporarily** binding this blockchain address to the EPK, and allowing the EPK to sign TXNs for it. In other words, it securely delegates TXN signing rights for this blockchain account to the EPK (Note: The EPK contains an expiration date and is thus short-lived).
Importantly, if the user loses their ESK, the user can obtain a new signed JWT over a new EPK via the application by simply signing in again via the OIDC provider (Or, in some cases, by requesting a new signed JWT using an OAuth refresh token).
With this system, the **challenge** is maintaining privacy, since revealing the JWT on-chain would leak the user’s identity. Furthermore, revealing the EPK to the OIDC provider would allow it to track the user’s TXNs on-chain.
We explain below how Keyless accounts work and how they address these challenges.
## Flow: Deriving a keyless account for a user in a dApp
[](#flow-deriving-a-keyless-account-for-a-user-in-a-dapp)
First, let us look at how a dApp can sign-in a user via (say) Google, derive that user’s keyless blockchain address and, for example, send that user an asset.
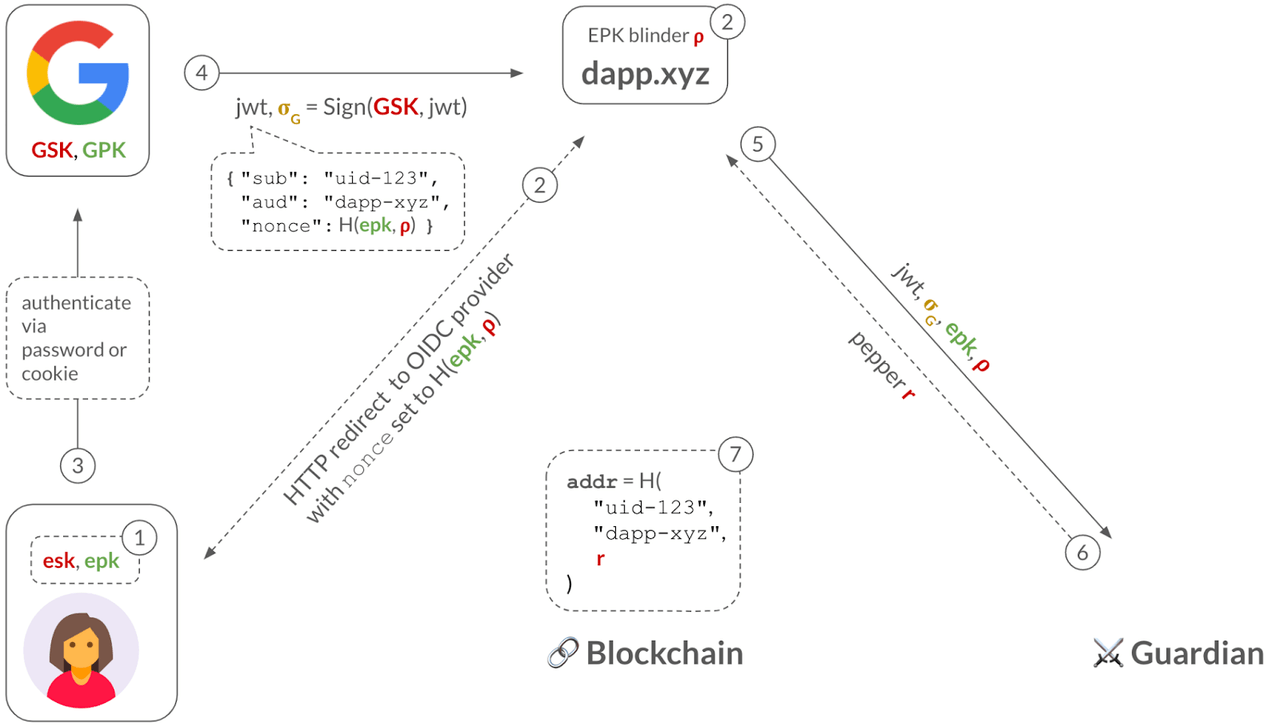
**Step 1**: The user generates an ephemeral key pair: an EPK with an expiration date, and its associated ESK. The dApp keeps the EPK and safely stores the ESK on the user-side (e.g., in the browser’s local storage, or in a trusted enclave if the ESK is a WebAuthn passkey).
**Step 2**: The dApp commits to the EPK as H(epk,ρ)H(\\mathsf{epk}, \\rho)H(epk,ρ), where ρ\\rhoρ is a blinding factor. When the user clicks on the “Sign in with Google” button, the dApp redirects the user to Google’s sign in page and, importantly, sets the `nonce` parameter in the URL to this EPK commitment. This hides the EPK from Google, maintaining privacy of the user’s TXN activity.
**Step 3**: Typically, the user has an HTTP cookie from having previously-signed-in to their Google account, so Google merely checks this cookie. If the user has multiple Google accounts, Google asks the user to select which one they want to sign-in into the dApp (The less common path is for the user to have to type in their Google username and password).
**Step 4**: Once the user has signed in, Google sends the dApp a signed JWT, which includes the user's `sub` identifier (e.g., `uid-123`), the application’s `aud` identifier (e.g., `"dapp-xyz"`) and the `nonce` with the EPK commitment (This assumes that the dApp has previously registered with Google and received this `"dapp-xyz"` identifier).
**Step 5**: The dApp now has almost everything it needs to derive a keyless account for the user: the user’s identifier (`sub`) and the dApp’s identifier (`aud`). But, to preserve the privacy of the user, the dApp will use a third piece of information: a blinding factor rrr called a **pepper**. The dApp will contact a so-called **guardian** who will deterministically derive a random rrr from the given (`sub`, `aud`). Importantly, the guardian will only reveal rrr to the dApp upon seeing a validly-signed JWT for the queried (`sub`, `aud`).
**Step 6**: The dApp derives the address of the account as addr\=H("uid-123","dapp-xyz",r)\\mathsf{addr} = H(\\texttt{"uid-123"}, \\texttt{"dapp-xyz"}, r)addr\=H("uid-123","dapp-xyz",r), where HHH is a cryptographic hash function.
Note that the pepper rrr is used to hide the user and app identity inside the address since, as we described above, only an authorized user with a valid JWT will be able to obtain this pepper.
Also, note that the address is independent of the EPK. This is why the ESK need not be long-lived and can be lost.
Finally, the dApp can, for example, send an NFT to the user at their address addr\\mathsf{addr}addr.
But how can the dApp authorize TXN from this account at addr\\mathsf{addr}addr? We discuss that next.
## Flow: Obtaining a zero-knowledge proof before transacting
[](#flow-obtaining-a-zero-knowledge-proof-before-transacting)
In the previous flow, we showed how a dApp can sign in a Google user and derive their privacy-preserving keyless address, with the help of a guardian.
Next, we show how this dApp can obtain a zero-knowledge proof (ZKP), which will allow it to authorize transactions from this address for the user. Importantly, the transaction will hide the user’s identifying information (e.g., the `sub` field).

**Step 1**: The dApp sends all the necessary public information (i.e., epk\\mathsf{epk}epk, GPK\\mathsf{GPK}GPK) and private information (i.e., JWT, signature σ\_G\\sigma\\\_Gσ\_G from Google, EPK blinding factor ρ\\rhoρ, and pepper rrr) to the **prover service**.
**Step 2**: The prover derives the user’s address addr\\mathsf{addr}addr and computes a zero-knowledge proof (ZKP) π\\piπ for the keyless relation R\_keyless\\mathcal{R}\\\_\\mathsf{keyless}R\_keyless (described below). This proof acts as a **privacy-preserving** digital certificate, and binds the user's address addr\\mathsf{addr}addr to the ephemeral public key epk\\mathsf{epk}epk. The prover then sends π\\piπ to the dApp.
In order to bind the epk\\mathsf{epk}epk with the user's address addr\\mathsf{addr}addr, the ZKP will be used to convince the validators that the user is in possession of (1) a JWT signed by Google, (2) which commits to the epk\\mathsf{epk}epk in its `nonce` field, and (3) contains the same information as in the address, without leaking anything about the JWT, its signature σ\_G\\sigma\\\_Gσ\_G, ρ\\rhoρ, or rrr.
More formally, the ZKP π\\piπ convinces a verifier (i.e., the blockchain), who has public inputs (addr,epk,GPK)(\\mathsf{addr}, \\mathsf{epk}, \\mathsf{GPK})(addr,epk,GPK), that the prover knows secret inputs (jwt,σ\_G,ρ,r)(\\mathsf{jwt}, \\sigma\\\_G, \\rho, r)(jwt,σ\_G,ρ,r) such that the relation R\_keyless\\mathcal{R}\\\_\\mathsf{keyless}R\_keyless depicted below holds:
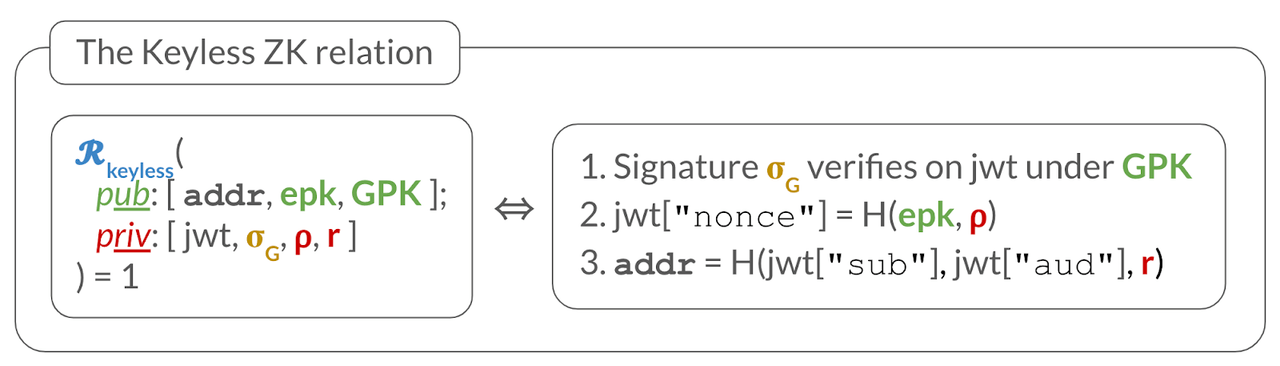
Recall from before that the signed JWT itself binds the blockchain address addr\\mathsf{addr}addr to epk\\mathsf{epk}epk, so that epk\\mathsf{epk}epk can sign transactions for addr\\mathsf{addr}addr. However, the JWT would leak the user’s identity, so the ZKP serves to hide the JWT (and other private information) while arguing that the proper checks hold (i.e., the checks in R\_keyless\\mathcal{R}\\\_\\mathsf{keyless}R\_keyless).
Next, we show how the dApp can now authorize TXNs from addr\\mathsf{addr}addr.
## Flow: Sending a TXN from a keyless account
[](#flow-sending-a-txn-from-a-keyless-account)
The previous flow explained how a dApp can obtain a ZKP from the prover service. Next, we describe how the dApp leverages this ZKP to transact for the account.
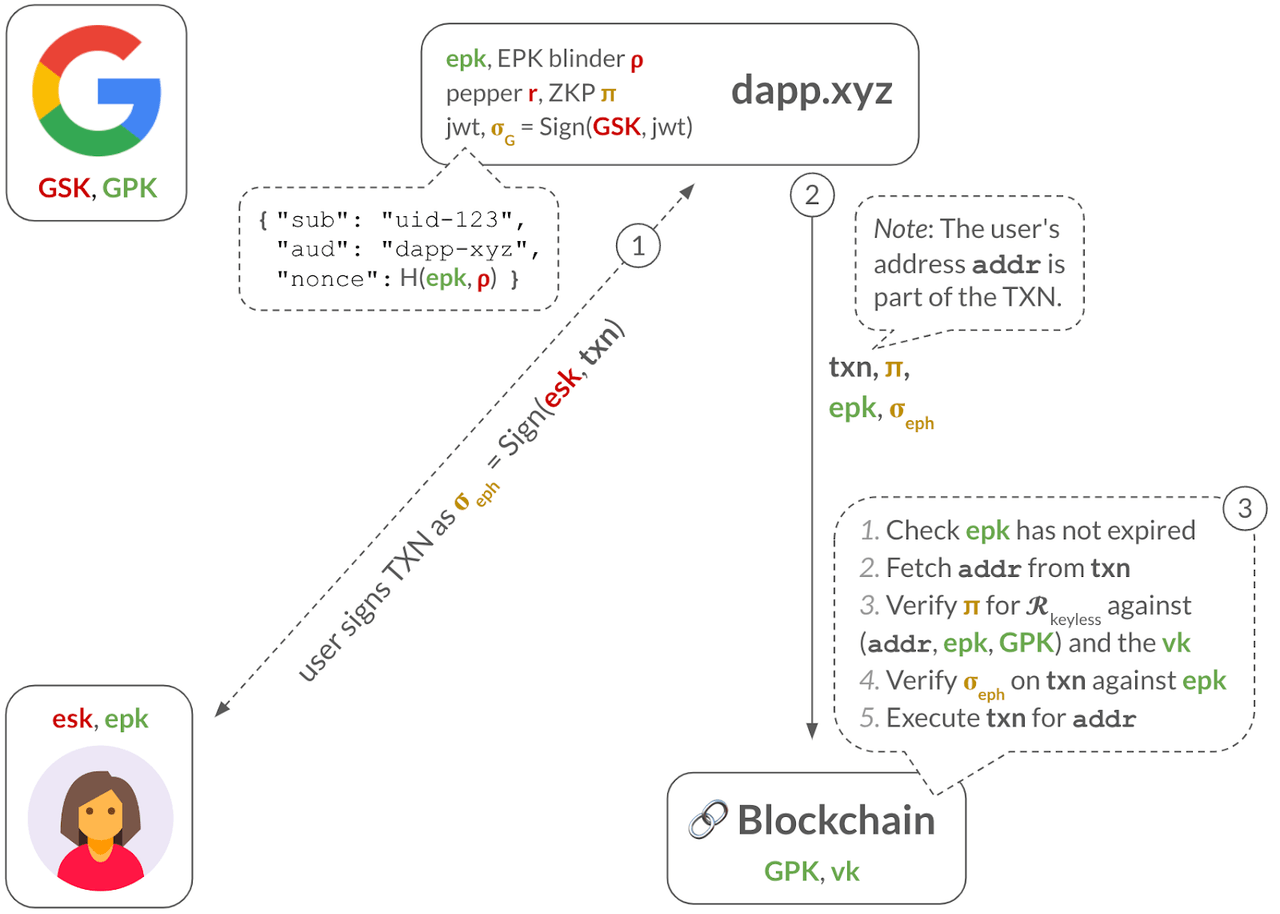
**Step 1**: The dApp obtains an ephemeral signature σ\_eph\\sigma\\\_\\mathsf{eph}σ\_eph over the TXN from the user. This could be done behind the user’s back, by the dApp itself who might manage the ESK. Or, it could be an actual signing request sent to the user, such as when the ESK is a WebAuthn passkey, which is stored on the user’s trusted hardware.
**Step 2**: The dApp sends the TXN, the ZKP π\\piπ, the ephemeral public key epk\\mathsf{epk}epk, and the ephemeral signature σ\_eph\\sigma\\\_\\mathsf{eph}σ\_eph to the blockchain validators.
**Step 3**: To check the TXN is validly-signed, the validators perform several steps: (1) check that epk\\mathsf{epk}epk has not expired, (2) fetch the user’s address addr\\mathsf{addr}addr from the TXN, (3) verify the ZKP against (addr,epk,GPK)(\\mathsf{addr}, \\mathsf{epk}, \\mathsf{GPK})(addr,epk,GPK), and (4) verify the ephemeral signature σ\_eph\\sigma\\\_\\mathsf{eph}σ\_eph on the TXN against the epk\\mathsf{epk}epk. If all these checks pass, they can safely execute the TXN.
## Want more?
[](#want-more)
The key ideas behind keyless accounts are also explained in this 20 minute presentation below.
[Play](https://youtube.com/watch?v=sKqeGR4BoI0)
# Keyless Integration Guide
> Step-by-step guide to integrate domain-scoped Keyless accounts directly into your dApp with practical examples.
Note
**Keyless Account Scoping**
Use of the \*\*_Aptos Keyless Integration Guide_\*\* will allow for the integration of keyless accounts directly into your application. This means that blockchain accounts are scoped to your application's domain (logging in with your Google account on dApp A and logging in with your Google account on dApp B will create separate accounts). Stay tuned for more to come on Aptos’ plan to allow Keyless accounts to be used portably across applications.
To provide feedback, get support, or be a design partner as we enhance Aptos Keyless, join us here: [https://t.me/+h5CN-W35yUFiYzkx](https://t.me/+h5CN-W35yUFiYzkx)
At a high level, there are three steps to follow in order to integrate Keyless Accounts.
1. **Configure your OpenID integration with your IdP.** In this step, the dApp will register with the IdP of choice (e.g. Google) and receive a `client_id`
2. **Install the Aptos TypeScript SDK.**
3. **Integrate Keyless Account support in your application client**
1. Set up the `"Sign In with [Idp]"` flow for your user.
2. Instantiate the user’s `KeylessAccount`
3. Sign and submit transactions via the `KeylessAccount`.
## Example Implementation
[](#example-implementation)
You can find an example app demonstrating basic Keyless integration with Google in the [aptos-keyless-example repository](https://github.com/aptos-labs/aptos-keyless-example/). Follow the directions in the README to start with the example. For more detailed instructions on keyless, please read the rest of this integration guide.
1. Step 1. Configure your OpenID integration with your IdP
The first step is to setup the configuration with your IdP(s).
[Follow the instructions here](/build/guides/aptos-keyless/oidc-support)
2. Step 2. Install the Aptos TypeScript SDK
```
# Keyless is supported in version 1.18.1 and abovepnpm install @aptos-labs/ts-sdk
```
3. Step 3. Client Integration Steps
Below are the default steps for a client to integrate Keyless Accounts
#### 1\. Present the user with a "Sign In with \[IdP\]" button on the UI
[](#1-present-the-user-with-a-sign-in-with-idp-button-on-the-ui)
1. In the background, we create an ephemeral key pair. Store this in local storage.
```
import {EphemeralKeyPair} from '@aptos-labs/ts-sdk/keyless';
const ephemeralKeyPair = EphemeralKeyPair.generate();
```
Note
`EphemeralKeyPair` moved to the `@aptos-labs/ts-sdk/keyless` sub-path in v7.0.0. If you are on v6 or earlier, import from `@aptos-labs/ts-sdk` instead.
2. Save the `EphemeralKeyPair` in local storage, keyed by its `nonce`.
```
// This saves the EphemeralKeyPair in local storagestoreEphemeralKeyPair(ephemeralKeyPair);
```
Example implementation for `storeEphemeralKeyPair`
Note
This implementation is an example of how to store the `EphemeralKeyPair` in local storage. Different implementations may be used according to your application's needs.
```
/** * Store the ephemeral key pair in localStorage. */export const storeEphemeralKeyPair = (ekp: EphemeralKeyPair): void => localStorage.setItem("@aptos/ekp", encodeEphemeralKeyPair(ekp));
/** * Retrieve the ephemeral key pair from localStorage if it exists. */export const getLocalEphemeralKeyPair = (): EphemeralKeyPair | undefined => { try { const encodedEkp = localStorage.getItem("@aptos/ekp"); return encodedEkp ? decodeEphemeralKeyPair(encodedEkp) : undefined; } catch (error) { console.warn( "Failed to decode ephemeral key pair from localStorage", error ); return undefined; }};
/** * Stringify the ephemeral key pairs to be stored in localStorage */export const encodeEphemeralKeyPair = (ekp: EphemeralKeyPair): string => JSON.stringify(ekp, (_, e) => { if (typeof e === "bigint") return { __type: "bigint", value: e.toString() }; if (e instanceof Uint8Array) return { __type: "Uint8Array", value: Array.from(e) }; if (e instanceof EphemeralKeyPair) return { __type: "EphemeralKeyPair", data: e.bcsToBytes() }; return e; });
/** * Parse the ephemeral key pairs from a string */export const decodeEphemeralKeyPair = (encodedEkp: string): EphemeralKeyPair => JSON.parse(encodedEkp, (_, e) => { if (e && e.__type === "bigint") return BigInt(e.value); if (e && e.__type === "Uint8Array") return new Uint8Array(e.value); if (e && e.__type === "EphemeralKeyPair") return EphemeralKeyPair.fromBytes(e.data); return e; });
```
3. Prepare the URL params of the login URL. Set the `redirect_uri` and `client_id` to your configured values with the IdP. Set the `nonce` to the nonce of the `EphemeralKeyPair` from step 1.1.
```
const redirectUri = 'https://.../login/callback'const clientId = env.IDP_CLIENT_ID// Get the nonce associated with ephemeralKeyPairconst nonce = ephemeralKeyPair.nonce
```
4. Construct the login URL for the user to authenticate with the IdP. Make sure the `openid` scope is set. Other scopes such as `email` and `profile` can be set based on your app’s needs.
```
const loginUrl = `https://accounts.google.com/o/oauth2/v2/auth?response_type=id_token&scope=openid+email+profile&nonce=${nonce}&redirect_uri=${redirectUri}&client_id=${clientId}`
```
5. When the user clicks the login button, redirect the user to the `loginUrl` that was created in step 1.4.
#### 2\. Handle the callback by parsing the token and create a Keyless account for the user
[](#2-handle-the-callback-by-parsing-the-token-and-create-a-keyless-account-for-the-user)
1. Once the user completes the login flow, they will be redirected to the `redirect_uri` set in step 1. The JWT will be set in the URL as a search parameter in a URL fragment, keyed by `id_token`. Extract the JWT from the `window` by doing the following:
```
const parseJWTFromURL = (url: string): string | null => { const urlObject = new URL(url); const fragment = urlObject.hash.substring(1); const params = new URLSearchParams(fragment); return params.get('id_token');};
// window.location.href = https://.../login/google/callback#id_token=...const jwt = parseJWTFromURL(window.location.href)
```
2. Decode the JWT and get the extract the nonce value from the payload.
```
import { jwtDecode } from 'jwt-decode';
const payload = jwtDecode<{ nonce: string }>(jwt);const jwtNonce = payload.nonce
```
3. Fetch the `EphemeralKeyPair` stored in step 1.2. Make sure to validate the nonce matches the decoded nonce and that the `EphemeralKeyPair` is not expired.
```
const ekp = getLocalEphemeralKeyPair();
// Validate the EphemeralKeyPairif (!ekp || ekp.nonce !== jwtNonce || ekp.isExpired() ) { throw new Error("Ephemeral key pair not found or expired");}
```
4. Instantiate the user’s `KeylessAccount`
Depending on the type of Keyless you are using, follow the instructions below:
1. Normal Keyless
```
import {Aptos, AptosConfig, Network} from '@aptos-labs/ts-sdk';
const aptos = new Aptos(new AptosConfig({ network: Network.DEVNET })); // Configure your network hereconst keylessAccount = await aptos.deriveKeylessAccount({ jwt, ephemeralKeyPair,});
```
2. Federated Keyless
```
import {Aptos, AptosConfig, Network} from '@aptos-labs/ts-sdk';
const aptos = new Aptos(new AptosConfig({ network: Network.DEVNET })); // Configure your network hereconst keylessAccount = await aptos.deriveKeylessAccount({ jwt, ephemeralKeyPair, jwkAddress: jwkOwner.accountAddress});
```
#### 3\. Store the KeylessAccount in local storage (Optional)
[](#3-store-the-keylessaccount-in-local-storage-optional)
1. After the account has been derived, store the `KeylessAccount` in local storage. This allows the user to return to the application without having to re-authenticate.
```
export const storeKeylessAccount = (account: KeylessAccount): void => localStorage.setItem("@aptos/account", encodeKeylessAccount(account));
export const encodeKeylessAccount = (account: KeylessAccount): string => JSON.stringify(account, (_, e) => { if (typeof e === "bigint") return { __type: "bigint", value: e.toString() }; if (e instanceof Uint8Array) return { __type: "Uint8Array", value: Array.from(e) }; if (e instanceof KeylessAccount) return { __type: "KeylessAccount", data: e.bcsToBytes() }; return e; });
```
2. Whenever the user returns back to the application, retrieve the `KeylessAccount` from local storage and use it to sign transactions.
```
export const getLocalKeylessAccount = (): KeylessAccount | undefined => { try { const encodedAccount = localStorage.getItem("@aptos/account"); return encodedAccount ? decodeKeylessAccount(encodedAccount) : undefined; } catch (error) { console.warn( "Failed to decode account from localStorage", error ); return undefined; }};
export const decodeKeylessAccount = (encodedAccount: string): KeylessAccount => JSON.parse(encodedAccount, (_, e) => { if (e && e.__type === "bigint") return BigInt(e.value); if (e && e.__type === "Uint8Array") return new Uint8Array(e.value); if (e && e.__type === "KeylessAccount") return KeylessAccount.fromBytes(e.data); return e; });
```
#### 4\. Submit transactions to the Aptos blockchain
[](#4-submit-transactions-to-the-aptos-blockchain)
1. Create the transaction you want to submit. Below is a simple coin transfer transaction for example:
```
import {Account} from '@aptos-labs/ts-sdk';
const bob = Account.generate();const transaction = await aptos.transferCoinTransaction({ sender: keylessAccount.accountAddress, recipient: bob.accountAddress, amount: 100,});
```
2. Sign and submit the transaction to the chain.
```
const committedTxn = await aptos.signAndSubmitTransaction({ signer: keylessAccount, transaction });
```
3. Wait for the transaction to be processed on-chain
```
const committedTransactionResponse = await aptos.waitForTransaction({ transactionHash: committedTxn.hash });
```
# Keyless Introduction
> Revolutionary blockchain accounts using OIDC authentication - eliminate private keys for seamless user onboarding.
Keyless accounts represent a pivotal advancement within the Aptos ecosystem, revolutionizing the way users onboard and interact with decentralized applications (dApps). Aptos Keyless allows users to gain ownership of a **self-custodial** Aptos blockchain account from their existing OpenID Connect (OIDC) account(s) (e.g., Sign in with Google; Sign in with Apple), rather than from a traditional secret key or mnemonic. In a nutshell, with Aptos Keyless, a user’s blockchain account is their OIDC account. Over time, Keyless will evolve to support many IdPs who support the OIDC standard, but we will begin with support for the providers listed [here](/build/guides/aptos-keyless/oidc-support).
At the core of the keyless accounts paradigm lies a deep understanding of user experience and security challenges prevalent in traditional blockchain systems. Managing private keys, the cornerstone of user identity and asset ownership, often proves cumbersome and error-prone for users, particularly those lacking technical expertise. Keyless accounts offer an elegant solution by obviating the need for users to grapple with the intricacies of private key management. Instead, users authenticate themselves through access to common social sign in options like Google, Apple, and many more. With this new system comes some important tradeoffs to understand on behalf of your users before implementing Keyless in your application. The following pages will expand on the benefits of Keyless accounts, how to integrate, the system architecture, and FAQs. For a more verbose and technical dive into Keyless accounts, please see [AIP-61-Keyless Accounts](https://github.com/aptos-foundation/AIPs/blob/main/aips/aip-61.md).
There are two ways to interact with Keyless accounts in the Aptos ecosystem. Developers are able to either 1) integrate the Aptos Keyless SDK directly into their dApp or 2) integrate a wallet, like Aptos Connect, that supports Keyless account creation. This documentation will focus on case #1 and more details on #2 can be found [here](https://aptosconnect.app/docs/). Please note that a direct integration of the Keyless SDK will result in user accounts being domain specific to your dApp whereas the use of a wallet integration will allow your users to carry their accounts to any application that supports that wallet.
Note: the Aptos Keyless SDK and Aptos Connect are representative examples of the aforementioned product experience, but developers in our ecosystem are building alternatives, like a Keyless Unity SDK and alternative wallet products with Keyless integration.
## Aptos Keyless Benefits
[](#aptos-keyless-benefits)
Keyless accounts are revolutionary to users for the following reasons:
1. **Simplified login user experience**: "1-click" account creation via familiar Web2 logins like Sign In with Google.
2. **Enhanced dApp user experience**: Ability to transact on the Aptos blockchain without needing to navigate away from the application experience to download a wallet.
3. **Secure key management**: Requires no manual secret key management by the user. Users sign transactions with the JSON Web Token (JWT) token issued by OIDC providers. As such, blockchain account access is synonymous with access to one’s OIDC account
4. **Improved account recovery**: Web2-like recovery flows are available to regain access to one’s blockchain account in case the user ever loses access to their OIDC account.
5. **Seamless cross-device experiences**: Users log in with their OIDC account no matter what device they are on - no need to download wallet software on each device, import their keys and encrypt them with a password, which must be maintained.
With these benefits, come some important structural components of Keyless accounts for developers to be aware of. You can see more on this in our FAQs.
# Keyless OIDC Support
> Comprehensive list of supported OpenID Connect identity providers and configuration options across networks.
Aptos Keyless supports the following IdPs and IAM providers on our network(s). Support for additional IdPs to come. Please reach out if you have need for coverage for a specific use case.
| Identity Provider | Federated Only | Devnet | Testnet | Mainnet | | ----------------- | -------------- | --------- | ------- | ------- | | Google | No | Live | Live | Live | | Apple | No | Live | Live | Live | | Auth0 | Yes | Live | Live | Live | | Cognito | Yes | Live | Live | Live | | Microsoft | No | In review | - | - | | Github | No | In review | - | - | | Facebook | No | In review | - | - |
If your identity provider is marked as "Federated Only", you will need to follow the instructions for [Federated Keyless](/build/guides/aptos-keyless/federated-keyless).
To integrate Aptos Keyless into your dApp, you must register your dApp with at least one of the available identity providers via their OIDC registration process. Each respective registration process will assign a Client ID to your application, which will serve as an identifier for your application in the Keyless architecture.
## Registering your dApp with Google
[](#registering-your-dapp-with-google)
1. Step 1: Sign in to Google Developer Console
1. Navigate to the [Google Cloud Console](https://console.cloud.google.com/).
2. Sign in with your Google account credentials.
2. Step 2: Create a New Project
1. If you don't have an existing project, click on the "Select a project" dropdown menu at the top of the page and choose "New Project."
2. Enter a name for your project and click "Create." Detailed instructions can be found [here](https://cloud.google.com/resource-manager/docs/creating-managing-projects#creating_a_project).
3. Step 3: Configure Consent Screen
1. In the left sidebar, navigate to "APIs & Services" > "OAuth consent screen."
2. Choose "External" user type and click "Create."
3. Enter the required details such as the application name, user support email, and developer contact information.
4. Optionally, add additional details like the application logo and privacy policy URL.
5. Click "Save and continue." Detailed steps are available [here](https://developers.google.com/workspace/guides/create-credentials#configure_the_oauth_consent_screen).
4. Step 4: Register Your Application
1. In the left sidebar, navigate to "APIs & Services" > "Credentials." 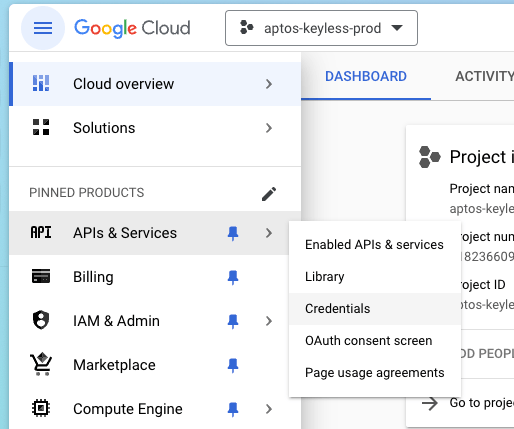
2. Click on "Create Credentials" and select "OAuth client ID." 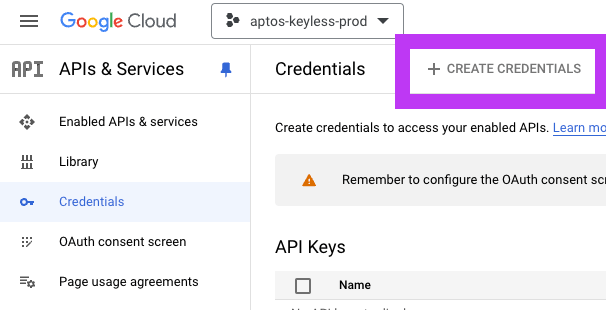
3. Choose the application type (e.g., Web application, Desktop app, or Mobile app).
4. Enter the necessary details such as the name of your application and the authorized redirect URIs. For OIDC, the redirect URIs should follow the format [https://your-app-domain.com/auth/google/callback](https://your-app-domain.com/auth/google/callback).
5. Click "Create."
5. Step 5: Obtain Client ID and Client Secret
1. After creating the OAuth client ID, Google will provide you with a client ID and client secret. These credentials are essential for authenticating your application.
2. Note down the client ID and client secret securely. Do not expose them publicly.
6. Step 6: Configure OIDC Integration in Your Application
1. Integrate OIDC authentication into your application using a suitable OIDC library or framework (e.g., Passport.js for Node.js, Spring Security for Java, or Auth0 for various platforms).
2. Use the client ID and client secret obtained from Google to configure OIDC authentication in your application settings.
3. Set up the appropriate callback URL ([https://your-app-domain.com/auth/google/callback](https://your-app-domain.com/auth/google/callback)) for handling authentication responses from Google.
## Registering your dApp with Apple
[](#registering-your-dapp-with-apple)
1. Step 1: Sign in to Apple Developer Account
1. Go to the [Apple Developer website](https://developer.apple.com/).
2. Sign in with your Apple ID.
3. Enroll in the Apple Developer Program if not already. 
2. Step 2: Create a New App ID
1. Navigate to the "Certificates, Identifiers & Profiles" section.
2. Click on "Identifiers" in the sidebar.
3. Click the "+" button to create a new App ID.
4. Fill in the details for your app, including the name and bundle ID.
5. Enable "Sign in with Apple" under the "Capabilities" section.
6. Click "Continue" and then "Register" to create the App ID.
3. Step 3: Generate a Private Key
1. In the "Keys" section of the "Certificates, Identifiers & Profiles" page, click the "+" button to create a new key.
2. Enter a name for the key, enable the "Sign in with Apple" capability, and click "Continue."
3. Download the generated private key and securely store it. This key will be used to authenticate your app with Apple's OIDC service.
4. Step 4: Configure Redirect URIs
1. Under the "App ID" section, locate your newly created App ID and click on it.
2. Scroll down to the "Sign in with Apple" section and click on "Edit."
3. Add the redirect URIs that your application will use for callback after authentication. The format should be [https://your-app-domain.com/auth/apple/callback](https://your-app-domain.com/auth/apple/callback).
4. Click "Save" to update the settings.
5. Step 5: Set Up Your OIDC Integration
1. Use an OIDC library or framework compatible with Apple's OIDC service (e.g., Passport.js for Node.js, Spring Security for Java).
2. Configure your application to use the client ID and private key obtained from Apple during the registration process.
3. Set up the appropriate callback URL ([https://your-app-domain.com/auth/apple/callback](https://your-app-domain.com/auth/apple/callback)) for handling authentication responses from Apple.
# Keyless Terminology and FAQ
> Essential terminology, definitions, and frequently asked questions about Aptos Keyless accounts and OIDC integration.
## Terminology
[](#terminology)
* **OpenID Connect (OIDC)**: is the identity authentication protocol used to enable federated identity verification. This protocol is what is used when a user goes through the "Sign in with Google" flow for example.
* **Identity Provider (IdP)**: is the trusted authority who authenticates your identity via OIDC. Supported example includes: Google.
* **JSON Web Token (JWT):** is an open standard used to share security information between two parties — a client and a server. Each JWT contains encoded JSON objects, including a set of claims. JWTs are signed using a cryptographic algorithm to ensure that the claims cannot be altered after the token is issued.
* `iss`, an identifier for the OIDC provider (e.g., [https://accounts.google.com](https://accounts.google.com))
* `aud`, the OAuth `client_id` of the application that the user is signing in to (e.g., [Notion.so](https://notion.so))
* `sub`, an identifier that the OIDC provider uses to identify the user
* This could be an identifier specific to this `client_id`
* Or, it could be an identifier shared across different `client_id`'s (e.g., Facebook’s OIDC does this)
* `email`, some providers might also expose the user’s email as one of the fields (e.g., Google)
* in addition, an `email_verified` field will be exposed to indicate if the provider has verified that the user owns this email address
* `nonce`, arbitrary data that the application wants the OIDC provider to sign over
* `iat`, the time the JWT was issued at.
* **Ephemeral Key Pair:** a temporary public/private key pair that is used to sign transactions for an Aptos Keyless account. The public key and its expiration date are committed in the JWT token via the `nonce` field.
* **Keyless Account:** a blockchain account that is directly-derived from (1) a user’s OIDC account (e.g., `alice@gmail.com`) and (2) an associated application’s OAuth client\_id (e.g., Notion.so). Users authenticate through the OIDC flow.
* **JSON Web Key (JWK):** is the cryptographic public key of the OIDC provider. This public key is used to verify the signature on the JWTs that the OIDC provider issues to the client application. This way, the client application can verify the authenticity of the tokens and ensure that they have not been tampered with.
* **client\_id:** the OAuth identifier for your application that you will receive from the IdP after registering your application with them. This will be used in our keyless architecture in the address derivation for your users.
* **redirect\_uri:** the URI of the callback handler once the user successfully authenticates. Needs to be registered with your IdP.
## Ceremony
[](#ceremony)
Aptos engaged in iterative trusted setup ceremonies to secure our Groth16 based ZK circuit. A trusted setup ceremony is a multi-party computation (MPC) that outputs the prover and verifier keys used in a zkSNARK system, common for efficient zero-knowledge proof systems. As long as a single participant in the ceremony is honest, the process is considered secure and the outputs will be valid. Our initial ceremony consisted of 140+ members of the Aptos ecosystem, which was an incredible show of the power of decentralization, security, and community - and a follow up ceremony was held following a developer feedback phase that allowed us to identify and implement an improvement to our circuit that helped us ensure Keyless is universally accessible. Our final ceremony contributions can be found in this repo \[here\] and verified using the process outlined \[here\].
## Frequently Asked Questions
[](#frequently-asked-questions)
**What is the best way to use Keyless accounts?**
* The best way to use Keyless accounts depends on your use case. If seamless account interoperability across our ecosystem is important to your dApp experience (think: mint an NFT on your platform and allow users to sell their NFT on an external NFT marketplace), you might want to consider integrating a wallet that supports Keyless. If you want to create a fully embedded account experience in your dApp, allowing users to transact without ever leaving your application, you might want to do a direct integration of the Aptos Keyless SDK.
**Does Keyless work with sponsored transactions or do my users always need to pay for their own gas?**
* Yes, Keyless works with sponsored transactions like any regular private key based account.
**If I use the Aptos Keyless SDK, can my user’s use their accounts across other dApps?**
* Keyless accounts are scoped to the domain they are created with as the address derivation includes a unique identifier for the application.
**What is Aptos Connect?**
* Account Management Infrastructure: Central to the keyless accounts paradigm is a robust account management infrastructure that facilitates the creation, deletion, and management of user accounts, alongside the storage and retrieval of associated metadata.
* While the adoption of keyless accounts heralds a paradigm shift towards enhanced usability and security, it is imperative for developers to remain cognizant of tradeoffs associated with this system vs. common alternatives like plaintext private keys.
**Are there dependency on external services?**
* Yes, Keyless accounts introduce a degree of dependency on external authentication services (pepper and prover), necessitating contingency plans and fallback mechanisms to mitigate service disruptions and ensure uninterrupted user access
**If my dApp goes down, my users cannot access their Keyless accounts. How can I help protect them in that case?**
* We encourage dApp developers to support additional backup recovery options for your users when integrating Keyless into a dApp. Specifically, we recommend that you support adding a backup private key to Keyless accounts in your dApp. Practically, this would transform the accounts into 1 of 2 multi-signature accounts where both keys are owned by the user. This would allow users to continue using OIDC login via your dApp to access their Keyless accounts but would add the ability for your users to export their backup private key to any self custodial product, where they could sign transactions from that same account with their traditional private key. Doing this will ensure that users never lose access to their digital assets, even if your dApp shuts down or the user loses access to their OIDC account.
* You should make a determination at what point in the user journey to incorporate a back-up is appropriate for your dApp. Incorporating a backup method later in the user journey would preserve the seamless onboarding experience that Keyless offers but could result in less users receiving a recovery key. Prompting users to add a backup key during the onboarding process would likely lead to more users receiving a recovery key but could add potential friction during the onboarding process.
# Keyless Simple Example
> Example demonstrating Keyless account integration with Google authentication and practical code samples.
Explore the code in the [aptos-keyless-example repository](https://github.com/aptos-labs/aptos-keyless-example/tree/main/examples/keyless-example/).
Follow the instructions in the repository's `README.md` to set up and run the example locally with your own Google `client_id`.
# Build an End-to-End Dapp on Aptos
> Complete tutorial for building a todo list dapp from smart contract to frontend with wallet integration on Aptos.
A common way to learn a new framework or programming language is to build a simple todo list. In this tutorial, we will learn how to build an end-to-end todo list dapp, starting from the smart contract side through the front-end side and finally use of a wallet to interact with the two.
See the completed code in the [source-code](https://github.com/aptos-labs/aptos-core/tree/main/aptos-move/move-examples/my_first_dapp).
## Prerequisites
[](#prerequisites)
You must have:
* [node and npm](https://nodejs.org/en/)
* [VSCode IDE](https://code.visualstudio.com/) or [Cursor](https://www.cursor.com/)
Although we will explain some React decisions, we are not going to deep dive into how React works; so we assume you have some previous experience with React.
## Setup
[](#setup)
In this section, we will setup three things:
1. API key using [Geomi](https://geomi.dev/)
2. Project using [create-aptos-dapp](/build/create-aptos-dapp) which will hold our project files, both client-side code (React based) and the Move code (our smart contract)
3. [Move On Aptos](/build/smart-contracts/move-vscode-extension) VSCode extension
### Setup API key
[](#setup-api-key)
First let's create an API key using [Geomi](https://geomi.dev/). The Aptos TypeScript SDK uses Geomi API by default, and without an API key, you will get very low rate limits.
1. **Visit Geomi**: Go to [geomi.dev](https://geomi.dev/) in your web browser.
2. **Sign up or Log in**: Create a new account or log in to your existing Geomi account.
3. **Create a new project**: Click on "Create New Project" to create a new project and name it `my-first-dapp`. 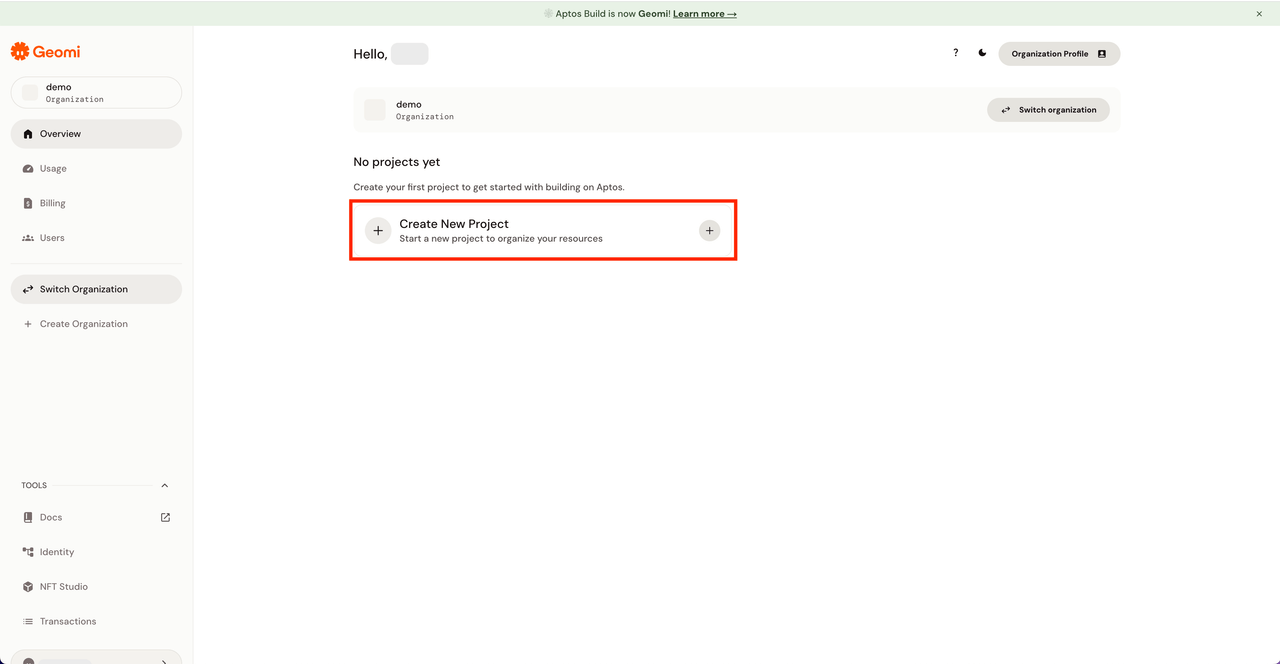 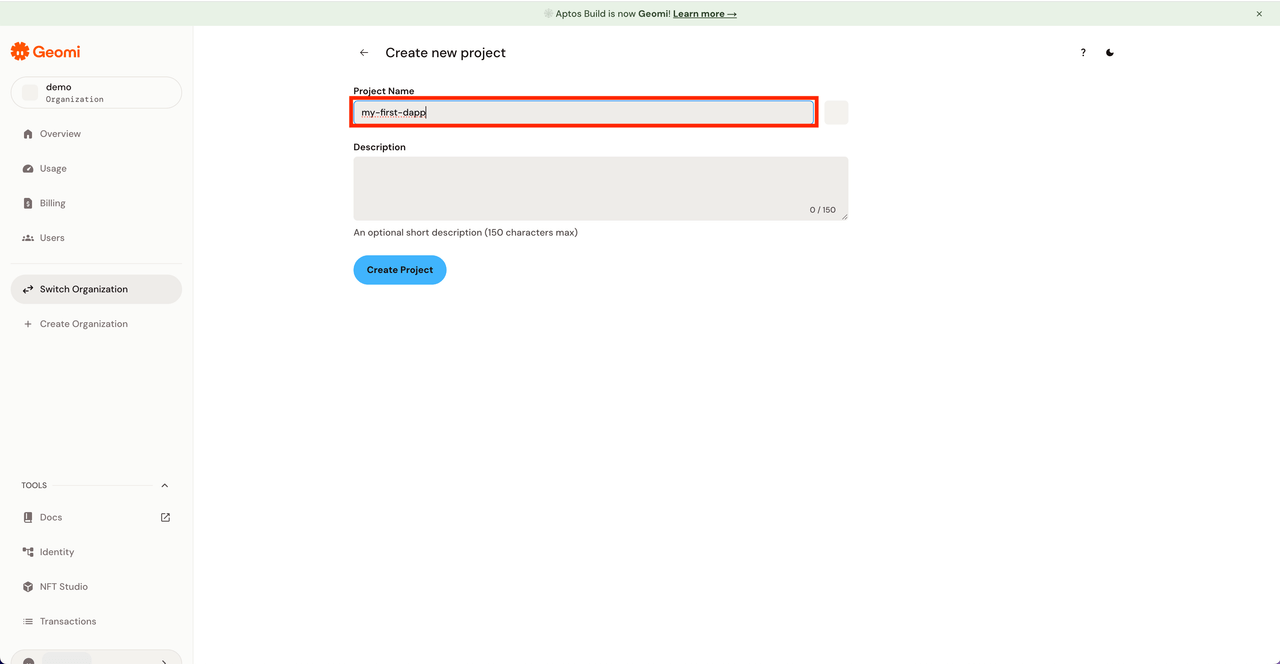
4. **Navigate to API Resource tab**: Navigate to the API Resource tab in your dashboard. 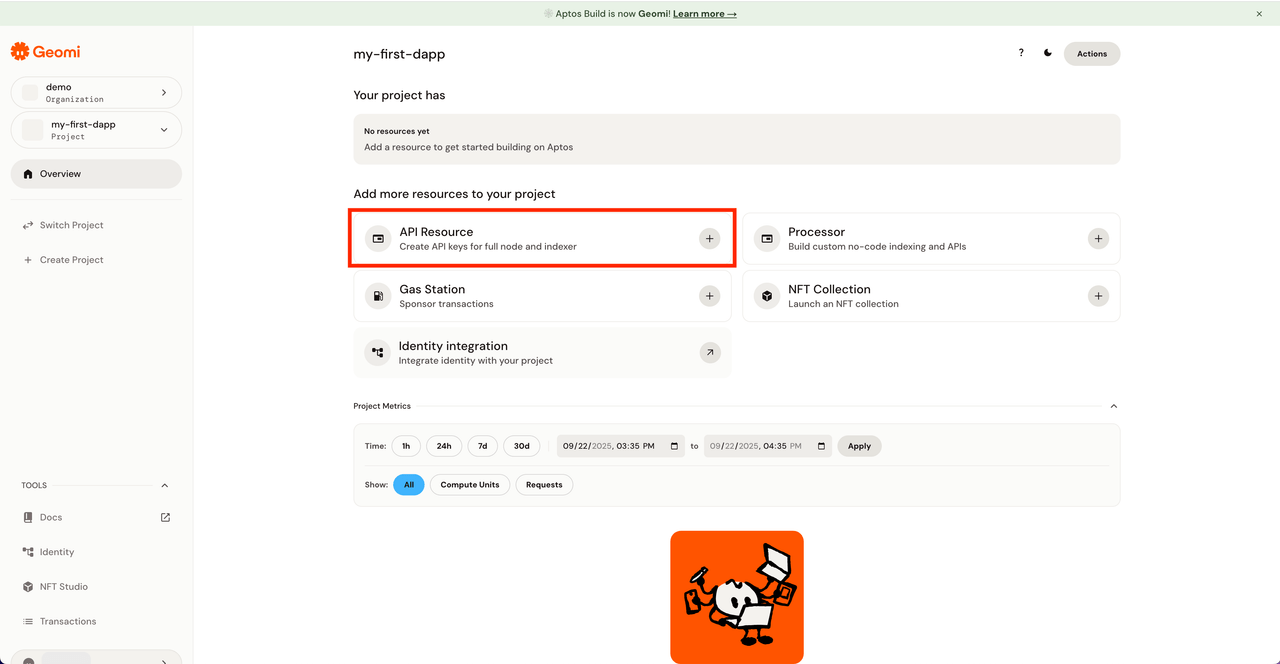
5. **Create New API Resource**: Name it `my-first-dapp-api` and set the network to `Devnet`. 
6. **Configure API Key**: Since we will be using the API key in our web app, toggle on `Client usage`. Here you can configure allowed URLs and extension IDs that can use the API key. Set `Allowed URLs` to `http://localhost`, which is the development server we will be using. Also set `Per IP rate limit` to `100,000`. 
7. **Copy and Save**: Now you have your API key. Copy the key as we will be using it in the next step. 
### Setup Project with create-aptos-dapp
[](#setup-project-with-create-aptos-dapp)
Next, we will be using [create-aptos-dapp](/build/create-aptos-dapp) to create the project.
1. **Open a terminal and navigate to the desired directory** for the project (for example, the `Desktop` directory).
2. **Run the create-aptos-dapp command** to create the project:
```
npx create-aptos-dapp@latest
```
3. **Follow the instructions to create the project** with these settings:
* Choose a name for the project, for example `my-first-dapp`
* Choose the `Full-stack project` option
* Choose the `Boilerplate Template` option
* For simplicity, choose not to use Surf
* Choose the `Vite app` framework option
* Choose the `Devnet` network option
* Say `Yes` for using API key and paste the Geomi API key you copied earlier
* Say `No` for customizing default selections
4. The tool will create the project in a directory with the same name as the project and install the required dependencies.
5. Follow the `Next Steps` instructions.
### Setup Move On Aptos VSCode extension
[](#setup-move-on-aptos-vscode-extension)
Finally, let's install the [Move On Aptos](/build/smart-contracts/move-vscode-extension) VSCode extension.
1. Open VSCode (or Cursor) and navigate to the Extensions tab.
2. Search for `Move On Aptos` published by `aptoslabs` and install the extension.
## Chapters
[](#chapters)
After meeting the [prerequisites](#prerequisites) and [getting set up](#setup) as described below, you will follow this tutorial in this order:
1. [Create a smart contract](/build/guides/build-e2e-dapp/1-create-smart-contract)
2. [Set up a frontend](/build/guides/build-e2e-dapp/2-set-up-the-frontend)
3. [Fetch Data from Chain](/build/guides/build-e2e-dapp/3-fetch-data-from-chain)
4. [Submit data to chain](/build/guides/build-e2e-dapp/4-submit-data-to-chain)
5. [Handle Tasks](/build/guides/build-e2e-dapp/5-handle-tasks)
Now let's [create the Todo List smart contract](/build/guides/build-e2e-dapp/1-create-smart-contract).
# 1. Create a Smart Contract
> First step in building an end-to-end dapp: create and deploy the Move smart contract for managing todo tasks.
This is the first chapter of the tutorial on [building an end-to-end dapp on Aptos](/build/guides/build-e2e-dapp). If you haven’t done it, review that introduction, and ensure your environment meets the [prerequisites](/build/guides/build-e2e-dapp#prerequisites) listed there.
Now that you are all set up, let's explore the `contract` directory.
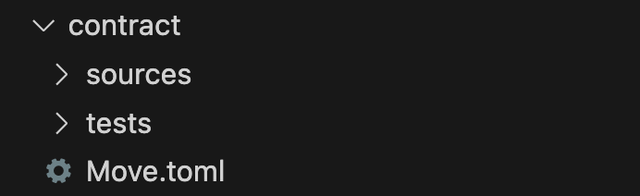
### What is a `Move.toml` file?
[](#what-is-a-movetoml-file)
A `Move.toml` file is a manifest file that contains metadata such as name, version, and dependencies for the package.
Take a look at the new `Move.toml` file. You should see your package information and an `AptosFramework` dependency. The `AptosFramework` dependency points to the `aptos-core/aptos-move/framework/aptos-framework` GitHub repo main branch.
### Why `sources` directory?
[](#why-sources-directory)
The `sources` directory holds a collection of `.move` modules files. And later when we want to compile the package using the CLI, the compiler will look for that `sources` directory and its `Move.toml` file.
### What is the `tests` directory?
[](#what-is-the-tests-directory)
The `tests` directory holds `.move` files that are used to test the files in our `sources` directory.
### Create a Move module
[](#create-a-move-module)
An account is needed to publish a Move module. When we installed the template, the tool created a new account for us and added it to the `.env` file. If you open that file, you will see content resembling:
```
PROJECT_NAME=my-first-dappVITE_APP_NETWORK=devnetVITE_APTOS_API_KEY=YOUR_API_KEYVITE_MODULE_PUBLISHER_ACCOUNT_ADDRESS=0x1cecfef9e239eff12fb1a3d189a121c37f48908d86c0e9c02ec103e0a05ddebb#This is the module publisher account's private key. Be cautious about who you share it with, and ensure it is not exposed when deploying your dApp.VITE_MODULE_PUBLISHER_ACCOUNT_PRIVATE_KEY=0x84638fd5c42d0937503111a587307169842f355ab661b5253c01cfe389373f43
```
Note
You just created a new account on the Aptos (dev) network! Yay! You can see it by going to the Aptos Explorer Devnet network view, pasting the `VITE_MODULE_PUBLISHER_ACCOUNT_ADDRESS` value from your `.env` file into the search field, and clicking on the dropdown option!
The Boilerplate template comes with a pre generated `message_board.move` file, a relevant test file and a `Move.toml` file. We will not be using `message_board.move` in this tutorial, so delete it.
As mentioned, our sources directory holds our `.move` module files; so let's create a new `todolist.move` file.
1. **Create a new `todolist.move` file** within the `sources` directory and add the following to that file:
```
module todolist_addr::todolist {
}
```
2. **Open the `Move.toml` file**, replace the name from `MessageBoard` to `Todolist` and the address from `message_board_addr` to `todolist_addr`, like the following code:
```
[package]name = "Todolist"version = "1.0.0"authors = []
[addresses]todolist_addr = "_"
[dependencies]AptosFramework = { git = "https://github.com/aptos-labs/aptos-framework.git", rev = "mainnet", subdir = "aptos-framework" }
[dev-dependencies]
```
Note
A Move module is stored under an address (so when it published anyone can access it using that address); the syntax for a Move module is
```
module :: {
}
```
In our module, the `account-address` is `todolist_addr` (a variable we just declared on the `Move.toml` file in the previous step that holds an `address`), and the `module-name` is `todolist` (a random name we selected).
### What is the `'_'` in the `Move.toml` file?
[](#what-is-the-_-in-the-movetoml-file)
The `'_'` is a placeholder for the account address. When we run the `move` compiler, the compiler will replace it with the actual account address.
### Scripts for running `move` commands
[](#scripts-for-running-move-commands)
`create-aptos-dapp` comes with premade scripts to easily run `move` commands, like `compile`, `test` and `publish`.
1. Open each of the files in the `scripts/move` directory and update the `message_board_addr` variable to be `todolist_addr`.
```
... namedAddresses: { todolist_addr: process.env.VITE_MODULE_PUBLISHER_ACCOUNT_ADDRESS, },...
```
Note
Later, when we will run the each of the `move` commands, it will run these scripts, and replace the `'_'` with the actual account address that assigned to the `todolist_addr` variable.
### Our contract logic
[](#our-contract-logic)
Before jumping into writing code, let’s first understand what we want our smart contract program to do. For ease of understanding, we will keep the logic pretty simple:
1. An account creates a new list.
2. An account creates a new task on their list.
* Whenever someone creates a new task, emit a `TaskCreated` event.
3. Let an account mark their task as completed.
Note
Creating an event is not mandatory yet useful if dapps/users want to monitor data, such as how many people create a new task, using the [Aptos Indexer](/build/indexer).
We can start with defining a `TodoList` struct, that holds the:
* tasks array
* a task counter that counts the number of created tasks (we can use that to differentiate between the tasks)
And also create a `Task` struct that holds:
* `task_id` - derived from the TodoList task counter.
* `creator_addr` - the account address who created that task.
* `content` - the task content.
* `completed` - a boolean that marks whether that task is completed or not.
On the `todolist.move` file, update the content in the module with:
```
.../// Main resource that stores all tasks for an accountstruct TodoList has key { tasks: Table, task_counter: u64}
/// Individual task structurestruct Task has store, drop, copy { task_id: u64, creator_addr: address, content: String, completed: bool,}...
```
**What did we just add?**
**TodoList**
A struct that has the `key` and `store` abilities:
* `Key` ability allows struct to be used as a storage identifier. In other words, `key` is an ability to be stored at the top-level and act as a storage. We need it here to have `TodoList` be a resource stored in our user account.
When a struct has the `key` ability, it turns this struct into a `resource`:
* `Resource` is stored under the account - therefore it _exists_ only when assigned to an account and can be _accessed_ through this account only.
**Task**
A struct that has the `store`, `drop` and `copy`abilities.
• `Store` - Task needs `Store` as it’s stored inside another struct (TodoList)
• `Copy` - value can be _copied_ (or cloned by value).
• `Drop` - value can be _dropped_ by the end of scope.
Let’s try to compile what we have now **(Spoiler alert: it will not work)**:
1. Run: `npm run move:compile` **Seeing errors?!** Let’s understand them.
We have some errors on `Unbound type`\- this is happening because we used some types but never imported them, and the compiler doesn't know where to get them from.
On the top of the module, import those types by adding:
```
...use aptos_std::table::Table;use std::string::String;...
```
That will tell the compiler where it can get those types from.
2. Run the `npm run move:compile` command again; If all goes well, we should see a response resembling (where the resulting account address is your default profile account address):
```
Compiling, may take a little while to download git dependencies...UPDATING GIT DEPENDENCY https://github.com/aptos-labs/aptos-core.gitINCLUDING DEPENDENCY AptosFrameworkINCLUDING DEPENDENCY AptosStdlibINCLUDING DEPENDENCY MoveStdlibBUILDING Todolist{"Result": [ "1cecfef9e239eff12fb1a3d189a121c37f48908d86c0e9c02ec103e0a05ddebb::todolist" ]}
```
At this point, we have successfully compiled our Move module. Yay!
Note
If you are still unable to compile your Move module, make sure you have deleted the `message_board.move` file, and replaced the `message_board_addr` to `todolist_addr` in the `Move.toml` file.
We also have a new `move/build` directory (created by the compiler) that holds our compiled modules, build information and `sources` directory.
### Create list function
[](#create-list-function)
The first thing an account can and should do with our contract is to create a new list.
Creating a list is essentially submitting a transaction, and so we need to know the `signer` who signed and submitted the transaction:
1. Add a `create_list` function that accepts a `signer` inside the `Todolist` module.
```
public entry fun create_list(account: &signer){
}
```
**Let’s understand the components of this function**
* `entry` - an _entry_ function is a function that can be called via transactions. Simply put, whenever you want to submit a transaction to the chain, you should call an entry function.
* `&signer` - The **signer** argument is injected by the Move VM as the address who signed that transaction.
Our code has a `TodoList` resource. Resource is stored under the account; therefore, it _exists_ only when assigned to an account and can be _accessed_ only through this account.
That means to create the `TodoList` resource, we need to assign it to an account that only this account can have access to.
The `create_list` function can handle that `TodoList` resource creation.
2. Add the following to the `create_list` function
```
/// Initializes a new todo list for the accountpublic entry fun create_list(account: &signer) { let tasks_holder = TodoList { tasks: table::new(), task_counter: 0 }; // Move the TodoList resource under the signer account move_to(account, tasks_holder);}
```
This function takes in a `signer`, creates a new `TodoList` resource, and uses `move_to` to have the resource stored in the provided signer account.
3. Let’s make sure everything is still working by running the `npm run move:compile` command again.
### Create task function
[](#create-task-function)
As mentioned before, our contract has a create task function that lets an account create a new task. Creating a task is also essentially submitting a transaction, and so we need to know the `signer` who signed and submitted the transaction. Another element we want to accept in our function is the task `content`.
1. Add a `create_task` function that accepts a `signer` and task `content` and the function logic.
```
/// Creates a new task in the todo listpublic entry fun create_task(account: &signer, content: String) acquires TodoList { // Get the signer address let signer_address = signer::address_of(account);
// Get the TodoList resource let todo_list = borrow_global_mut(signer_address);
// Increment task counter let counter = todo_list.task_counter + 1;
// Create a new task let new_task = Task { task_id: counter, creator_addr: signer_address, content, completed: false };
// Add the new task to the tasks table todo_list.tasks.upsert(counter, new_task);
// Update the task counter todo_list.task_counter = counter;
// Emit a task created event event::emit(TaskCreated { task_id: counter, creator_addr: signer_address, content, completed: false })}
```
2. You will notice that we have not created the `TaskCreated` event struct yet. Create it at the top of the file (under the use statements) with the following code:
```
#[event]struct TaskCreated has drop, store { task_id: u64, creator_addr: address, content: String, completed: bool,}
```
3. Since we now use three new modules - signer, event, and table (you can see it being used in `signer::`, `event::`, and `table::`) - we need to import these modules. At the top of the file, add those two use statements (replace the `table` use statement with the following code):
```
use aptos_framework::event;use aptos_std::table::{Self, Table}; // This one we already have, need to modify ituse std::signer;
```
4. Let’s make sure everything is still working by running the `npm run move:compile` command again.
**Back to the code; what is happening here?**
* First, we want to get the signer address, so we can get this account’s `TodoList` resource.
* Then, we retrieve the `TodoList` resource with the `signer_address`; with that we have access to the `TodoList` properties.
* We can now increment the `task_counter` property, and create a new `Task` with the `signer_address`, `counter` and the provided `content`.
* We push it to the `todo_list.tasks` table that holds all of our tasks along with the new `counter` (which is the table key) and the newly created Task.
* Then we assign the global `task_counter` to be the new incremented counter.
* Finally, we emit the `TaskCreated` event that holds the new Task data. `event::emit()` is an `aptos-framework` function that emits a module event with payload `msg`. In our case, we are passing the function a `TaskCreated` event struct with the new Task data.
### Complete task function
[](#complete-task-function)
Another function we want our contract to hold is the option to mark a task as completed.
1. Add a `complete_task` function that accepts a `signer` and a `task_id`:
```
/// Marks a task as completedpublic entry fun complete_task(account: &signer, task_id: u64) acquires TodoList { // Get the signer address let signer_address = signer::address_of(account);
// Get the TodoList resource let todo_list = borrow_global_mut(signer_address);
// Get the task record let task_record = todo_list.tasks.borrow_mut(task_id);
// Mark the task as completed task_record.completed = true;}
```
**Let’s understand the code.**
* As before in our create list function, we retrieve the `TodoList` struct by the signer address, so we can have access to the tasks table that holds all the account tasks.
* Then, we get a mutable reference for the task with the provided `task_id` on the `todo_list.tasks` table.
* Finally, we update that task `completed` property to be true.
2. Now compile the code by running: `npm run move:compile` to make sure everything is still working.
### Add validations
[](#add-validations)
As this code now compiles, we want to have some validations and checks before creating a new task or updating the task as completed, so we can be sure our functions work as expected.
1. Add a check to the `create_task` function to make sure the signer account has a list:
```
public entry fun create_task(account: &signer, content: String) acquires TodoList { // gets the signer address let signer_address = signer::address_of(account);
// assert signer has created a list assert!(exists(signer_address), 1);
...}
```
2. Add a check to the `complete_task` function to make sure the:
* signer has created a list.
* task exists.
* task is not completed.
With the following code:
```
/// Marks a task as completedpublic entry fun complete_task(account: &signer, task_id: u64) acquires TodoList { // Get the signer address let signer_address = signer::address_of(account);
// Ensure the account has initialized a todo list assert!(exists(signer_address), 1);
// Get the TodoList resource let todo_list = borrow_global_mut(signer_address);
// Ensure the task exists assert!(todo_list.tasks.contains(task_id), 2);
// Get the task record let task_record = todo_list.tasks.borrow_mut(task_id);
// Ensure the task is not already completed assert!(task_record.completed == false, 3);
// Mark the task as completed task_record.completed = true;}
```
We just added our first `assert` statements!
If you noticed, `assert` accepts two arguments: the first is what to check for, and the second is an error code. Instead of passing in an arbitrary number, a convention is to declare `errors` on the top of the module file and use these instead.
On the top of the module file (under the `use` statements), add those error declarations:
```
// Errors/// Account has not initialized a todo listconst ENOT_INITIALIZED: u64 = 1;/// Task does not existconst ETASK_DOESNT_EXIST: u64 = 2;/// Task is already completedconst ETASK_IS_COMPLETED: u64 = 3;
```
Now we can update our asserts with these constants:
```
/// Creates a new task in the todo listpublic entry fun create_task(account: &signer, content: String) acquires TodoList { // Get the signer address let signer_address = signer::address_of(account);
// Ensure the account has initialized a todo list assert!(exists(signer_address), ENOT_INITIALIZED);
...}
/// Marks a task as completedpublic entry fun complete_task(account: &signer, task_id: u64) acquires TodoList { // Get the signer address let signer_address = signer::address_of(account);
// Ensure the account has initialized a todo list assert!(exists(signer_address), ENOT_INITIALIZED);
// Get the TodoList resource let todo_list = borrow_global_mut(signer_address);
// Ensure the task exists assert!(todo_list.tasks.contains(task_id), ETASK_DOESNT_EXIST);
// Get the task record let task_record = todo_list.tasks.borrow_mut(task_id);
// Ensure the task is not already completed assert!(task_record.completed == false, ETASK_IS_COMPLETED);
// Mark the task as completed task_record.completed = true;}
```
**WONDERFUL!!**
Let’s stop for one moment and make sure our code compiles by running the `npm run move:compile` command. If all goes well, we should output resembling:
```
Compiling, may take a little while to download git dependencies...UPDATING GIT DEPENDENCY https://github.com/aptos-labs/aptos-core.gitINCLUDING DEPENDENCY AptosFrameworkINCLUDING DEPENDENCY AptosStdlibINCLUDING DEPENDENCY MoveStdlibBUILDING MessageBoard{ "Result": [ "1cecfef9e239eff12fb1a3d189a121c37f48908d86c0e9c02ec103e0a05ddebb::todolist" ]}
```
If you encounter errors, make sure you followed the steps above correctly and try to determine the cause of the issues.
### Write tests
[](#write-tests)
Now that we have our smart contract logic ready, we need to add some tests for it.
First, delete the `test_end_to_end.move` file in the `tests` directory, as we won't be using it.
1. For simplicity, and because we don't have much code to test, we will have the tests in the `todolist.move` file. If you need to write a more complex test, you should create a separate test file in the `tests` directory.
The test steps are:
```
// create a list // create a task // update task as completed
```
2. Add the following code to the bottom of the `todolist.move` file:
```
#[test]public entry fun test_flow() {
}
```
Note: Test functions use the `#[test]` annotation.
Note
we need to use `entry` here because we are testing an `entry` function.
3. Update the test function to be:
```
#[test(admin = @0x123)]public entry fun test_flow(admin: signer) acquires TodoList { // Create an admin account for testing account::create_account_for_test(signer::address_of(&admin));
// Initialize a todo list for the admin account create_list(&admin);
// Create a task and verify it was added correctly create_task(&admin, string::utf8(b"Create e2e guide video for aptos devs.")); let todo_list = borrow_global(signer::address_of(&admin)); assert!(todo_list.task_counter == 1, 5);
// Verify task details let task_record = todo_list.tasks.borrow(todo_list.task_counter); assert!(task_record.task_id == 1, 6); assert!(task_record.completed == false, 7); assert!(task_record.content == string::utf8(b"Create e2e guide video for aptos devs."), 8); assert!(task_record.creator_addr == signer::address_of(&admin), 9);
// Complete the task and verify it was marked as completed complete_task(&admin, 1); let todo_list = borrow_global(signer::address_of(&admin)); let task_record = todo_list.tasks.borrow(1); assert!(task_record.task_id == 1, 10); assert!(task_record.completed == true, 11); assert!(task_record.content == string::utf8(b"Create e2e guide video for aptos devs."), 12); assert!(task_record.creator_addr == signer::address_of(&admin), 13);}
```
Our `#[test]` annotation has changed and declares an account variable.
Additionally, the function itself now accepts a signer argument.
**Let’s understand our tests.**
Since our tests run outside an account scope, we need to _create_ accounts to use in our tests. The `#[test]` annotation gives us the option to declare those accounts. We use an `admin` account and set it to a random account address (`@0x123`). The function accepts this signer (account) and creates it by using a built-in function to create an account for test.
Then we simply go through the flow by:
* creating a list
* creating a task
* updating a task as completed
And assert the expected data/behavior at each step.
Before running the tests again, we need to import (`use`) some new modules we are now employing in our code:
4. At the top of the file, add these `use` statements:
```
#[test_only]use aptos_framework::account;#[test_only]use std::string::{Self};
```
Note that we are using the `#[test_only]` annotation to import the modules only for testing. This is because we don't want to use these modules in our production code.
5. Run the `npm run move:test` command. If all goes right, we should see a success message like:
```
Running Move unit tests[ PASS ] 0x1cecfef9e239eff12fb1a3d189a121c37f48908d86c0e9c02ec103e0a05ddebb::todolist::test_flowTest result: OK. Total tests: 1; passed: 1; failed: 0{ "Result": "Success"}
```
6. Let’s add one more test to make sure our `complete_task` function works as expected. Add another test function with:
```
#[test(admin = @0x123)]#[expected_failure(abort_code = ENOT_INITIALIZED)]public entry fun account_can_not_update_task(admin: signer) acquires TodoList { // Create an admin account for testing account::create_account_for_test(signer::address_of(&admin));
// Attempt to complete a task without creating a list first (should fail) complete_task(&admin, 2);}
```
This test confirms that an account can’t use that function if they haven’t created a list before.
The test also uses a special annotation `#[expected_failure]` that, as the name suggests, expects to fail with an `ENOT_INITIALIZED` error code.
7. Run the `npm run move:test` command. If all goes right, we should see a success message like:
```
Running Move unit tests[ PASS ] 0x1cecfef9e239eff12fb1a3d189a121c37f48908d86c0e9c02ec103e0a05ddebb::todolist::account_can_not_update_task[ PASS ] 0x1cecfef9e239eff12fb1a3d189a121c37f48908d86c0e9c02ec103e0a05ddebb::todolist::test_flowTest result: OK. Total tests: 2; passed: 2; failed: 0{ "Result": "Success"}
```
Now that everything works, we can compile the Move modules and publish the Move package to chain so our React app (and everyone else) can interact with our smart contract!
### Publish todolist module to chain
[](#publish-todolist-module-to-chain)
1. Run: `npm run move:test` and `npm run move:compile` - all should work without errors.
2. Run: `npm run move:publish`
3. Enter `yes` to the prompt `Do you want to publish this package at object address 0x8f66343d40de3eeef5dd45cab8c1531a542f0e5f546da9f11852d4c2b30165a7 [yes/no] >`. **(Spoiler alert: it will fail)**
**Oh no! We got an error!**
It complains about an account mismatch with the `MODULE_ADDRESS_DOES_NOT_MATCH_SENDER` error code. Apparently we compiled the package with a different account we try to publish it.
Let's fix it.
1. Open the `scripts/move/publish.js` file.
2. Update the `addressName` variable value to be `todolist_addr`.
That will use the same account we used for compiling the package.
Let's try again:
1. Run: `npm run move:publish`
2. Enter `yes` in the prompt.
3. Enter `yes` in the second prompt.
4. That will compile, simulate and finally publish your module into devnet. You should see a success message:
```
Transaction submitted: https://explorer.aptoslabs.com/txn/0x68dadf24b9ec29b9c32bd78836d20032de615bbef5f10db580228577f7ca945a?network=devnetCode was successfully deployed to object address 0x2bce4f7bb8a67641875ba5076850d2154eb9621b0c021982bdcd80731279efa6{ "Result": "Success"}
```
5. You can now head to the [Aptos Explorer](https://explorer.aptoslabs.com/?network=devnet) link and view the transaction details. You can also see the module published on chain by looking for the object address.
Note
Check out your `.env` file and see the `VITE_MODULE_ADDRESS` variable, it is set to the object address of the published module.
### Full Todolist module code
[](#full-todolist-module-code)
Here is the full `todolist.move` file to confirm your work:
```
module todolist_addr::todolist { use aptos_framework::event; use aptos_std::table::{Self, Table}; use std::signer; use std::string::String;
#[test_only] use aptos_framework::account; #[test_only] use std::string::{Self};
// Errors /// Account has not initialized a todo list const ENOT_INITIALIZED: u64 = 1; /// Task does not exist const ETASK_DOESNT_EXIST: u64 = 2; /// Task is already completed const ETASK_IS_COMPLETED: u64 = 3;
#[event] struct TaskCreated has drop, store { task_id: u64, creator_addr: address, content: String, completed: bool, }
/// Main resource that stores all tasks for an account struct TodoList has key { tasks: Table, task_counter: u64 }
/// Individual task structure struct Task has store, drop, copy { task_id: u64, creator_addr: address, content: String, completed: bool, }
/// Initializes a new todo list for the account public entry fun create_list(account: &signer) { let tasks_holder = TodoList { tasks: table::new(), task_counter: 0 }; // Move the TodoList resource under the signer account move_to(account, tasks_holder); }
/// Creates a new task in the todo list public entry fun create_task(account: &signer, content: String) acquires TodoList { // Get the signer address let signer_address = signer::address_of(account);
// Ensure the account has initialized a todo list assert!(exists(signer_address), ENOT_INITIALIZED);
// Get the TodoList resource let todo_list = borrow_global_mut(signer_address);
// Increment task counter let counter = todo_list.task_counter + 1;
// Create a new task let new_task = Task { task_id: counter, creator_addr: signer_address, content, completed: false };
// Add the new task to the tasks table todo_list.tasks.upsert(counter, new_task);
// Update the task counter todo_list.task_counter = counter;
// Emit a task created event event::emit(TaskCreated { task_id: counter, creator_addr: signer_address, content, completed: false }) }
/// Marks a task as completed public entry fun complete_task(account: &signer, task_id: u64) acquires TodoList { // Get the signer address let signer_address = signer::address_of(account);
// Ensure the account has initialized a todo list assert!(exists(signer_address), ENOT_INITIALIZED);
// Get the TodoList resource let todo_list = borrow_global_mut(signer_address);
// Ensure the task exists assert!(todo_list.tasks.contains(task_id), ETASK_DOESNT_EXIST);
// Get the task record let task_record = todo_list.tasks.borrow_mut(task_id);
// Ensure the task is not already completed assert!(task_record.completed == false, ETASK_IS_COMPLETED);
// Mark the task as completed task_record.completed = true; }
#[test(admin = @0x123)] public entry fun test_flow(admin: signer) acquires TodoList { // Create an admin account for testing account::create_account_for_test(signer::address_of(&admin));
// Initialize a todo list for the admin account create_list(&admin);
// Create a task and verify it was added correctly create_task(&admin, string::utf8(b"Create e2e guide video for aptos devs.")); let todo_list = borrow_global(signer::address_of(&admin)); assert!(todo_list.task_counter == 1, 5);
// Verify task details let task_record = todo_list.tasks.borrow(todo_list.task_counter); assert!(task_record.task_id == 1, 6); assert!(task_record.completed == false, 7); assert!(task_record.content == string::utf8(b"Create e2e guide video for aptos devs."), 8); assert!(task_record.creator_addr == signer::address_of(&admin), 9);
// Complete the task and verify it was marked as completed complete_task(&admin, 1); let todo_list = borrow_global(signer::address_of(&admin)); let task_record = todo_list.tasks.borrow(1); assert!(task_record.task_id == 1, 10); assert!(task_record.completed == true, 11); assert!(task_record.content == string::utf8(b"Create e2e guide video for aptos devs."), 12); assert!(task_record.creator_addr == signer::address_of(&admin), 13); }
#[test(admin = @0x123)] #[expected_failure(abort_code = ENOT_INITIALIZED)] public entry fun account_can_not_update_task(admin: signer) acquires TodoList { // Create an admin account for testing account::create_account_for_test(signer::address_of(&admin));
// Attempt to complete a task without creating a list first (should fail) complete_task(&admin, 2); }}
```
Now let's [set up the frontend](/build/guides/build-e2e-dapp/2-set-up-the-frontend) in chapter 2.
# 2. Set up the frontend
> Configure the React frontend with wallet adapter integration for interacting with your Aptos smart contract.
This is the second chapter of the tutorial on [building an end-to-end dapp on Aptos](/build/guides/build-e2e-dapp) where you have already [created a smart contract](/build/guides/build-e2e-dapp/1-create-smart-contract) and are now setting up the frontend.
## Set up the frontend
[](#set-up-the-frontend)
`create-aptos-dapp` has already created the frontend for us with a basic layout and Wallet implementation using the [aptos-wallet-adapter](/build/sdks/wallet-adapter#aptos-wallet-adapter) library.
1. Run: `npm run dev`
At this point you should have your app running on [http://localhost:5173](http://localhost:5173), which displays the default template layout.
2. In the `frontend` directory, find all the frontend files. Let’s clean it up a bit.
3. Open the `App.tsx` file and update its content to be:
```
import { Header } from "@/components/Header";import { TopBanner } from "@/components/TopBanner";
function App() { return ( <>
My app goes here
);}
export default App;
```
Once you save the changes, you should see that the app content has changed in the browser and displays `My app goes here`.
## Our dapp UI
[](#our-dapp-ui)
First we will build the dapp UI layout. We have two UI states for the app:
* When an account hasn't created a list yet (on the left).
* When an account has created a list and can now add tasks to it (on the right). 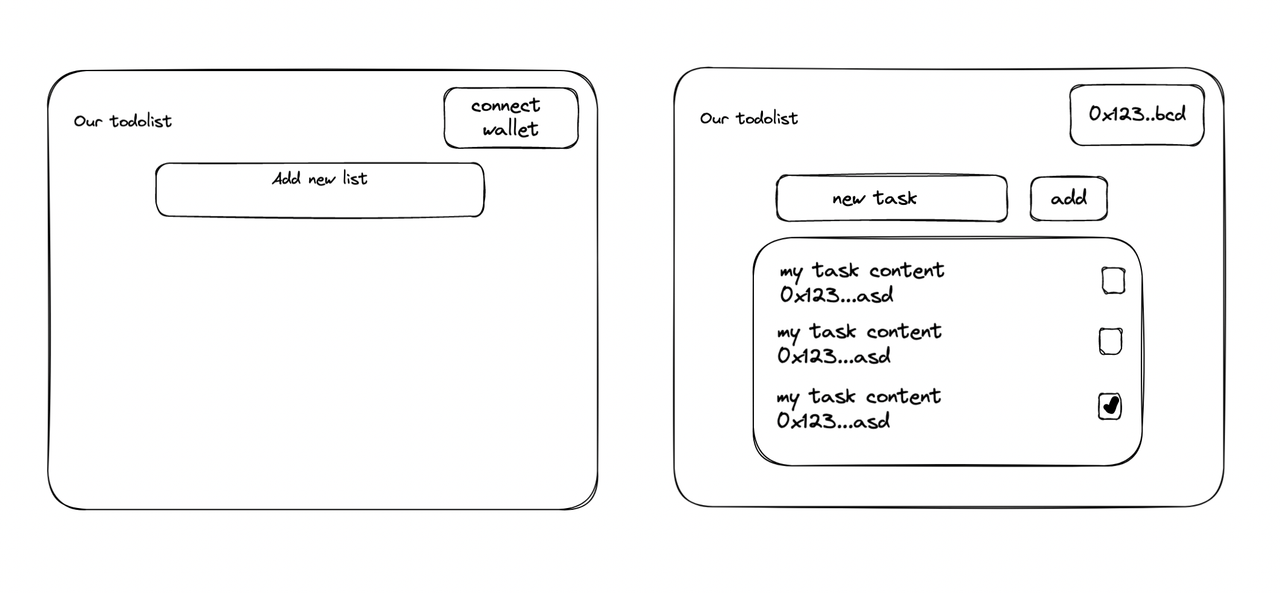
We now have a working client with a Wallet connect button and a wallet selector modal. Feel free to play with it and connect a wallet with it.
Then learn how to [fetch data from chain](/build/guides/build-e2e-dapp/3-fetch-data-from-chain) in chapter 3.
# 3. Fetch Data from Chain
> Learn to retrieve on-chain data by checking for TodoList resources and implementing conditional UI logic.
In the third chapter of the tutorial on [building an end-to-end dapp on Aptos](/build/guides/build-e2e-dapp), you will be learning to fetch data from chain.
Our UI logic relies on whether the connected account has created a todo list. If the account has created a todo list, our app should display that list; if not, the app should display a button offering the option to create a new list.
For that, we first need to check if the connected account has a `TodoList` resource. In our smart contract, whenever someone creates a todo list we create and assign a `TodoList` resource to their account.
To fetch data from chain, we can use the [Aptos TypeScript SDK](/build/sdks/ts-sdk). The SDK provides classes and functions for us to easily interact and query the Aptos chain.
To get started:
1. **Stop the local server** if running and go to the `App.tsx` file.
2. **Import wallet from the wallet adapter React provider**:
```
import { useWallet } from "@aptos-labs/wallet-adapter-react";
```
3. **Extract the account object from the wallet adapter**:
```
function App ( const { account } = useWallet();)
```
The `account` object is `null` if there is no account connected; when an account is connected, the `account` object holds the account information, including the account address.
4. **Set up React hooks and state**:
* Import `useEffect` and `useState` using:
```
import { useState, useEffect } from "react";
```
* Create local state to track whether the account has a todo list and add a `useEffect` hook to fetch data when the account changes:
```
function App() { const [accountHasList, setAccountHasList] = useState(false); useEffect(() => { fetchList(); }, [account?.address]);}
```
5. **Import required dependencies**:
* Import `MODULE_ADDRESS` variable using:
```
import { MODULE_ADDRESS } from "./constants";
```
* Import `aptosClient` using:
```
import { aptosClient } from "./utils/aptosClient";
```
6. **Create the `fetchList` function**:
```
const fetchList = async () => { if (!account) return []; const moduleAddress = MODULE_ADDRESS; try { const todoListResource = await aptosClient().getAccountResource( { accountAddress:account?.address, resourceType:`${moduleAddress}::todolist::TodoList` } ); setAccountHasList(true); } catch (e: any) { setAccountHasList(false); }};
```
7. **Update the UI based on the `accountHasList` state**:
* Import `Button` component using:
```
import { Button } from "./components/ui/button";
```
* Update the UI based on the `accountHasList` state:
```
return ( <>
{!accountHasList && (
)}
);
```
)}
);">
The `aptosClient().getAccountResource()` expects an _account address_ that holds the resource we are looking for and a string representation of an on-chain _Move struct type_:
* **account address** - is the current connected account (we are getting it from the wallet account object)
* **Move struct type string syntax**:
* The account address who holds the move module
* The module name the resource lives in = `todolist`
* The resource name = `TodoList`
If the request succeeds and there is a resource for that account, we want to set our local state to `true`; otherwise, we would set it to `false`.
We now have an **Add new list** button that appears only if the account doesn't have a list.
8. Start the local server with `npm run dev`. You should see the **Add new list** button.
Next, let’s understand how to create a new list by [submitting data to chain](/build/guides/build-e2e-dapp/4-submit-data-to-chain) in chapter 4.
# 4. Submit Data to Chain
> Implement transaction submission to create new todo lists using wallet adapter's signAndSubmitTransaction function.
In the fourth chapter of the tutorial on [building an end-to-end dapp on Aptos](/build/guides/build-e2e-dapp), you will be submitting data to the chain.
So now we have an **Add new list** button that appears if the connected account hasn’t created a list yet. We still don't have a way for an account to create a list, so let’s add that functionality.
1. First, our wallet adapter provider has a `signAndSubmitTransaction` function; let’s extract it by updating the following:
```
const { account, signAndSubmitTransaction } = useWallet();
```
2. Add an `onClick` event to the new list button:
```
```
">
3. Update the import statement from `@aptos-labs/wallet-adapter-react` to also import the `InputTransactionData` type and
```
import { useWallet, InputTransactionData,} from "@aptos-labs/wallet-adapter-react";
```
4. Add the `addNewList` function:
```
const addNewList = async () => { if (!account) return [];
const transaction:InputTransactionData = { data: { function:`${moduleAddress}::todolist::create_list`, functionArguments:[] } } try { // sign and submit transaction to chain const response = await signAndSubmitTransaction(transaction); // wait for transaction await aptosClient().waitForTransaction({transactionHash:response.hash}); setAccountHasList(true); } catch (error: any) { setAccountHasList(false); }};
```
5. Since our new function also uses `moduleAddress`, let’s get it out of the `fetchList` function scope to the global scope so it can be used globally.
In our `fetchList` function, find the line:
```
const moduleAddress = MODULE_ADDRESS;
```
And move it to outside of the main `App` function, so it can be globally accessed.
**Let’s go over the `addNewList` function code.**
First, we use the `account` property from our wallet provider to make sure there is an account connected to our app.
Then we build our transaction data to be submitted to chain:
```
const transaction:InputTransactionData = { data: { function:`${moduleAddress}::todolist::create_list`, functionArguments:[] } }
```
* `function`\- is built from the module address, module name and the function name.
* `functionArguments` - the arguments the function expects, in our case it doesn’t expect any arguments.
Next, we submit the transaction payload and wait for its response. The response returned from the `signAndSubmitTransaction` function holds the transaction hash. Since it can take a bit for the transaction to be fully executed on chain and we also want to make sure it is executed successfully, we `waitForTransaction`. And only then we can set our local `accountHasList` state to `true`.
6. Before testing our app, let’s tweak our UI a bit and add a Spinner component to show up while we are waiting for the transaction. Add a local state to keep track whether a transaction is in progress:
```
const [transactionInProgress, setTransactionInProgress] = useState(false);
```
7. Update our `addNewList` function to update the local state:
```
const addNewList = async () => { if (!account) return []; setTransactionInProgress(true); const transaction:InputTransactionData = { data: { function:`${moduleAddress}::todolist::create_list`, functionArguments:[] } } try { // sign and submit transaction to chain const response = await signAndSubmitTransaction(transaction); // wait for transaction await aptosClient().waitForTransaction({transactionHash:response.hash}); setAccountHasList(true); } catch (error: any) { setAccountHasList(false); } finally { setTransactionInProgress(false); }};
```
9. Update our UI with the following:
```
return ( <> ... {!accountHasList && (
)} );
```
)} );">
Now you can head over to our app, and add a new list!
Since you haven’t made the user interface able to handle cases where an account has created a list, you will do so next [handling tasks](/build/guides/build-e2e-dapp/5-handle-tasks) in chapter 5.
# 5. Handle Tasks
> Complete the dapp by implementing task management functionality to fetch existing tasks and add new ones.
In the fifth and final chapter of the tutorial on [building an end-to-end dapp on Aptos](/build/guides/build-e2e-dapp), you will add functionality to the app so the user interface is able to handle cases where an account has created a list.
We have covered how to [fetch data](/build/guides/build-e2e-dapp/3-fetch-data-from-chain) (an account’s todo list) from chain and how to [submit a transaction](/build/guides/build-e2e-dapp/4-submit-data-to-chain) (new todo list) to chain using Wallet.
Let’s finish building our app by implementing fetch tasks and adding a task function.
## Fetch tasks
[](#fetch-tasks)
1. Create a local state `tasks` that will hold our tasks. It will be a state of a Task type (that has the same properties we set on our smart contract):
```
type Task = { address: string; completed: boolean; content: string; task_id: string;};
function App() { const [tasks, setTasks] = useState([]); ...}
```
2. Update our `fetchList` function to fetch the tasks in the account’s `TodoList` resource:
```
const fetchList = async () => { if (!account) return []; try { const todoListResource = await aptosClient().getAccountResource({ accountAddress:account?.address, resourceType:`${moduleAddress}::todolist::TodoList` }); setAccountHasList(true); // tasks table handle const tableHandle = (todoListResource as any).tasks.handle; // tasks table counter const taskCounter = (todoListResource as any).task_counter;
let tasks = []; let counter = 1; while (counter <= taskCounter) { const tableItem = { key_type: "u64", value_type: `${moduleAddress}::todolist::Task`, key: `${counter}`, }; const task = await aptosClient().getTableItem({handle:tableHandle, data:tableItem}); tasks.push(task); counter++; } // set tasks in local state setTasks(tasks); } catch (e: any) { setAccountHasList(false); }};
```
**This part is a bit confusing, so stick with us!**
Tasks are stored in a table (this is how we built our contract). To fetch a table item (i.e a task), we need that task's table handle. We also need the `task_counter` in that resource so we can loop over and fetch the task with the `task_id` that matches the `task_counter`.
```
const tableHandle = (TodoListResource as any).data.tasks.handle;const taskCounter = (TodoListResource as any).data.task_counter;
```
Now that we have our tasks table handle and our `task_counter` variable, lets loop over the `taskCounter` . We define a `counter` and set it to 1 as the task\_counter / task\_id is never less than 1.
We loop while the `counter` is less then the `taskCounter` and fetch the table item and push it to the tasks array:
```
let tasks = [];let counter = 1;while (counter <= taskCounter) { const tableItem = { key_type: "u64", value_type: `${moduleAddress}::todolist::Task`, key: `${counter}`, }; const task = await aptosClient().getTableItem(tableHandle, tableItem); tasks.push(task); counter++;}
```
We build a `tableItem` object to fetch. If we take a look at our table structure from the contract:
```
tasks: Table,
```
We see that it has a `key` type `u64` and a `value` of type `Task`. And whenever we create a new task, we assign the `key` to be the incremented task counter.
```
// adds the new task into the tasks tabletable::upsert(&mut todo_list.tasks, counter, new_task);
```
So the object we built is:
```
{ key_type: "u64", value_type:`${moduleAddress}::todolist::Task`, key: `${taskCounter}`,}
```
Where `key_type` is the table `key` type, `key` is the key value we are looking for, and the `value_type` is the table `value` which is a `Task` struct. The Task struct uses the same format from our previous resource query:
* The account address who holds that module = our profile account address
* The module name the resource lives in = `todolist`
* The struct name = `Task`
The last thing we want to do is display the tasks we just fetched.
3. In our `App.tsx` file, update our UI with the following code:
Import the `Input` using `import { Input } from "./components/ui/input";`
```
{!accountHasList ? ( ) : (
)}
```
) : (
{tasks && tasks.length > 0 && tasks.map((task) => (
{task.content}
))}
)}">
That will display the **Add new list** button if account doesn’t have a list or instead the tasks if the account has a list.
Go ahead and refresh your browser - see the magic!
We haven’t added any tasks yet, so we dont see anything. Let’s add the option to add some tasks!
## Add task
[](#add-task)
1. Update our UI with an _add task_ input:
```
{!accountHasList ? ( ...) : (
// Add this!
...
...)}
```
...
...)}">
We have added a text input to write the task and a button to add the task.
2. Create a new local state that holds the task content:
```
function App() { ... const [newTask, setNewTask] = useState(""); ...}
```
3. Find our `` component, add the `onChange` event to it, pass it our `onWriteTask` function and set the input value to be the `newTask` local state:
```
setNewTask(e.target.value)} />
```
Cool! Now we have a working flow that when the user types something on the Input component, a function will get fired and set our local state with that content.
4. Let’s also add a function that submits the typed task to chain! Find the `